Business Workflow Needs an HTTP Endpoint? Create a Logic App with a Request and Response
A Logic App connects workflow steps visually. An HTTP request can start the workflow, pass in data, and receive a response. For example, a shop could submit an order to a workflow that later checks inventory or requests approval.
This lab builds the smallest useful endpoint: HTTP request → Response. It returns the submitted order ID so you can verify the input reached the workflow. It does not save, approve, or ship the order. No application code, VM, or resources from the messaging trips are required.
Create a Consumption Logic App
In the Azure portal, search for Logic Apps → Add / Create. Choose Consumption for this small workflow:
Subscription: CloudTrips TEST
Resource group: rg-cloudtrips-logicapps-test-weu
Logic App name: la-ctorders-http-weu
Region: West Europe
Plan type: Consumption
Log Analytics: Disabled for this lab, if offered
Consumption bills by workflow operations rather than requiring a dedicated hosting plan. Review the estimate and create the resource. If the creation flow offers hosting options first, choose the multi-tenant Consumption option.
Add the Request Trigger
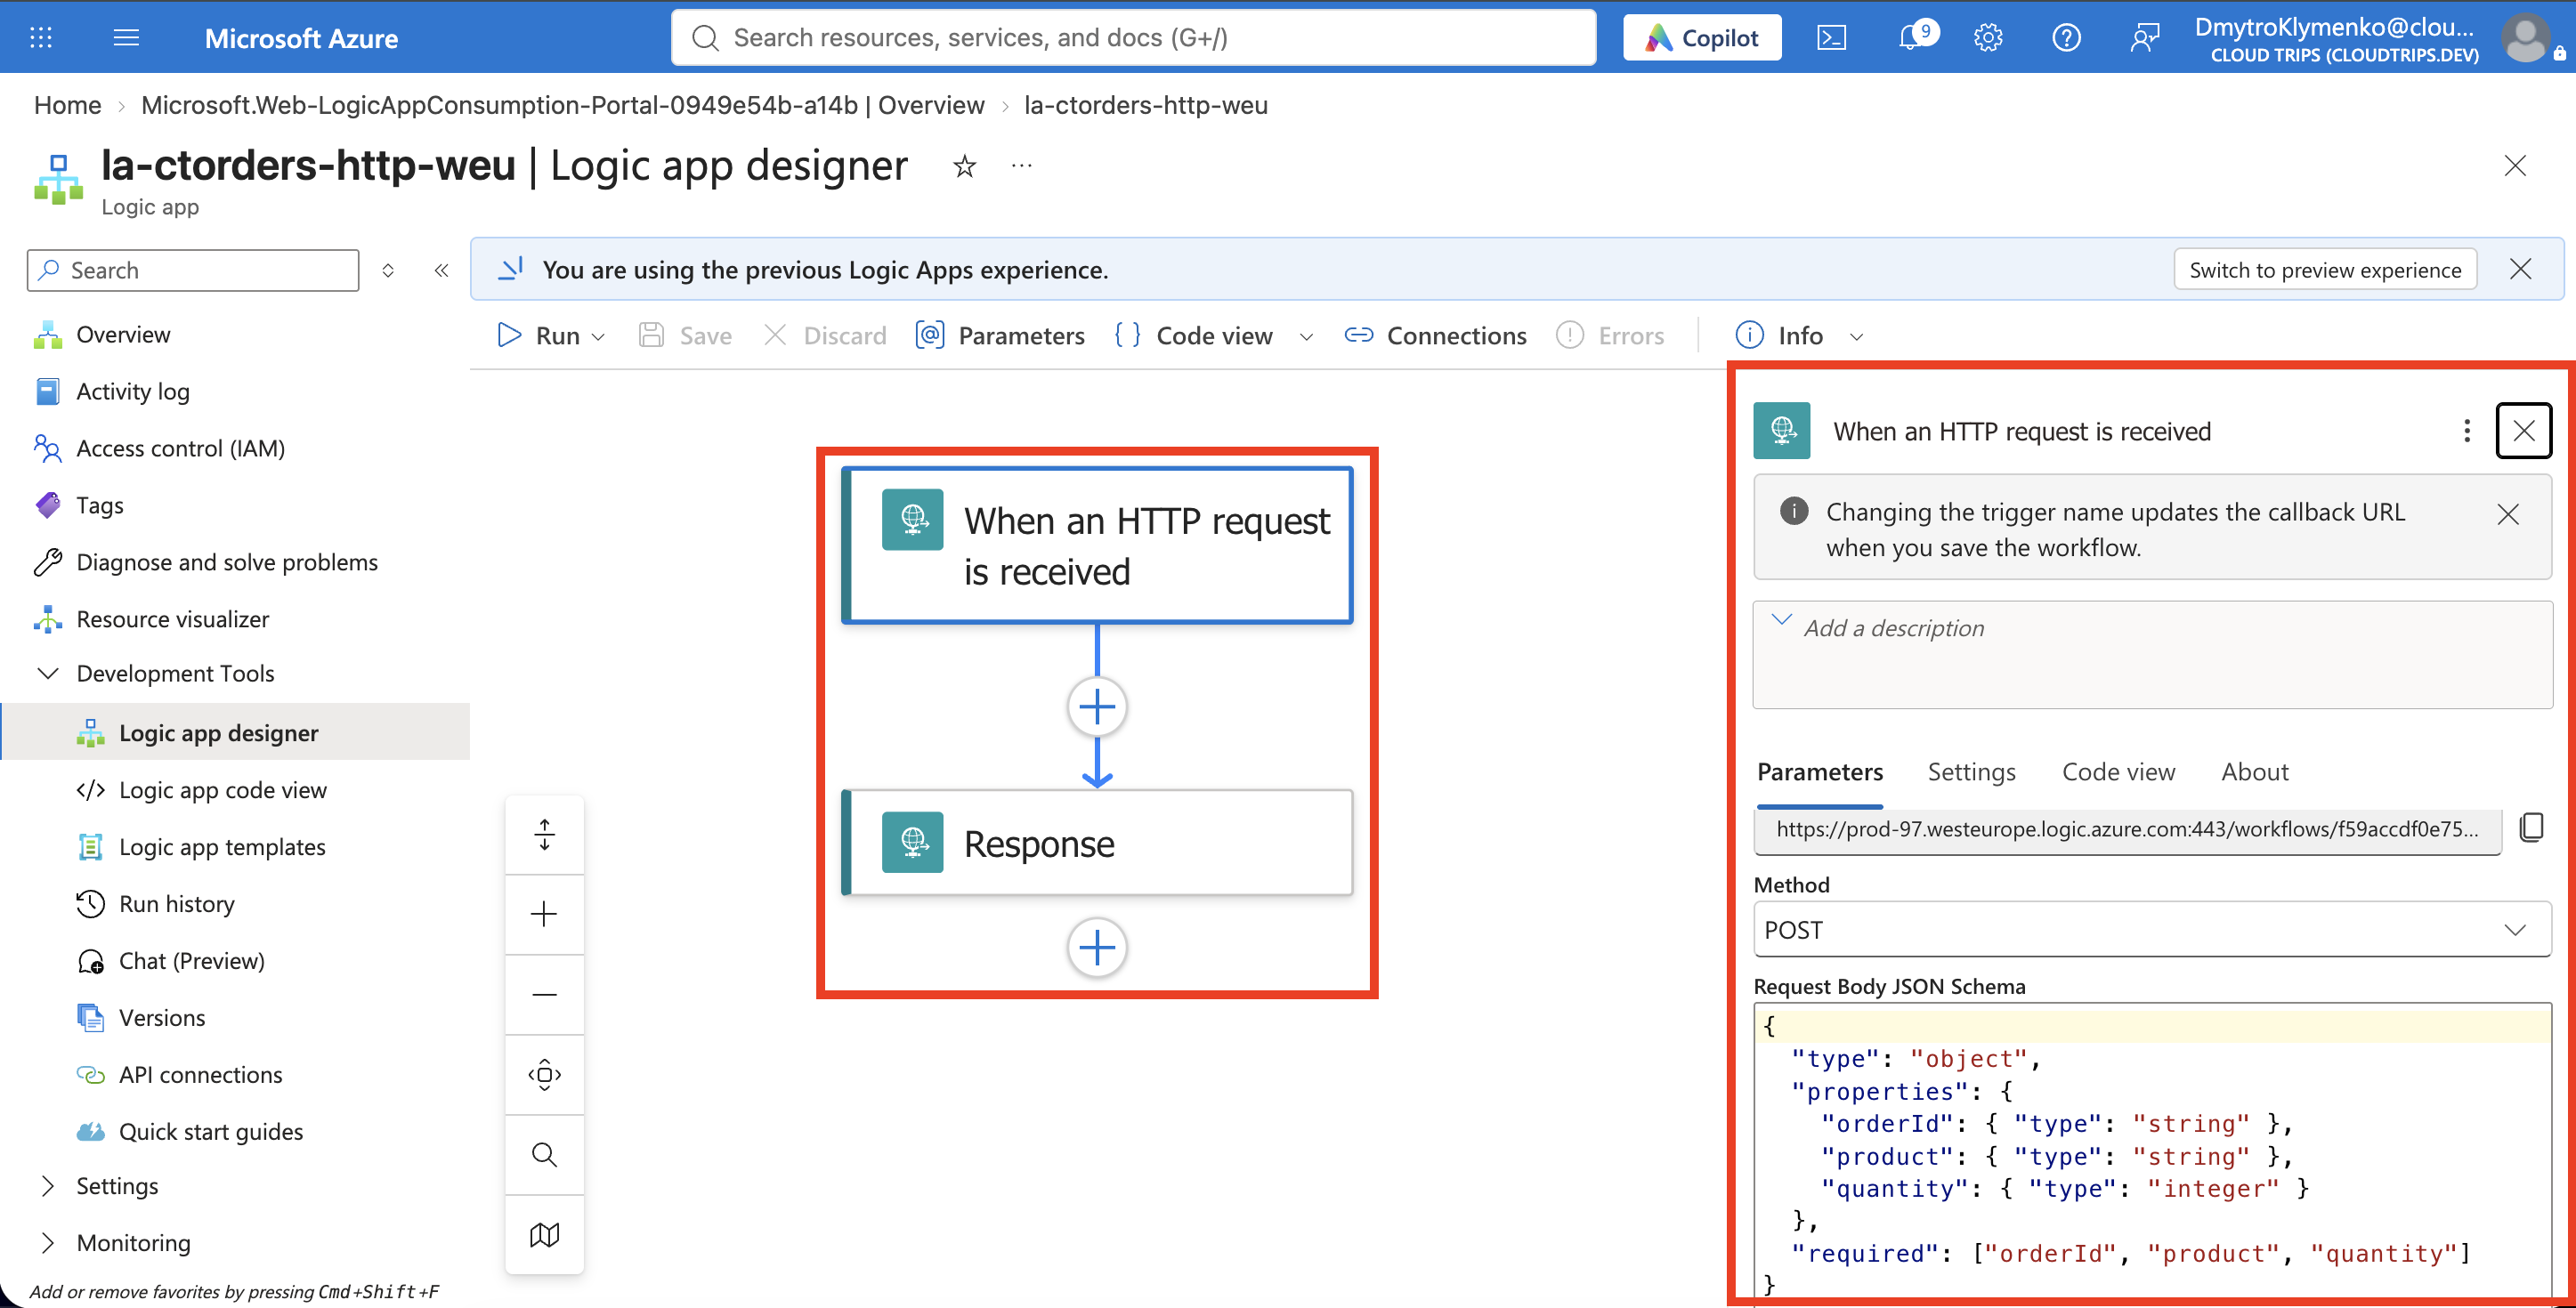
Open the Logic App → Development Tools → Logic app designer. Start a blank workflow if prompted. Select Add a trigger, search for Request, and choose the built-in When an HTTP request is received trigger.
Use the Request connector, not the HTTP action that calls another service. Set Method to POST under the trigger’s parameters; use Add new parameter or Advanced parameters if Method is hidden.
Paste this into Request Body JSON Schema:
{
  "type": "object",
  "properties": {
    "orderId": { "type": "string" },
    "product": { "type": "string" },
    "quantity": { "type": "integer" }
  },
  "required": ["orderId", "product", "quantity"]
}
The schema describes the incoming JSON and makes its fields available in the designer. Leave the relative path empty. We will retrieve the generated URL after adding the response and saving.
Add the Response
Below the trigger, select + → Add an action. Search for Response and select the built-in action from Request:
Status Code: 200
Headers:
  Content-Type: application/json
In Body, enter:
{
  "status": "received",
  "orderId": "@{triggerBody()?['orderId']}",
  "message": "CloudTrips workflow received your order."
}
The expression triggerBody()?['orderId'] reads orderId from the incoming request. In this JSON body, @{...} inserts that value into the response string. If the designer displays it as a dynamic-content token after saving, that is expected.
Leave asynchronous response disabled if that setting is shown. Select Save. Reopen the trigger and copy its generated HTTP POST URL or HTTP URL.
The full URL includes a signature that authorizes calls. Keep it out of screenshots and public text. Collapse the trigger’s settings before capturing the workflow image.
Call the Endpoint
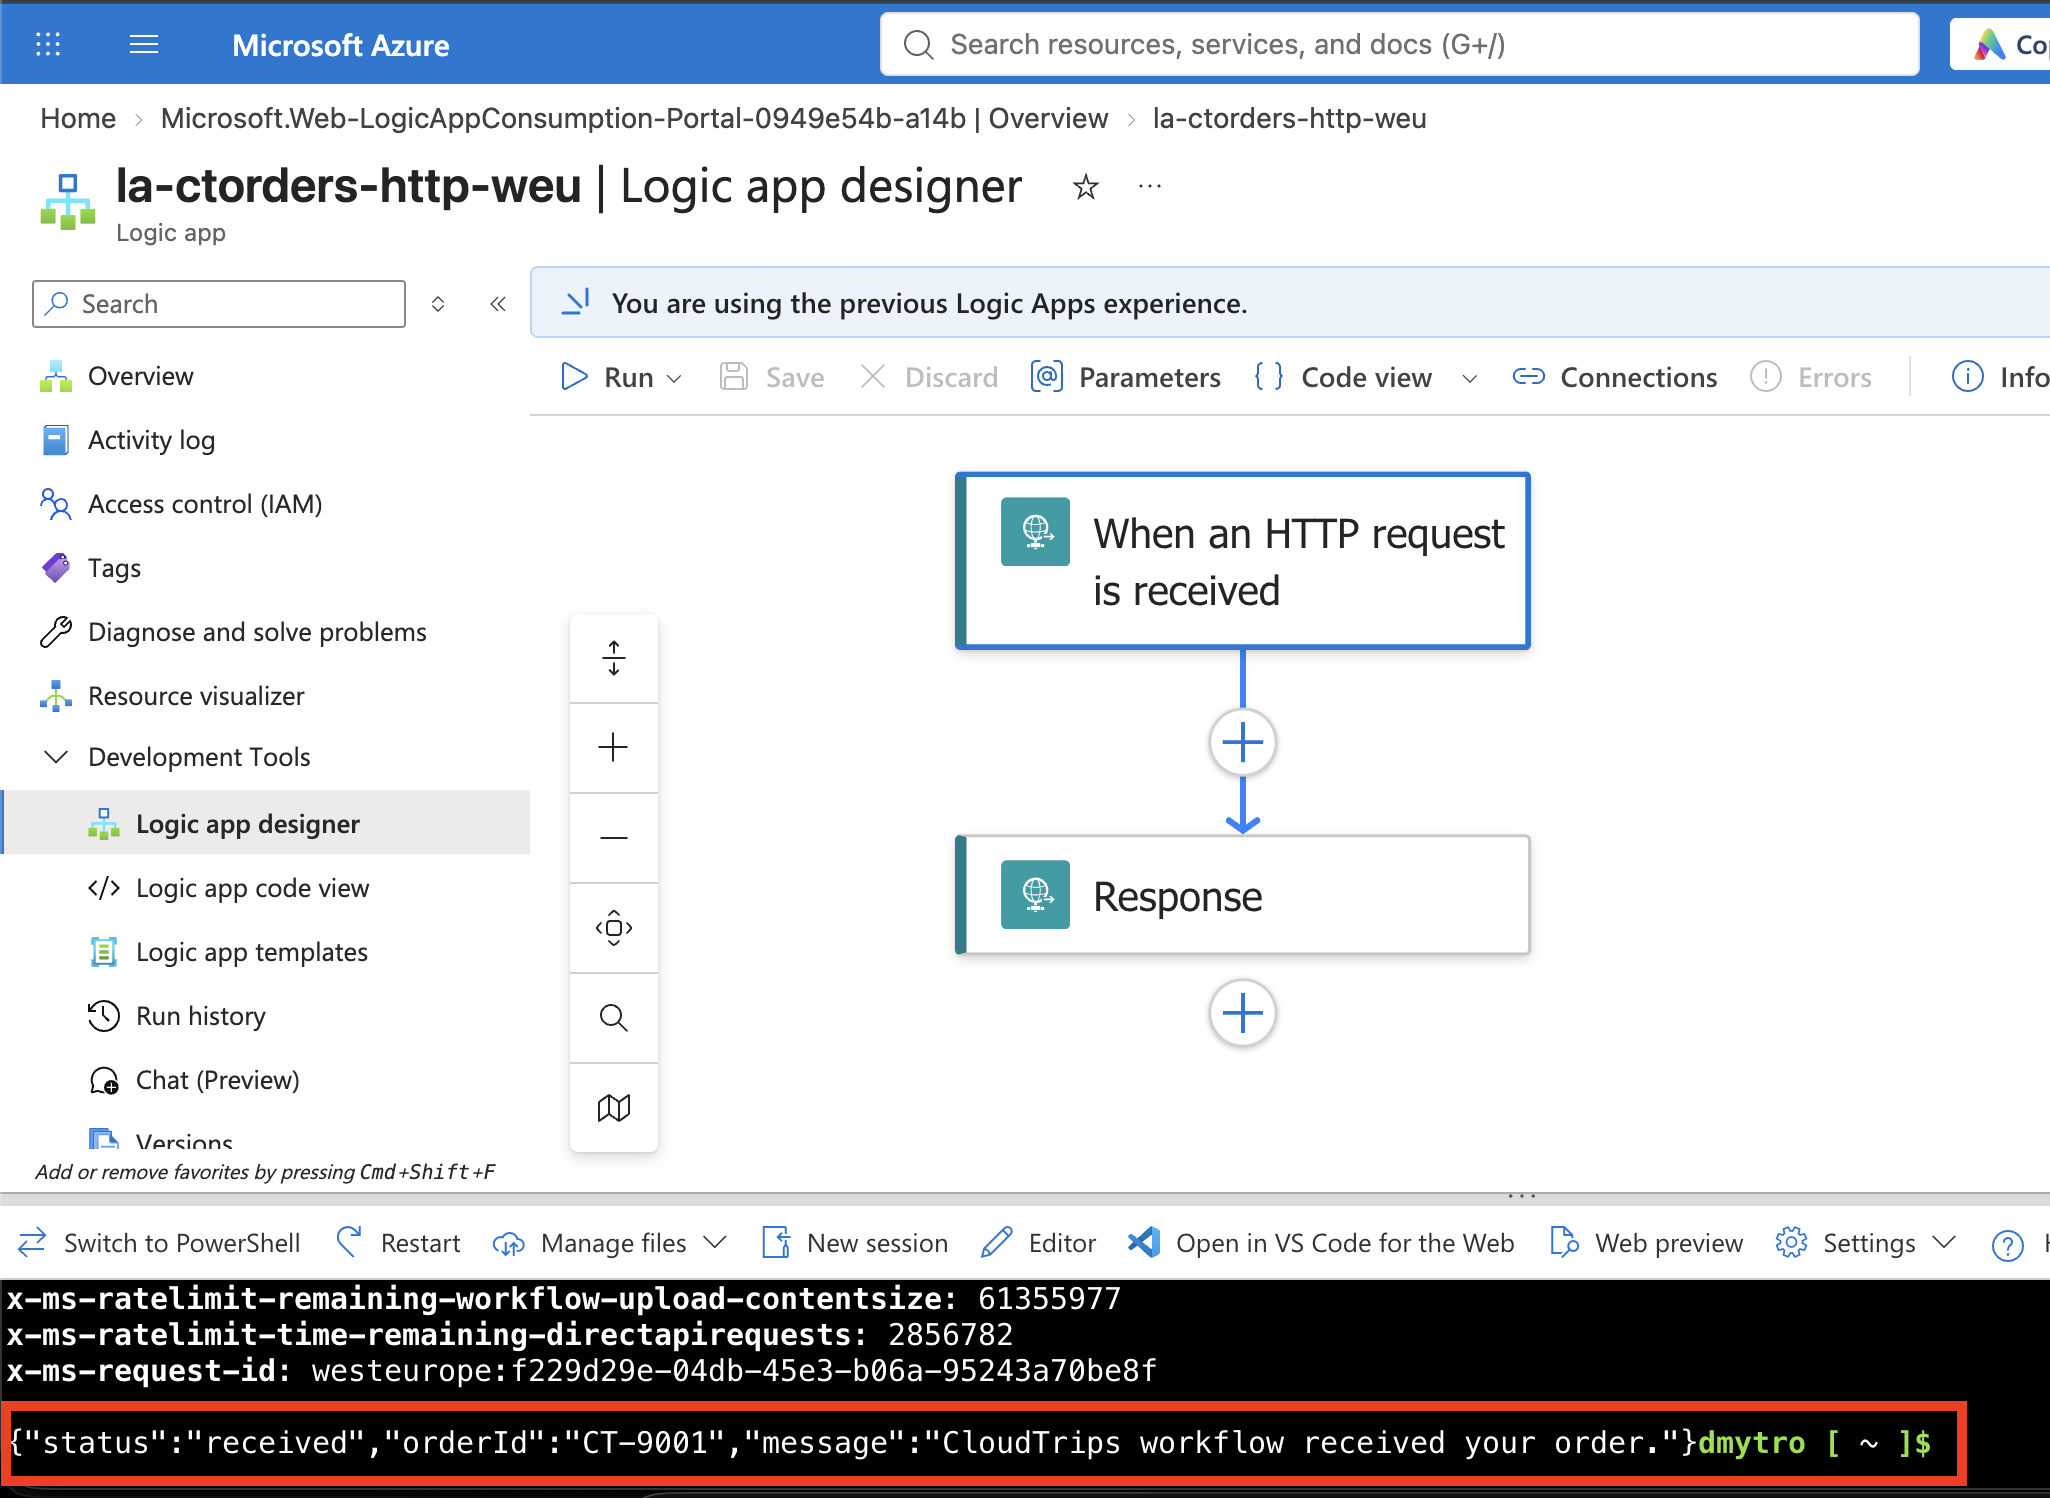
Open Azure Cloud Shell → Bash. Run the block below, then paste the full copied URL at its prompt. The URL stays hidden while you paste it and is not written into the command history. No pip packages or extra files are needed.
read -r -s -p 'Paste the HTTP POST URL, then press Enter: ' ct_logic_url
printf '\n'

curl --include --max-time 30 \
  --request POST "$ct_logic_url" \
  --header 'Content-Type: application/json' \
  --data '{"orderId":"CT-9001","product":"Notebook","quantity":1}'

unset ct_logic_url
Expect HTTP 200 and this JSON body:
{
  "status": "received",
  "orderId": "CT-9001",
  "message": "CloudTrips workflow received your order."
}
The actual orderId proves the workflow used your request. To test another value, rerun the block with CT-9002 in the request body and paste the URL again.
Opening the URL in a browser sends GET, not the POST configured here. Use the command above to test the endpoint. If you receive 401 or 403, copy the complete current URL, including its query string. If you receive 202 with no response body, check that the Response action is saved and asynchronous response is disabled. If the response contains the expression literally, reinsert orderId using the trigger’s dynamic-content field in the Response body and save.
Inspect the Workflow Run
Open the Logic App’s Overview → Runs history. Refresh and open the latest Succeeded run. Expand the request trigger to inspect its input body, then the Response action to inspect status code and body. Confirm CT-9001 appears in both, or CT-9002 if you ran the second test.
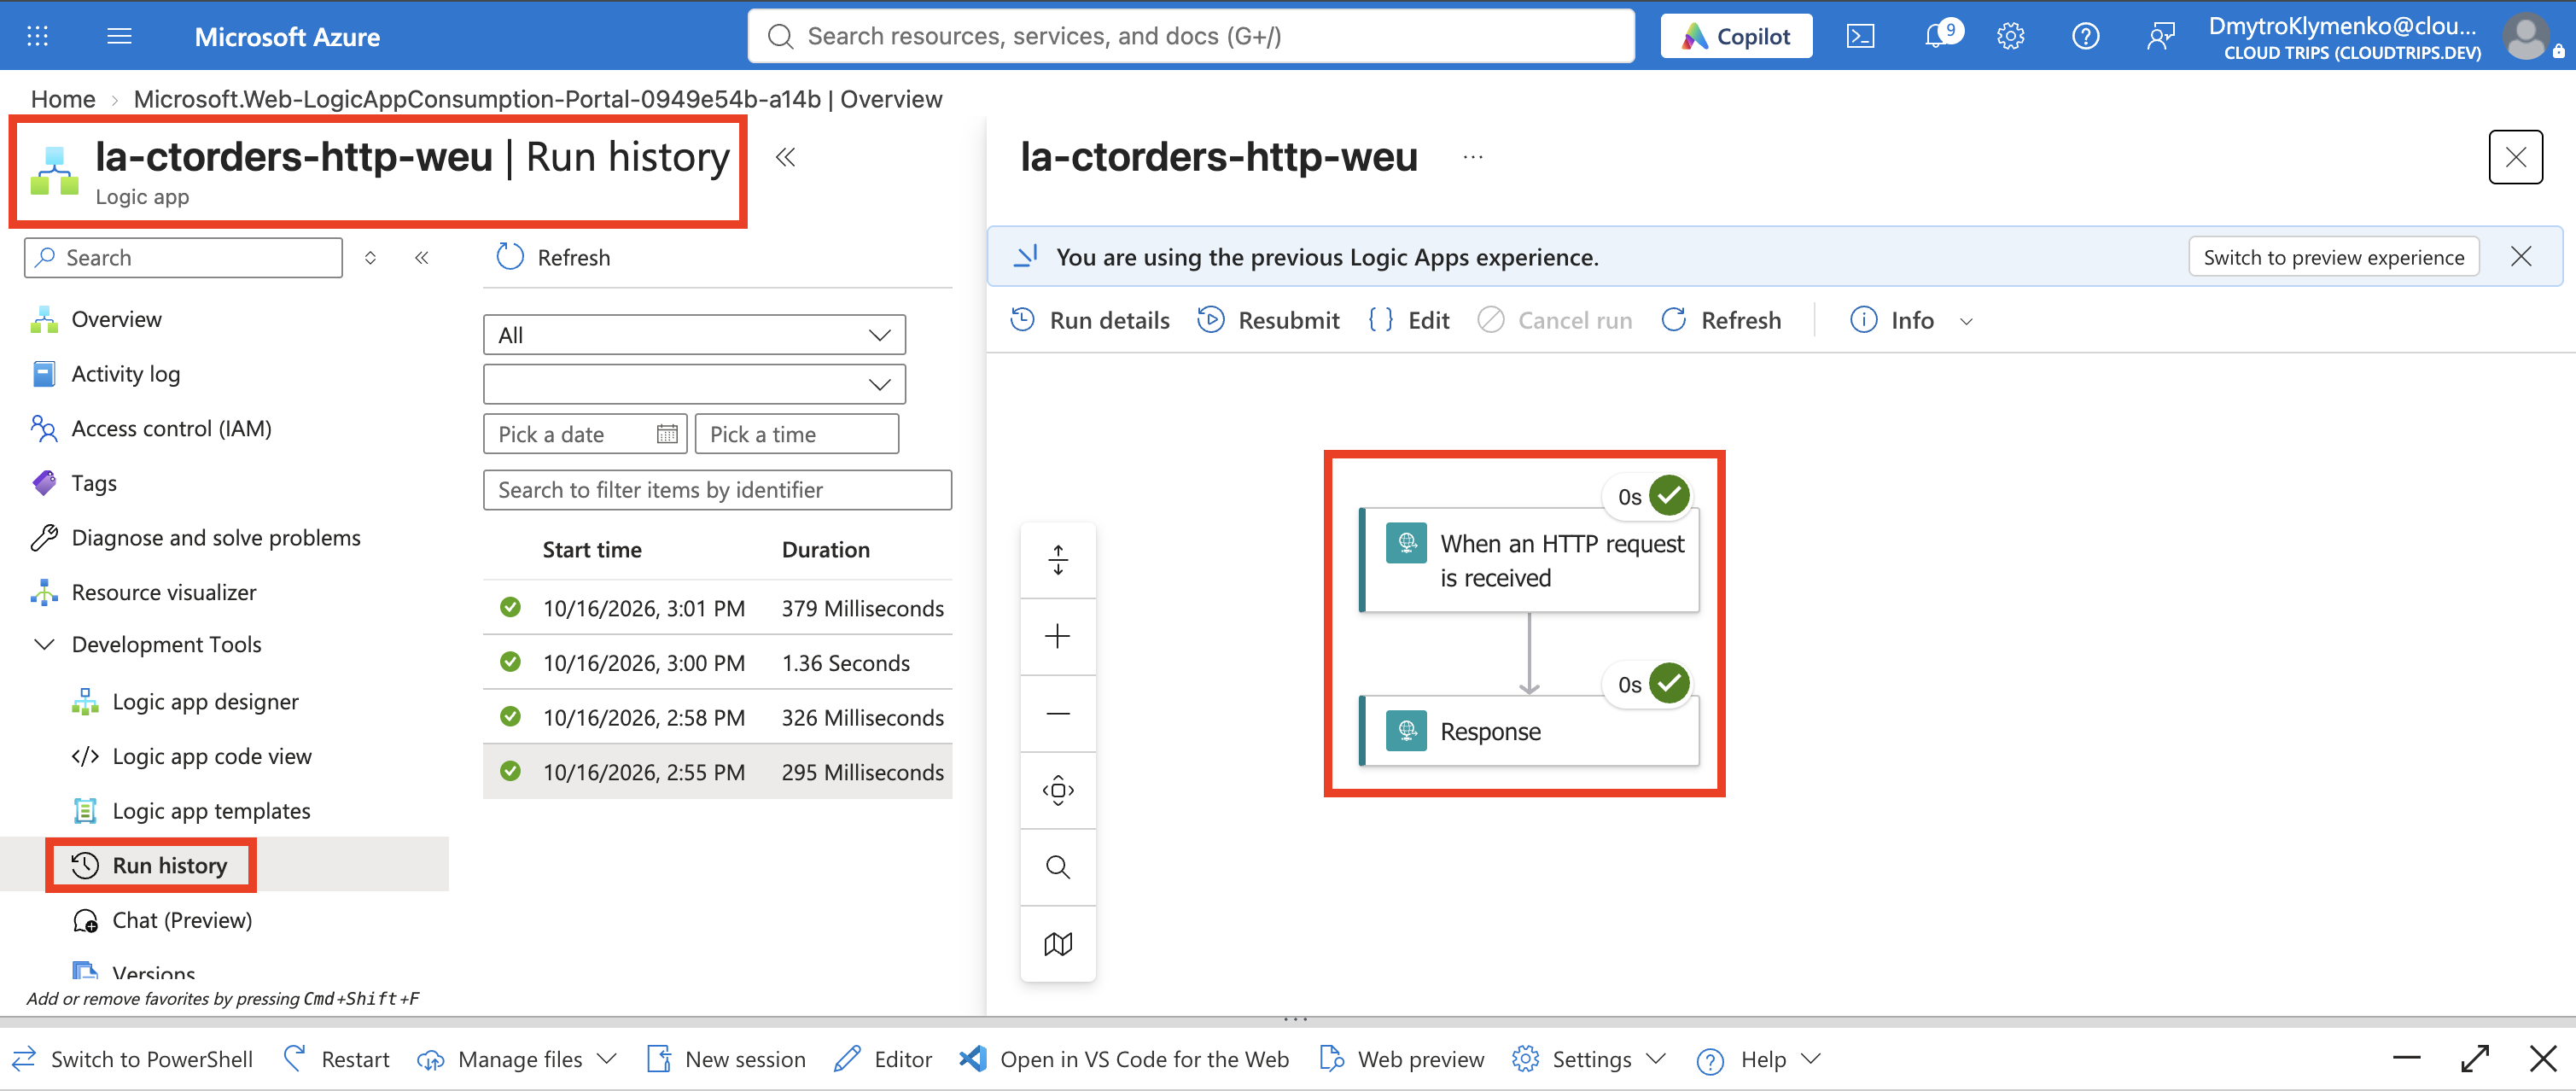
The trigger starts the workflow. Actions perform its steps. The Response action sends an answer back to the original HTTP caller. You can later insert business steps between the trigger and response; long-running work needs a deliberate asynchronous design rather than holding the caller open indefinitely.
Finish
Keep the Logic App if you want to extend this workflow. Otherwise delete rg-cloudtrips-logicapps-test-weu. Disabling the Logic App stops new trigger executions; deleting it also removes its callable endpoint and run history.