SaaS App Needs SSO? Create Enterprise Application
A company starts using a SaaS app.
Users should not keep a separate password for it.
The Microsoft Entra pattern is:
Create enterprise application -> copy Entra IdP values -> configure the SaaS app -> copy SaaS SP values back to Entra -> assign users -> test sign-inThis trip uses the Microsoft Entra SAML Toolkit as a demo SaaS-style application.
You can use the same flow for a real gallery SaaS app such as Salesforce, ServiceNow, GitHub Enterprise, or many others.
The important SAML idea is that configuration happens on both sides.
Microsoft Entra is the identity provider.
The SaaS app is the service provider.
Entra must know the app endpoints, and the app must know the Entra sign-in endpoints and certificate.
Enterprise Application vs App Registration
This distinction matters.
An app registration is usually for an application you are building.
An enterprise application is the app instance in your tenant.
For SaaS SSO, you normally work with:
Enterprise applicationsbecause you are connecting your tenant to an app users will access.
Open Enterprise Applications
Go to:
Entra ID > Enterprise appsSelect:
New application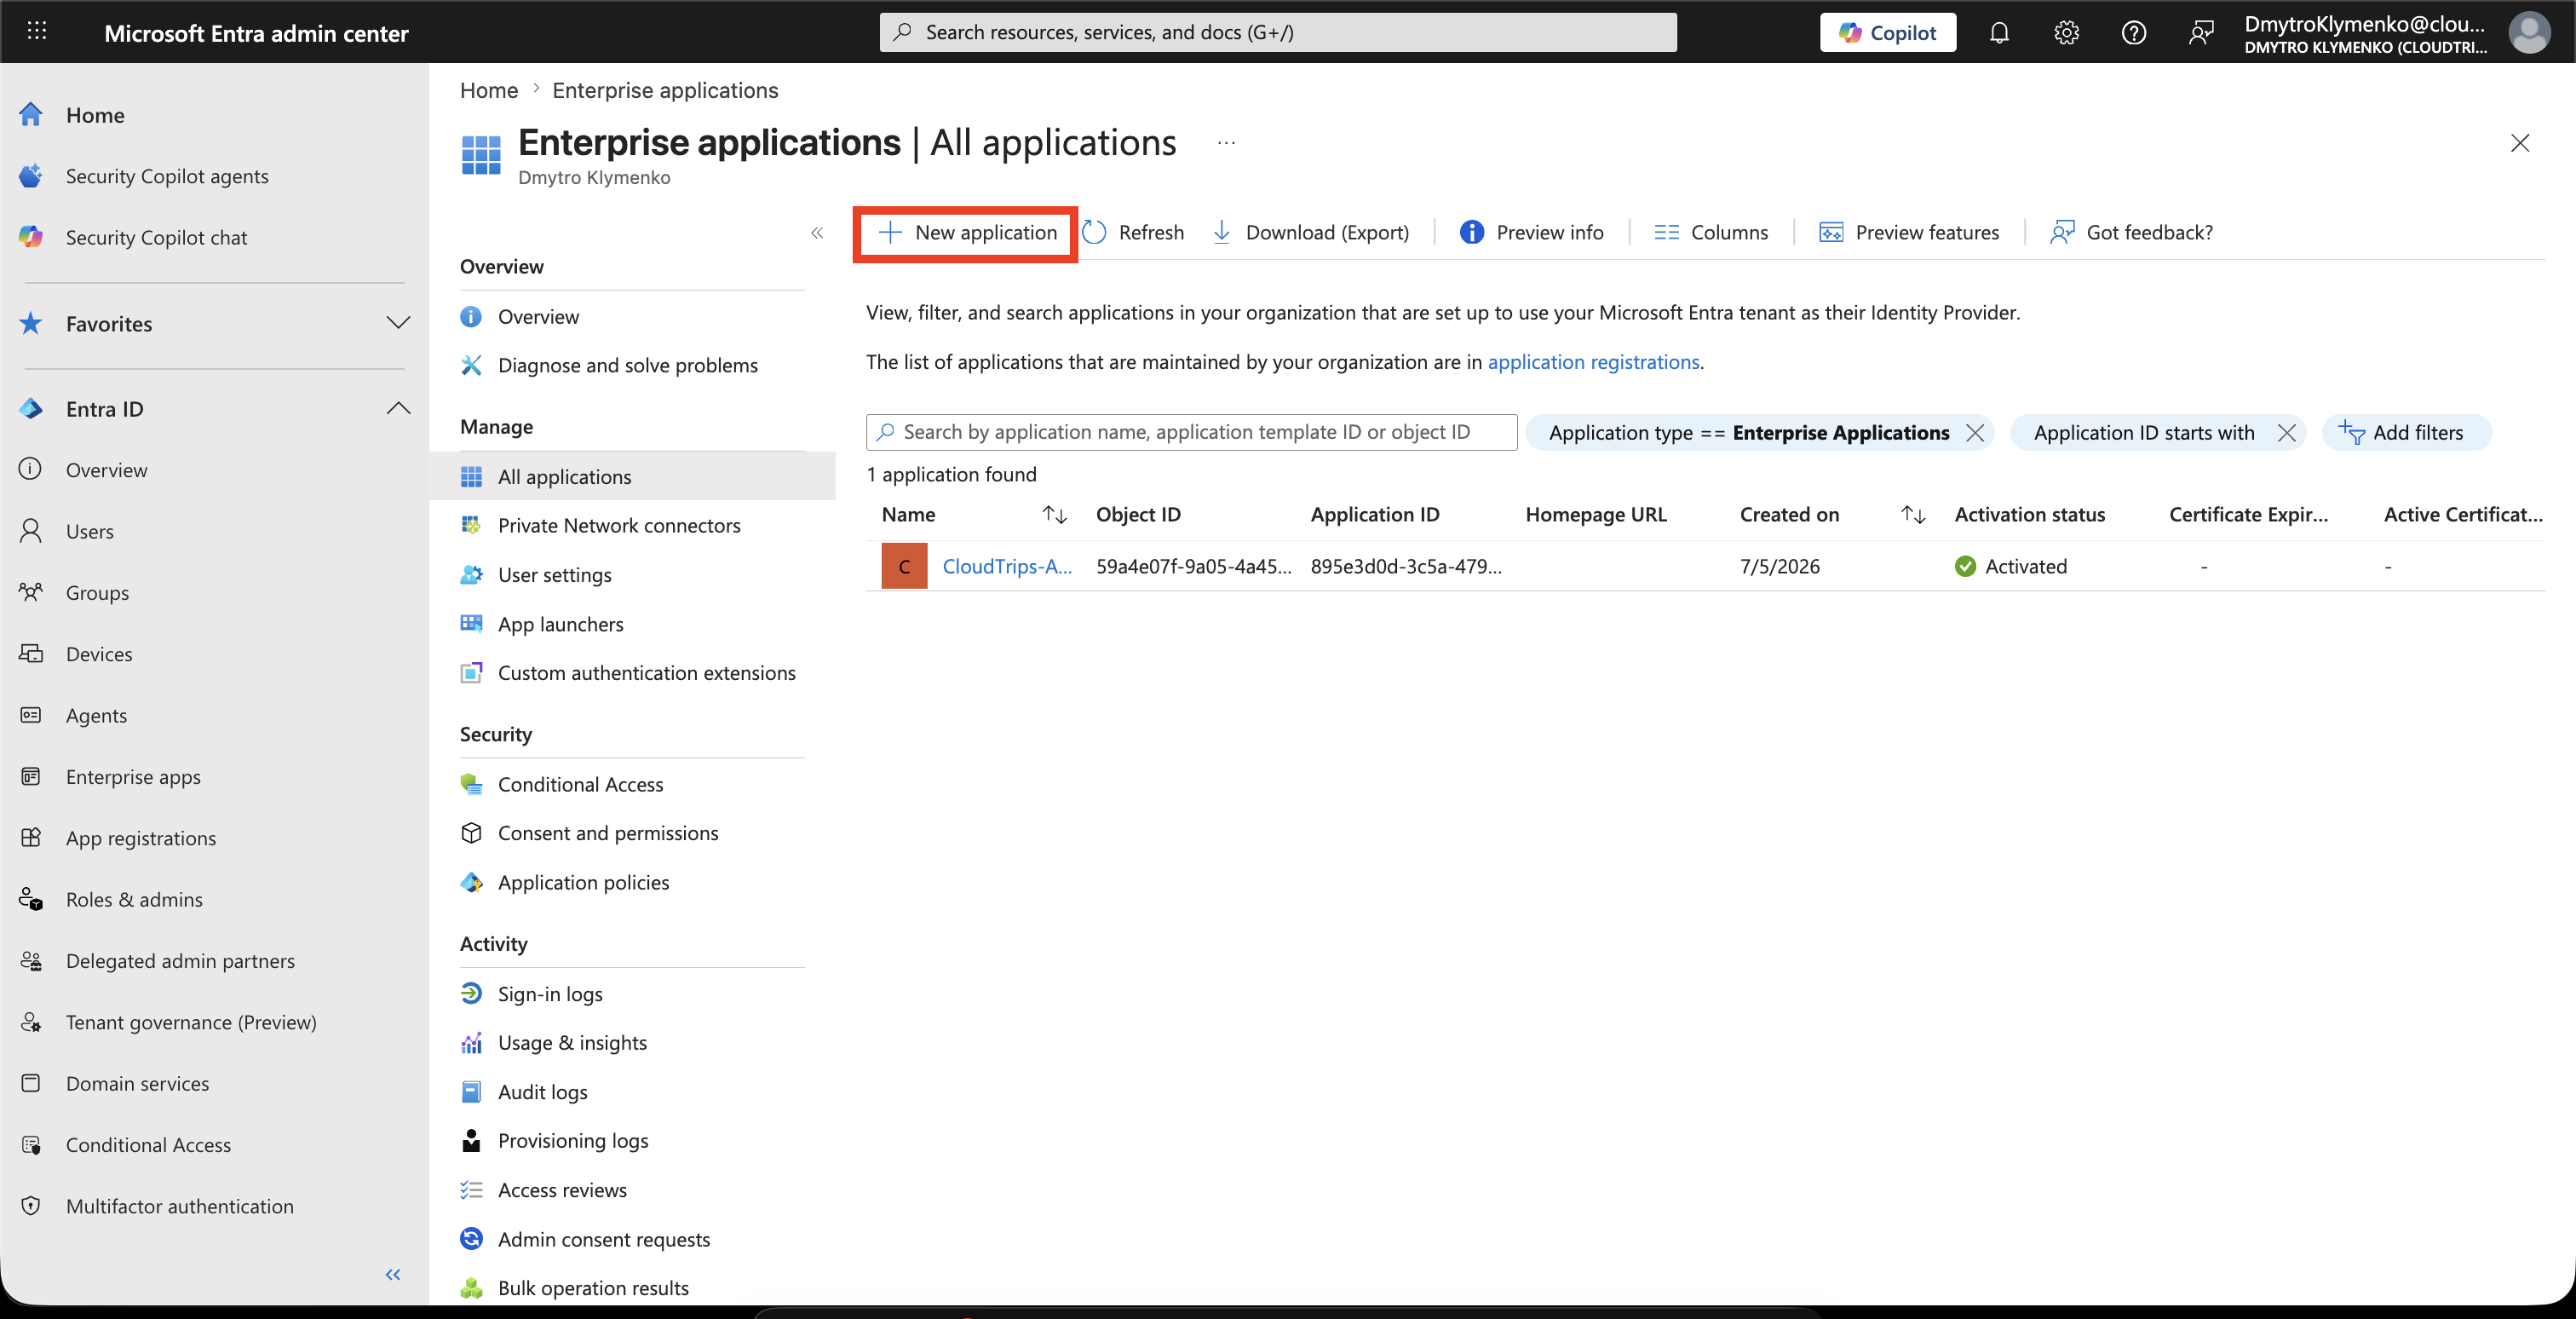
Choose a Gallery App
Search for:
Microsoft Entra SAML ToolkitSelect the gallery application.
This app is useful for learning the SAML SSO configuration flow without needing a real external SaaS tenant.
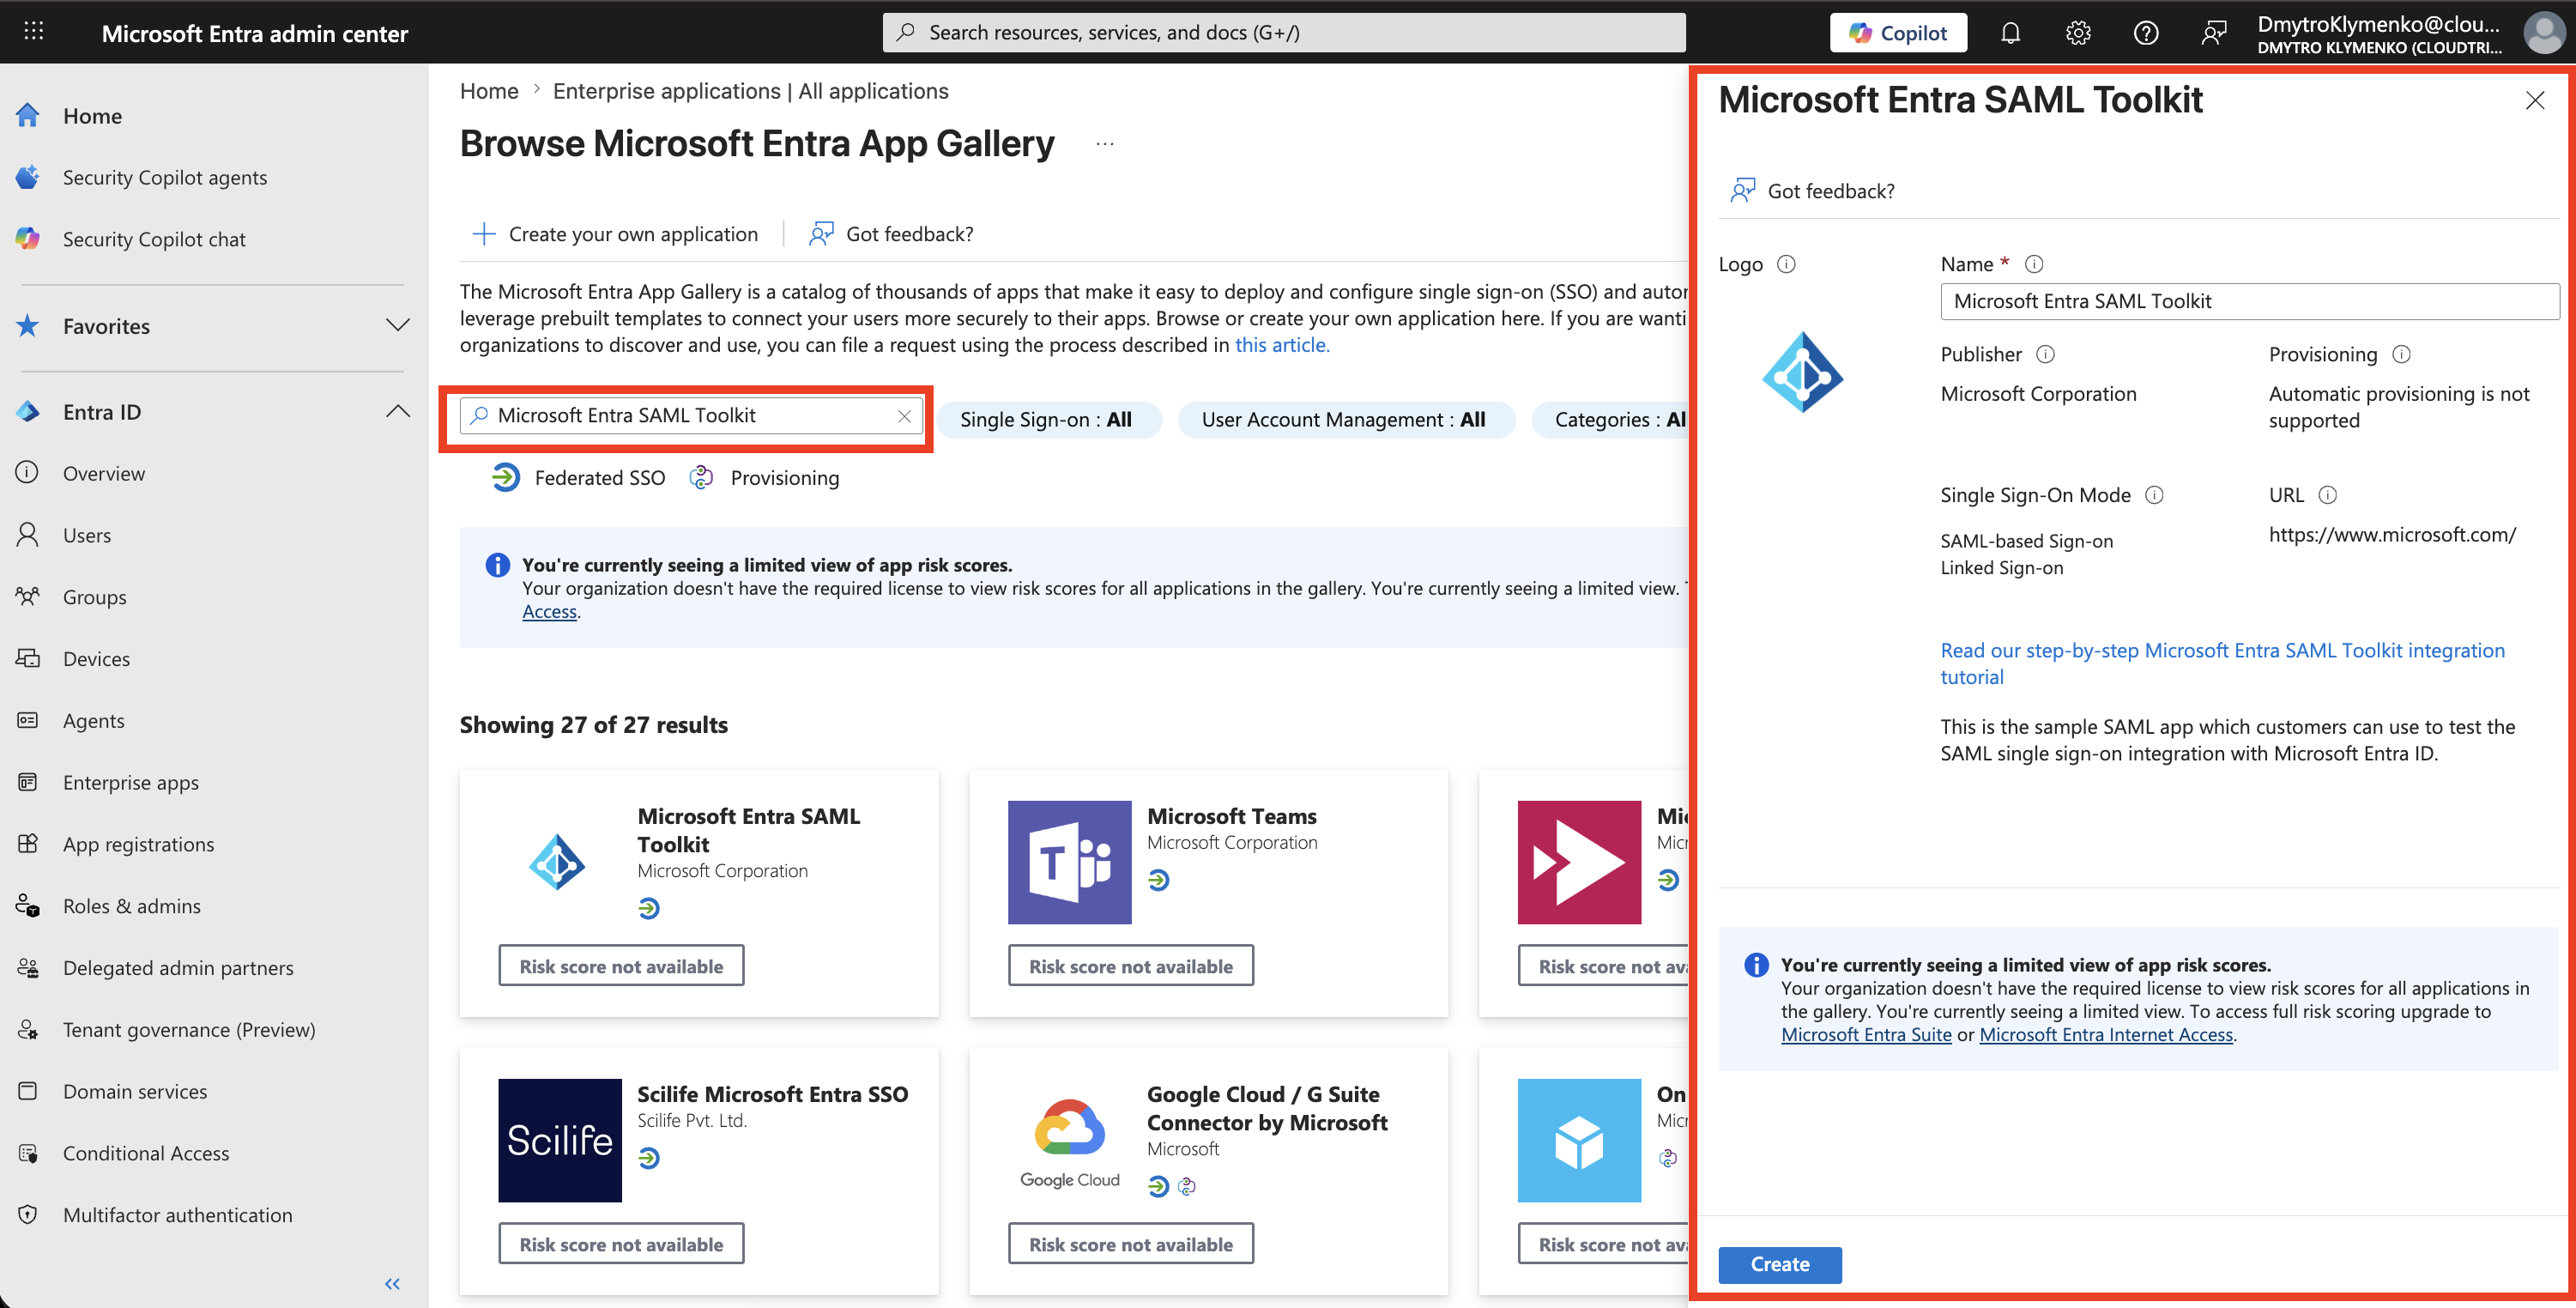
Create the Enterprise Application
Name the application clearly.
Example:
CloudTrips SAML ToolkitCreate the application.
After creation, the app appears as an enterprise application in your tenant.
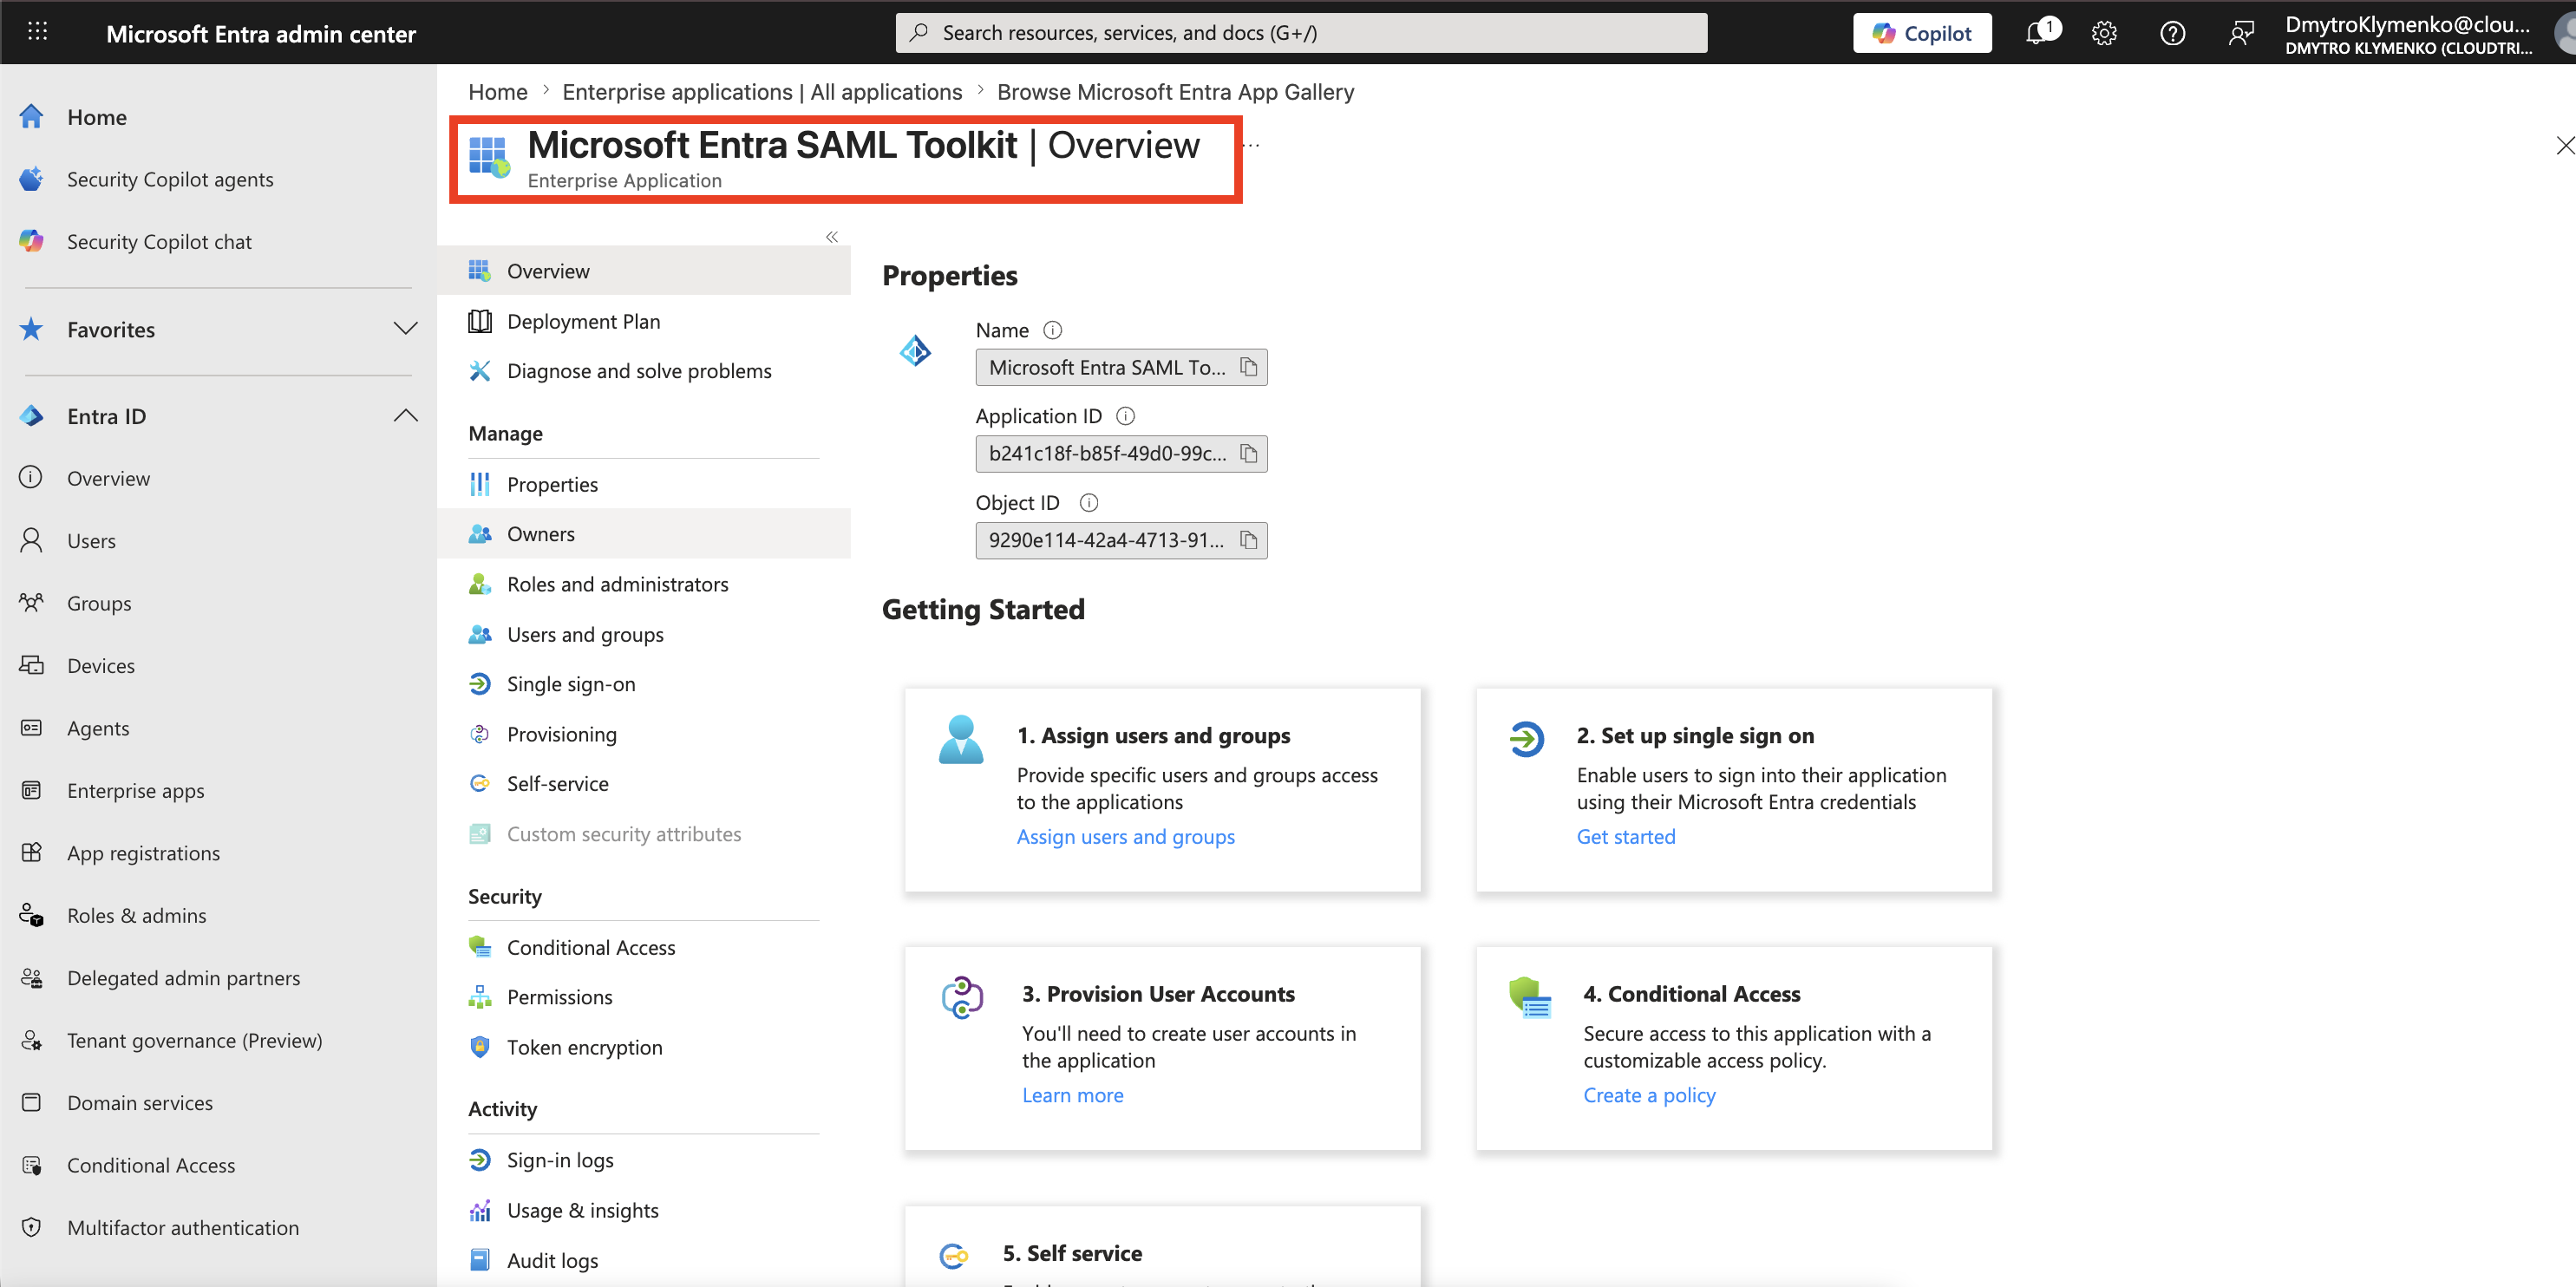
Open Single Sign-On
In the enterprise application, open:
Single sign-onChoose:
SAMLSAML is still a very common SSO protocol for SaaS applications.
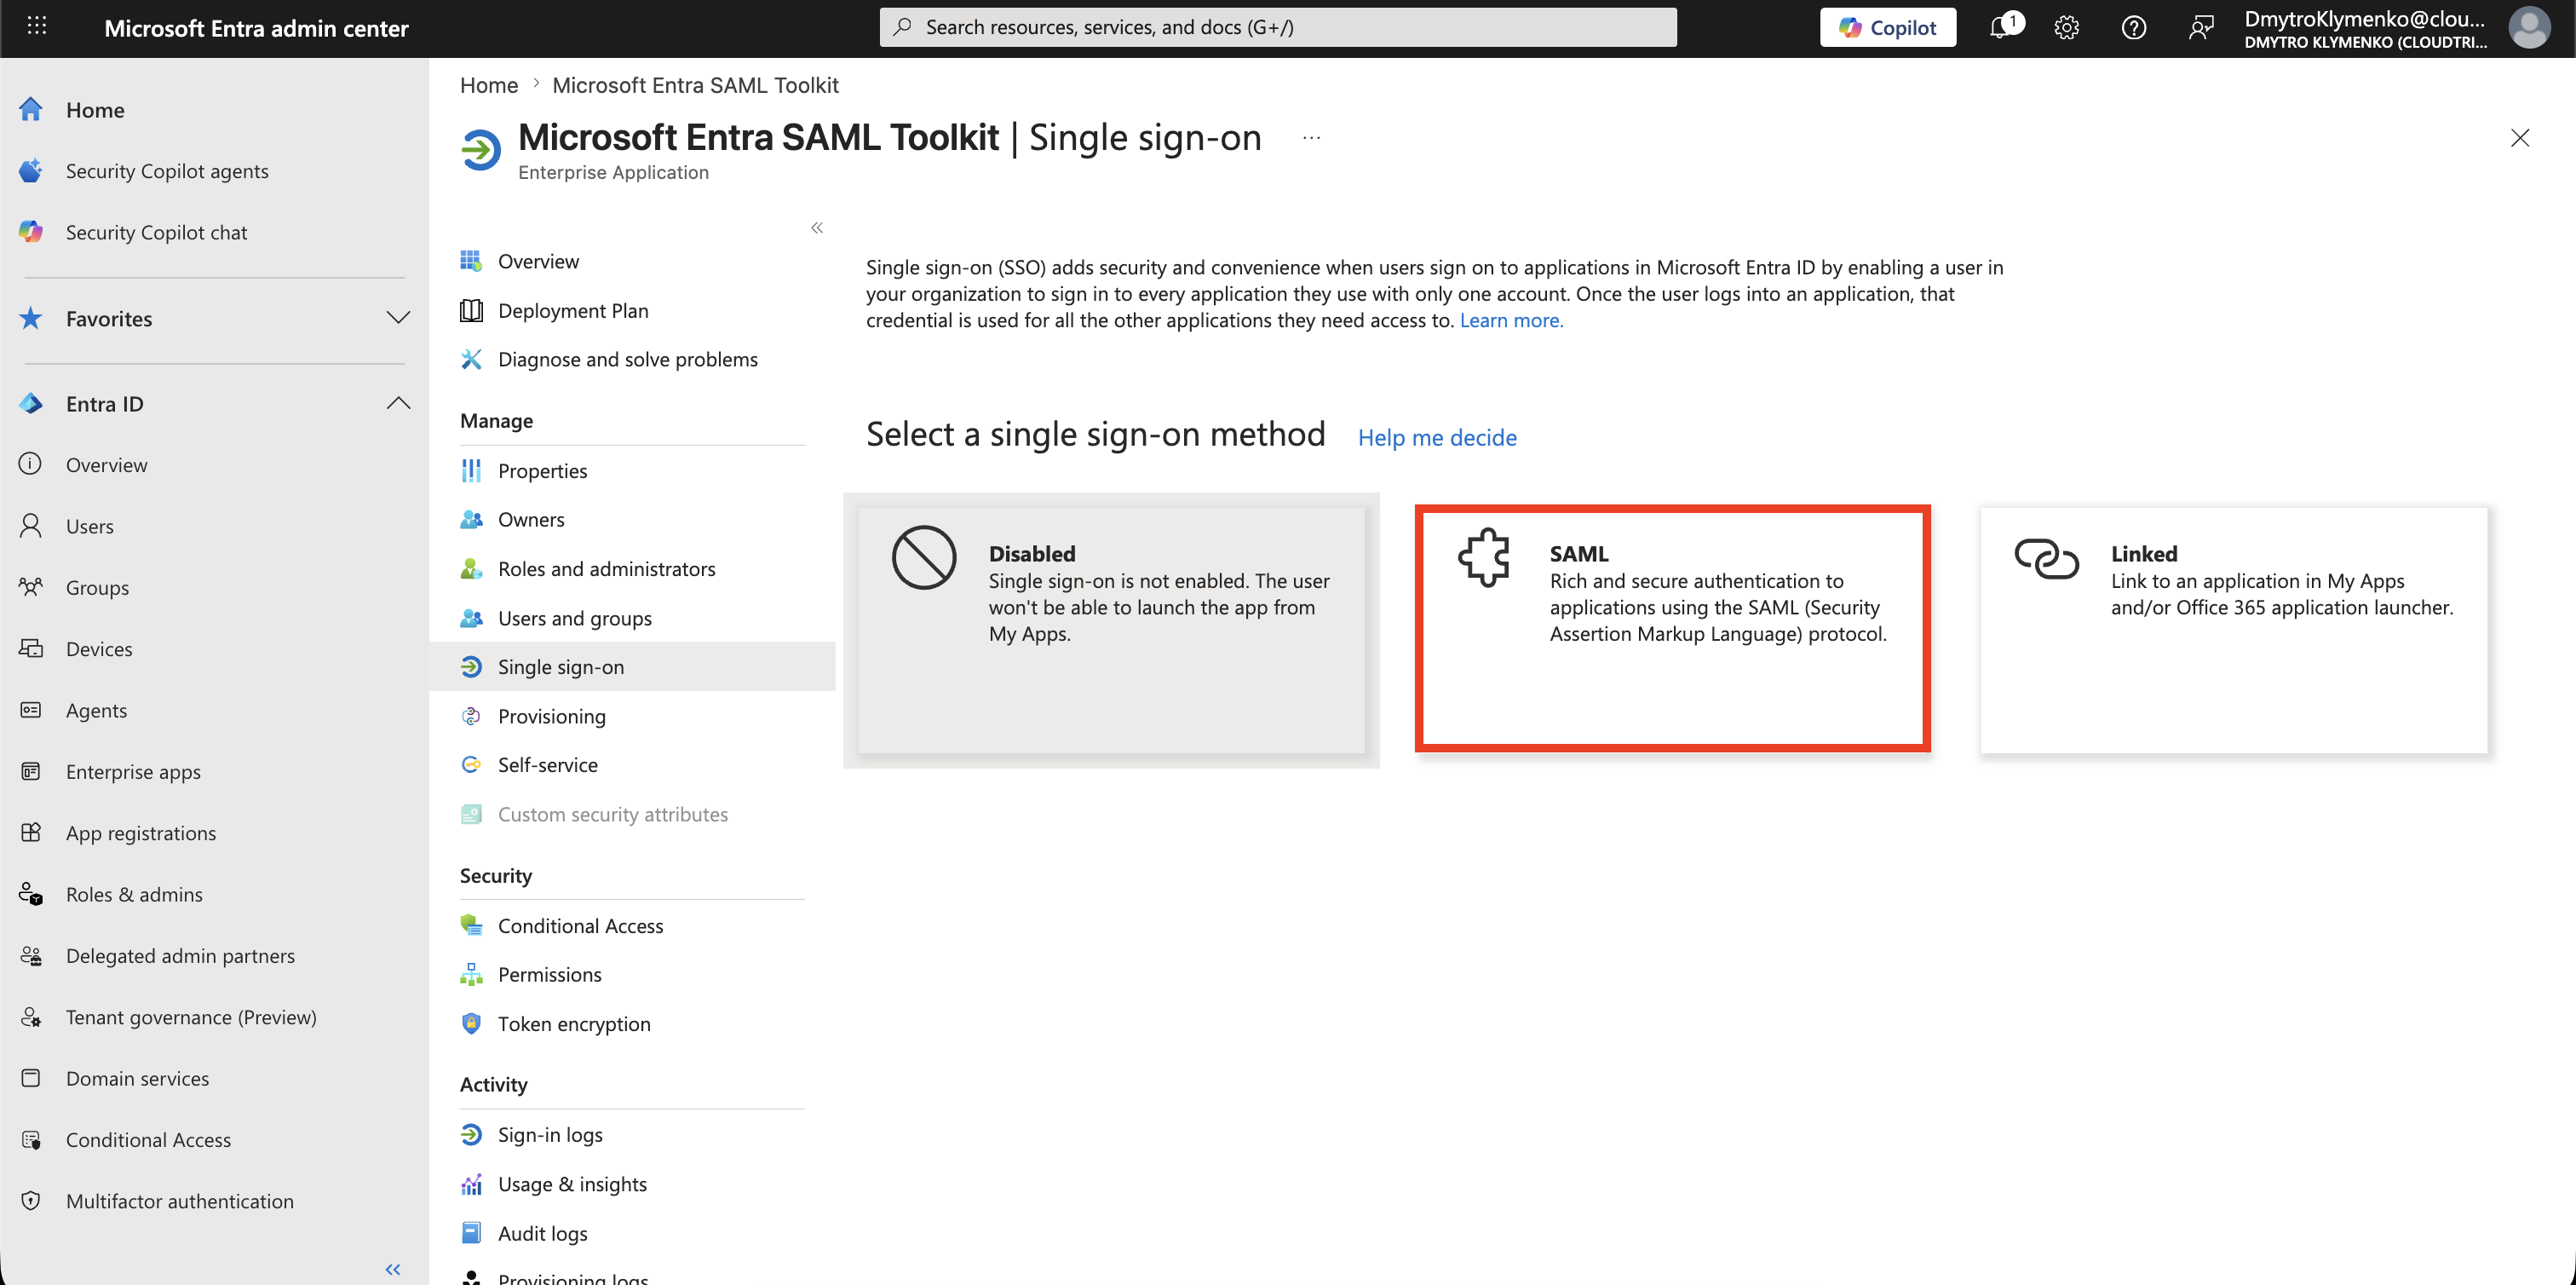
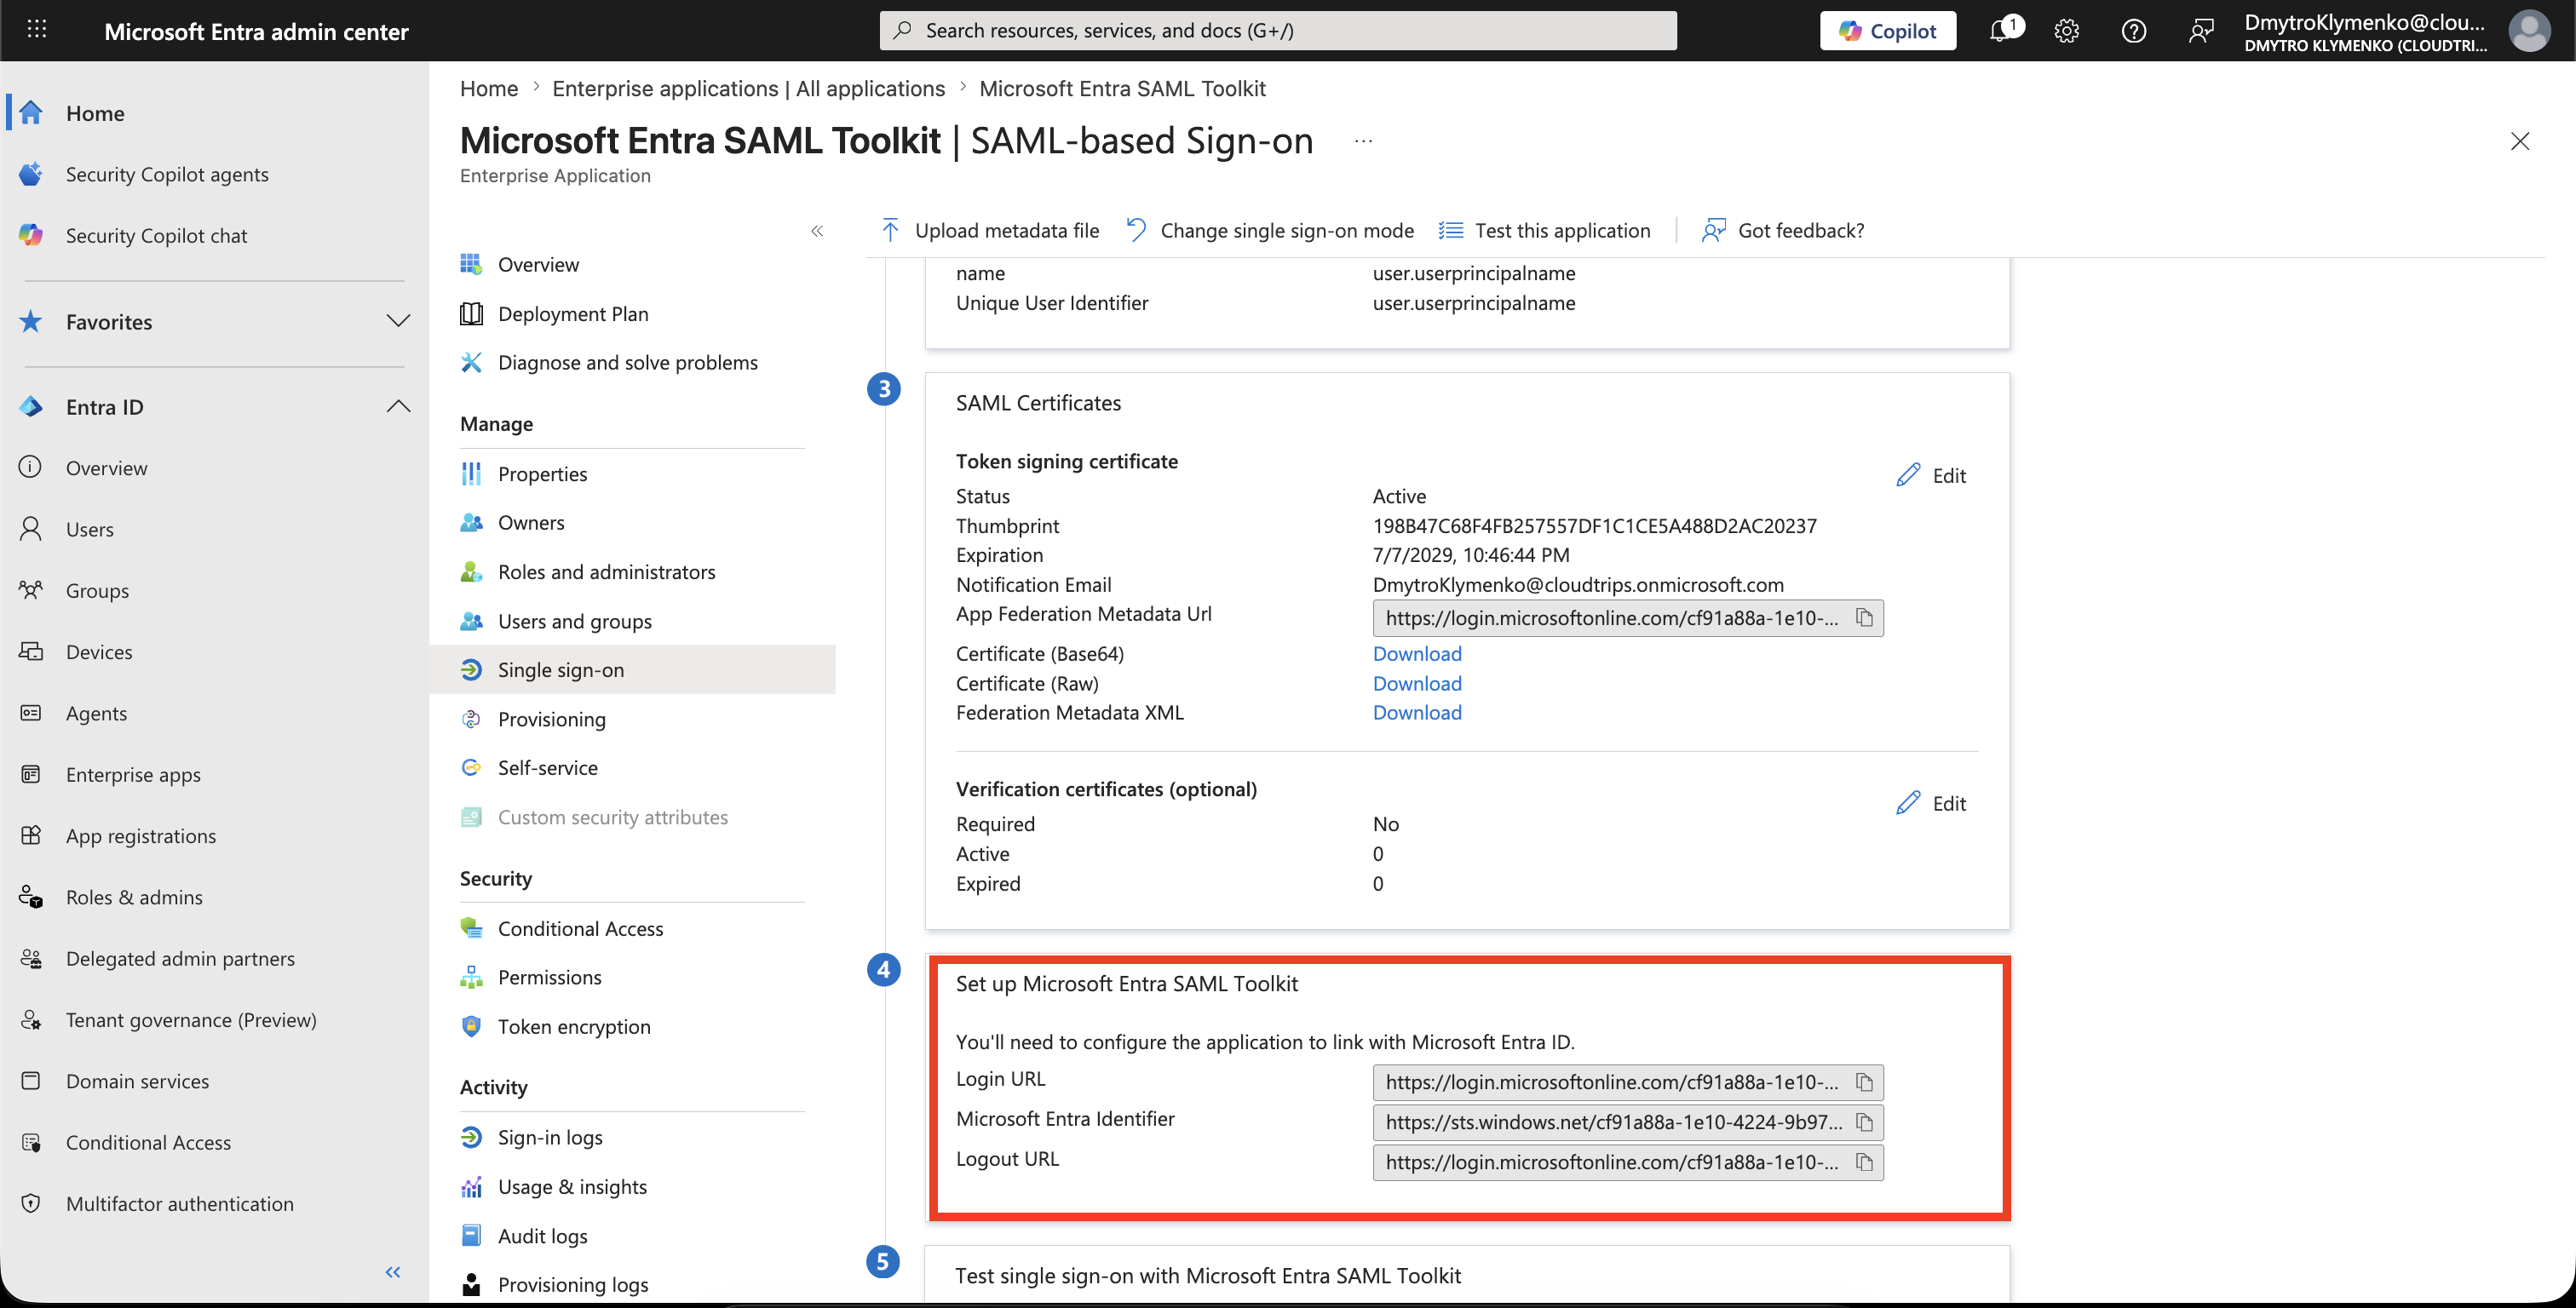
Copy Entra Identity Provider Values
On the SAML setup page, find the Entra identity provider values:
Login URL
Microsoft Entra Identifier
Logout URL
Certificate
Download or copy the raw certificate value if the SaaS app asks for it.
These values tell the SaaS app how to trust your Entra tenant.
You need them before the SAML Toolkit can generate its own service provider values.
Register the Matching Toolkit User
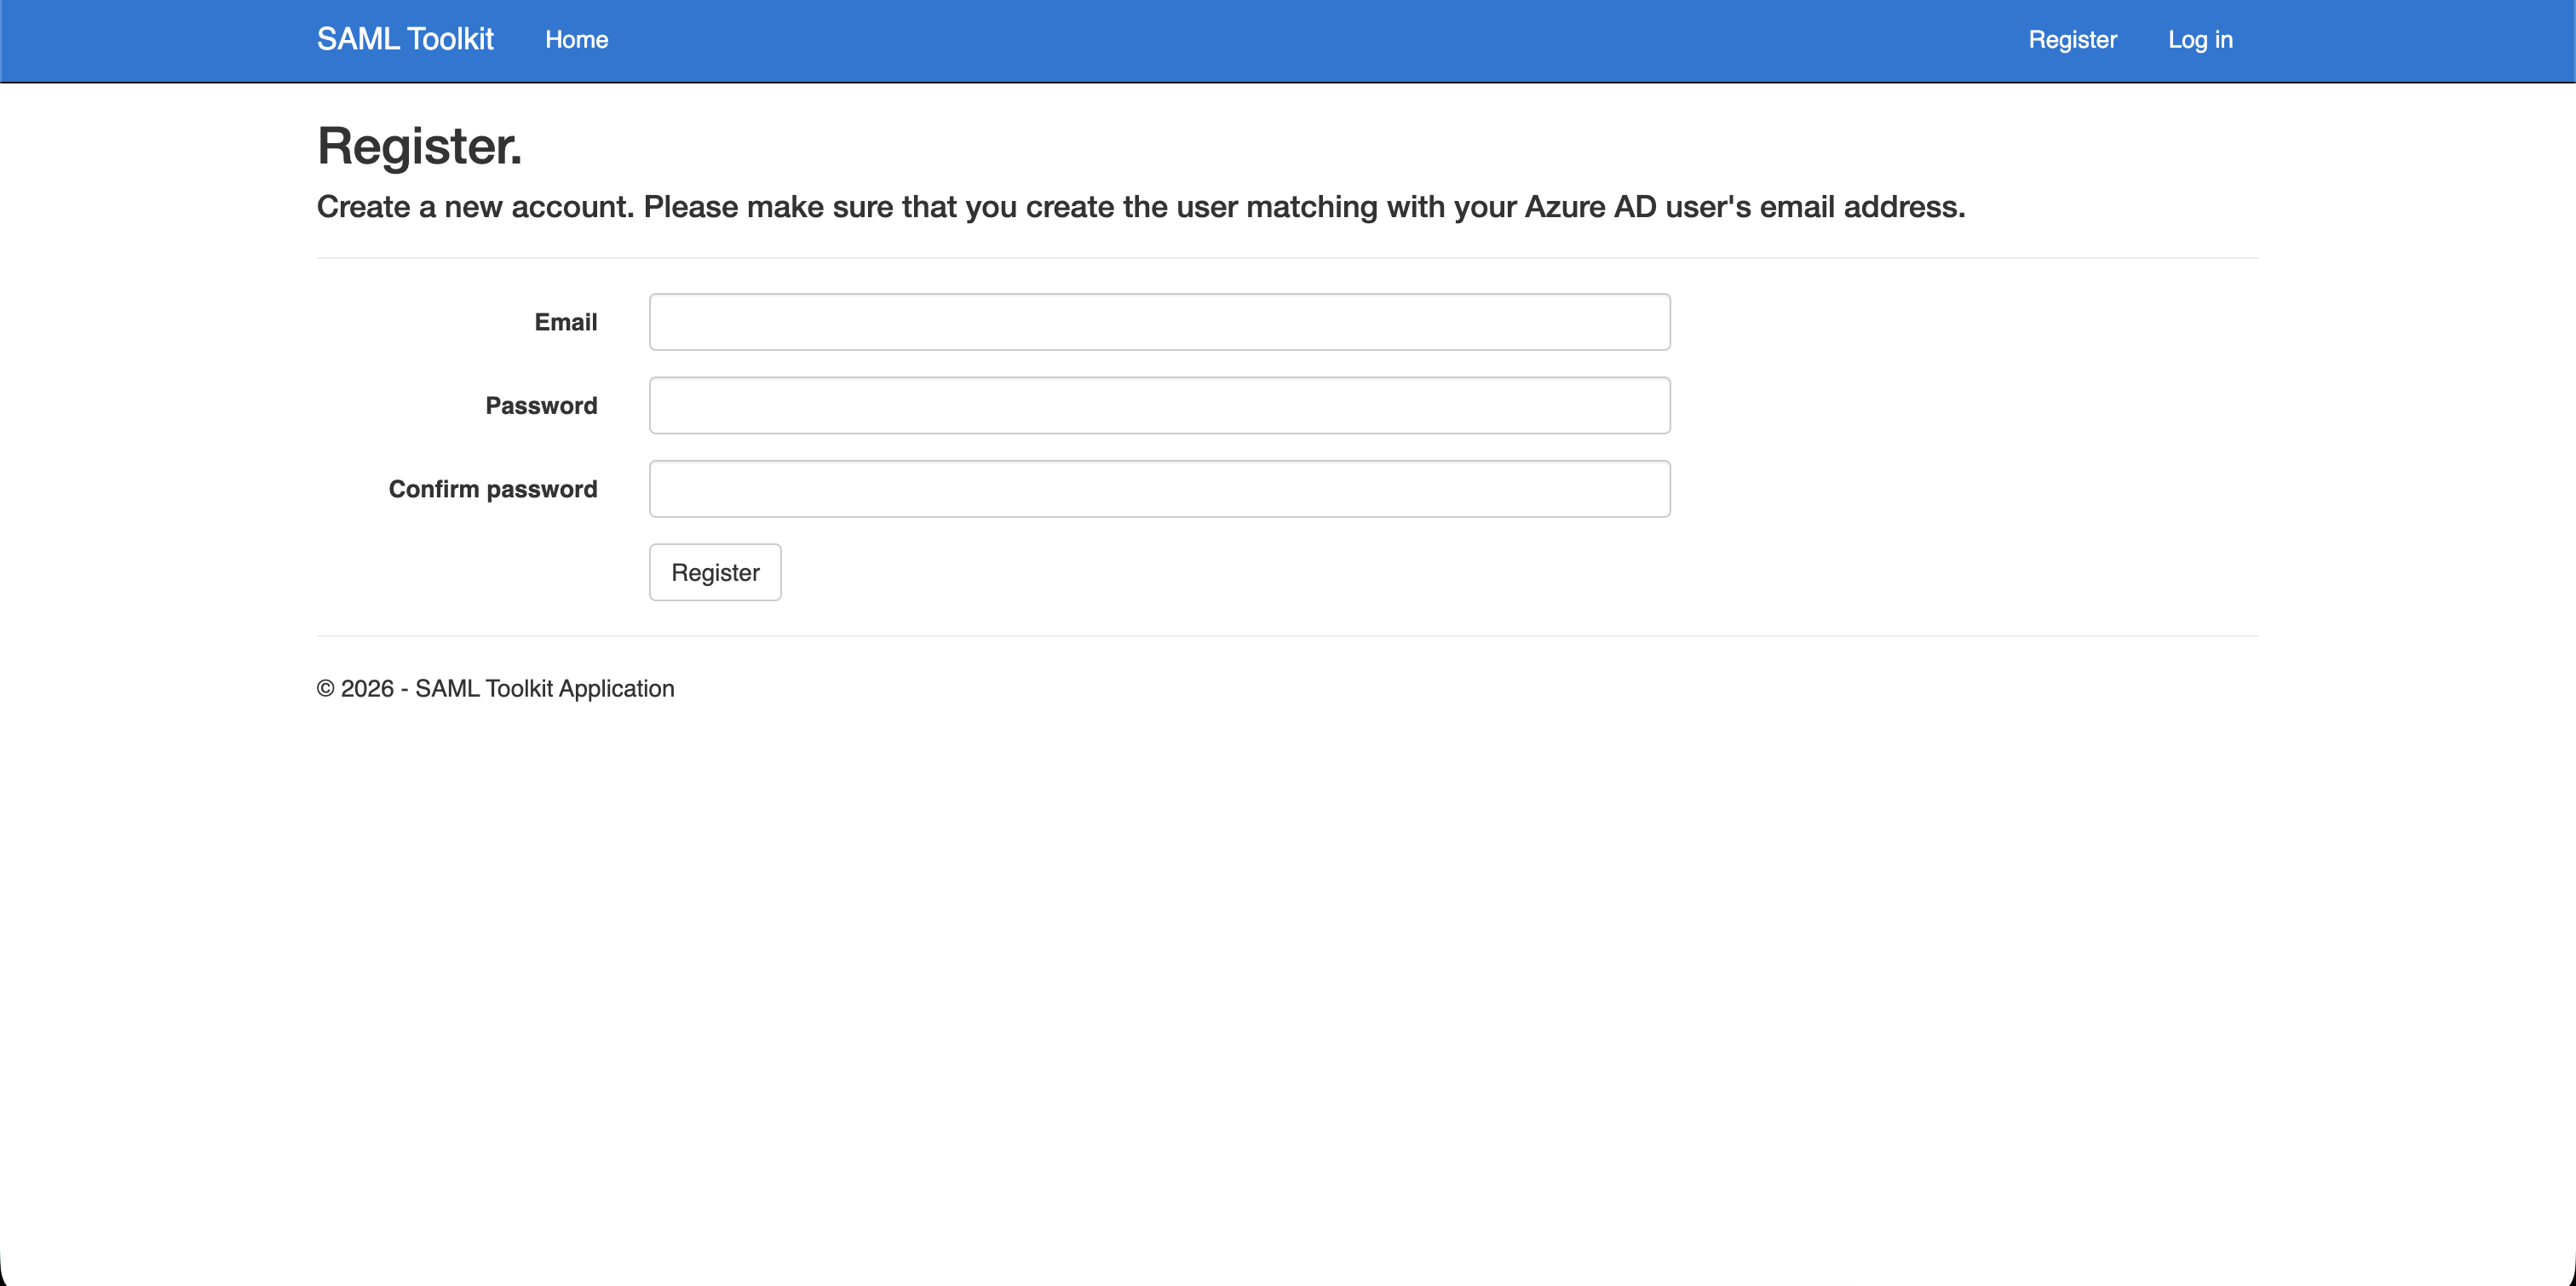
Open the SAML Toolkit website.
Create a local user in the toolkit with the same email address as the Entra user you will test with.
Example:
DmytroKlymenko@cloudtrips.onmicrosoft.comThis does not mean the user keeps using a separate password after SSO works.
It means the demo SaaS app has a local user record that can be matched to the SAML NameID Entra sends.
Many real SaaS apps do this with SCIM provisioning, just-in-time provisioning, or pre-created users.
Configure SAML in the Toolkit App
Log in to the SAML Toolkit with the local user.
Open the toolkit SAML configuration page.
Paste the Entra values into the toolkit:
Azure AD Login URL
Azure AD Identifier
Logout URL
Raw certificate
Save the toolkit configuration.
The toolkit now knows that Entra is the identity provider.
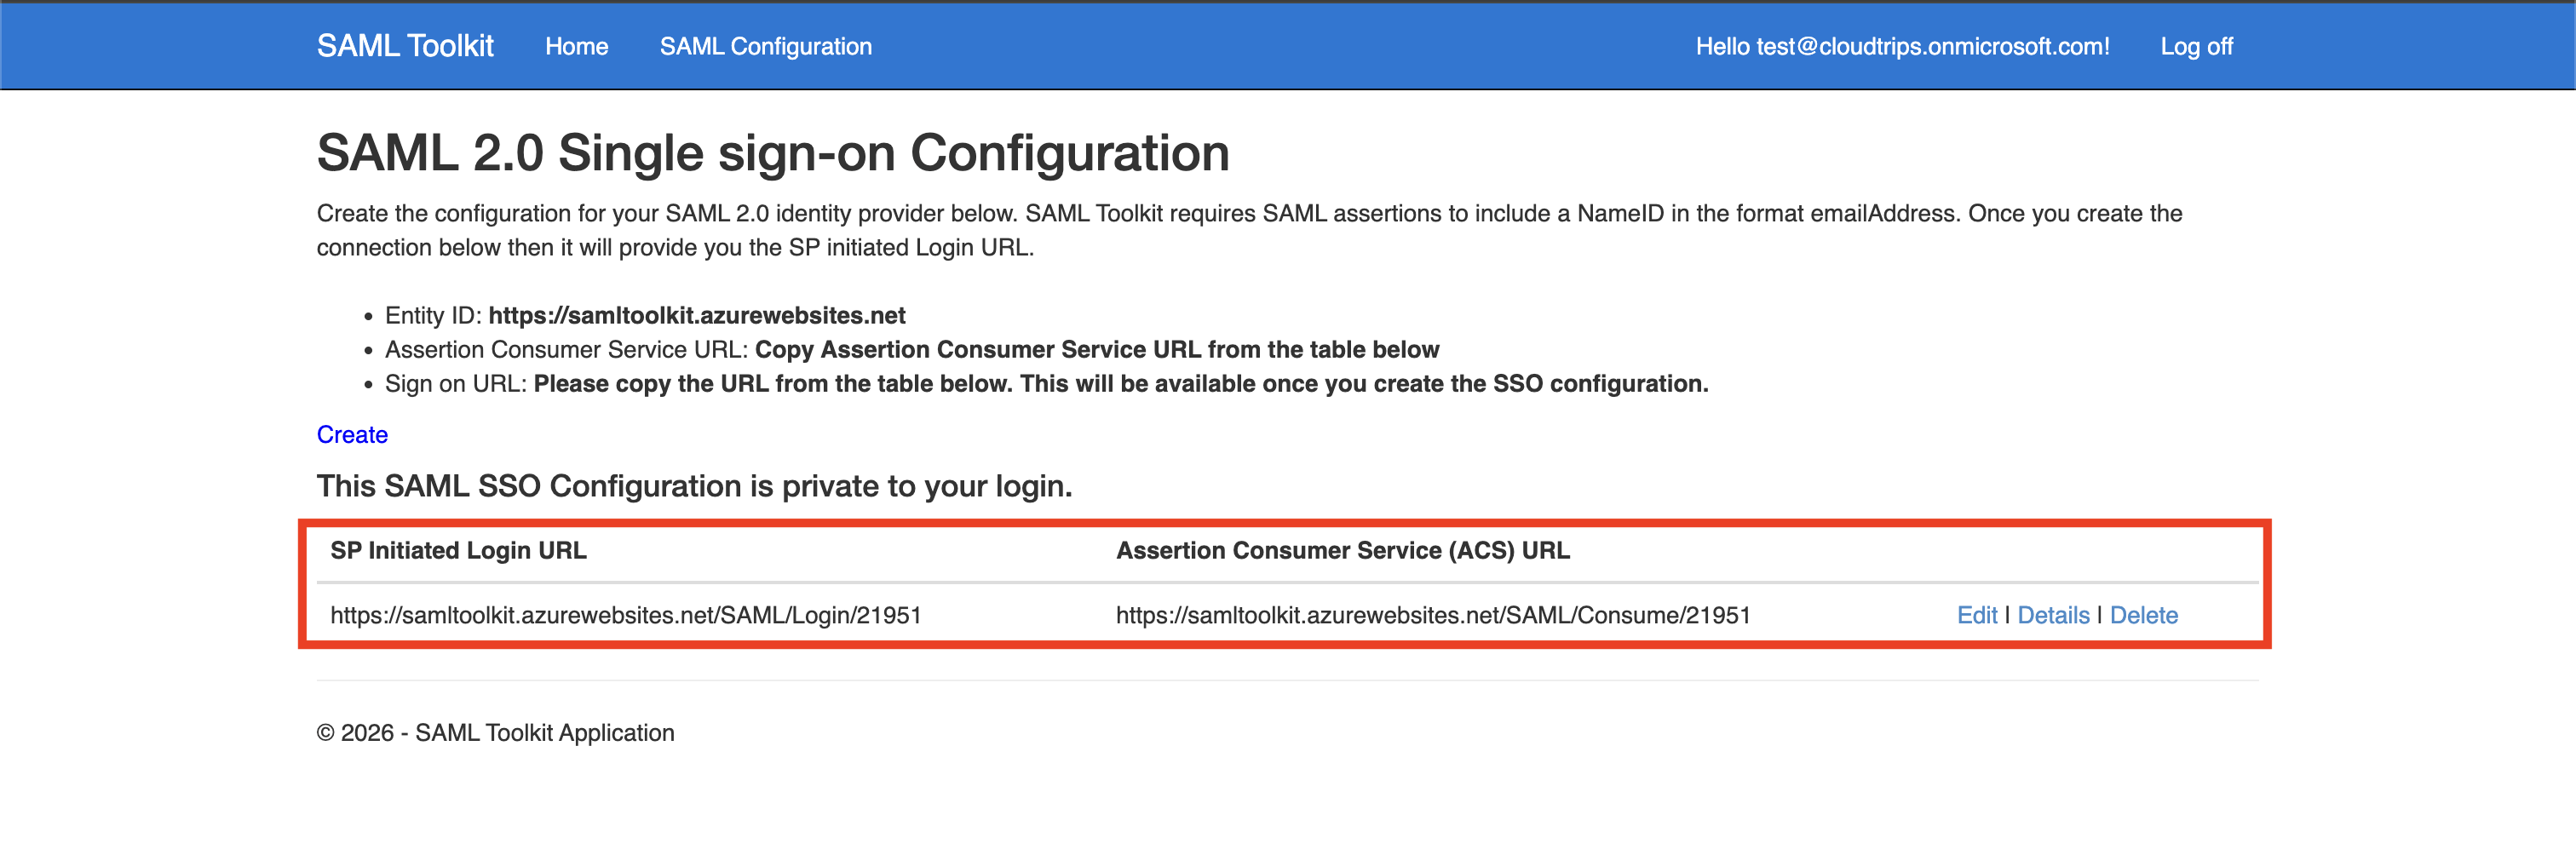
After saving, the toolkit shows its service provider values.
Copy Toolkit Service Provider Values
From the toolkit configuration page, copy the values generated by the toolkit:
Entity ID
Assertion Consumer Service URL
SP initiated SSO URL
These are the values Entra must use in Basic SAML Configuration.
In the test that worked, the reply URL included a toolkit-specific number, for example:
https://samltoolkit.azurewebsites.net/SAML/Consume/21951If you recreate the toolkit configuration, that number can change.
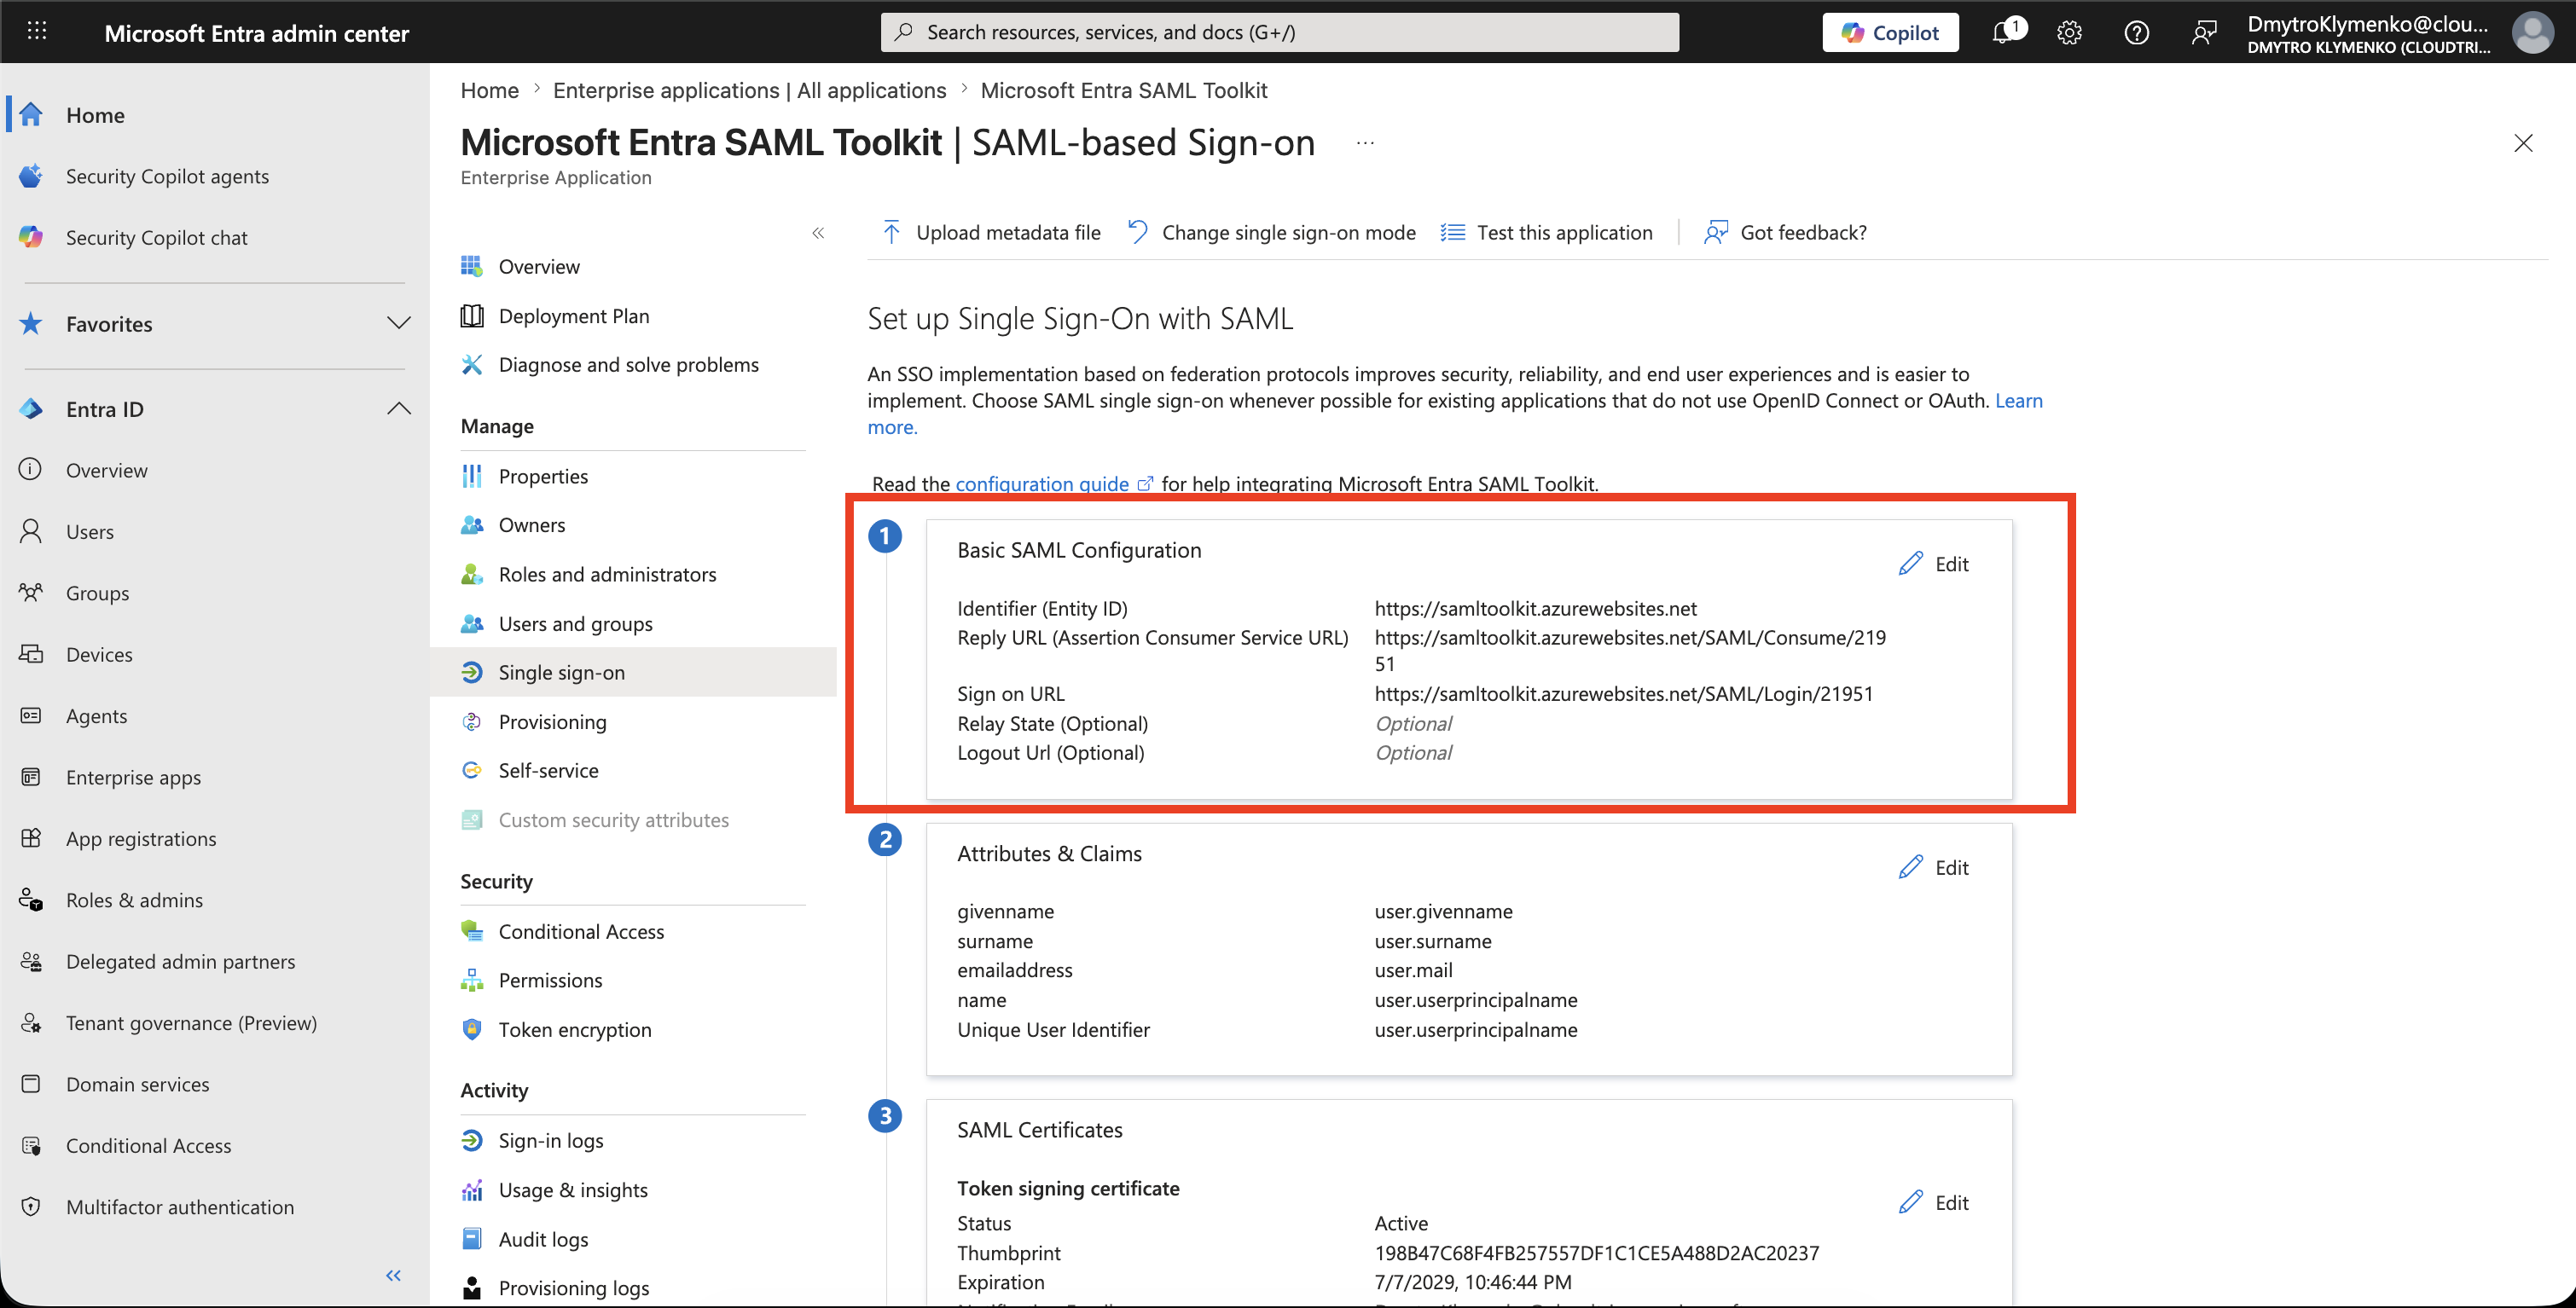
Configure Basic SAML Settings in Entra
Return to:
Enterprise application > Single sign-on > Basic SAML ConfigurationUse the toolkit service provider values:
Identifier = toolkit Entity ID
Reply URL = toolkit Assertion Consumer Service URL
Sign on URL = toolkit SP initiated SSO URL
The values must match what the toolkit generated.
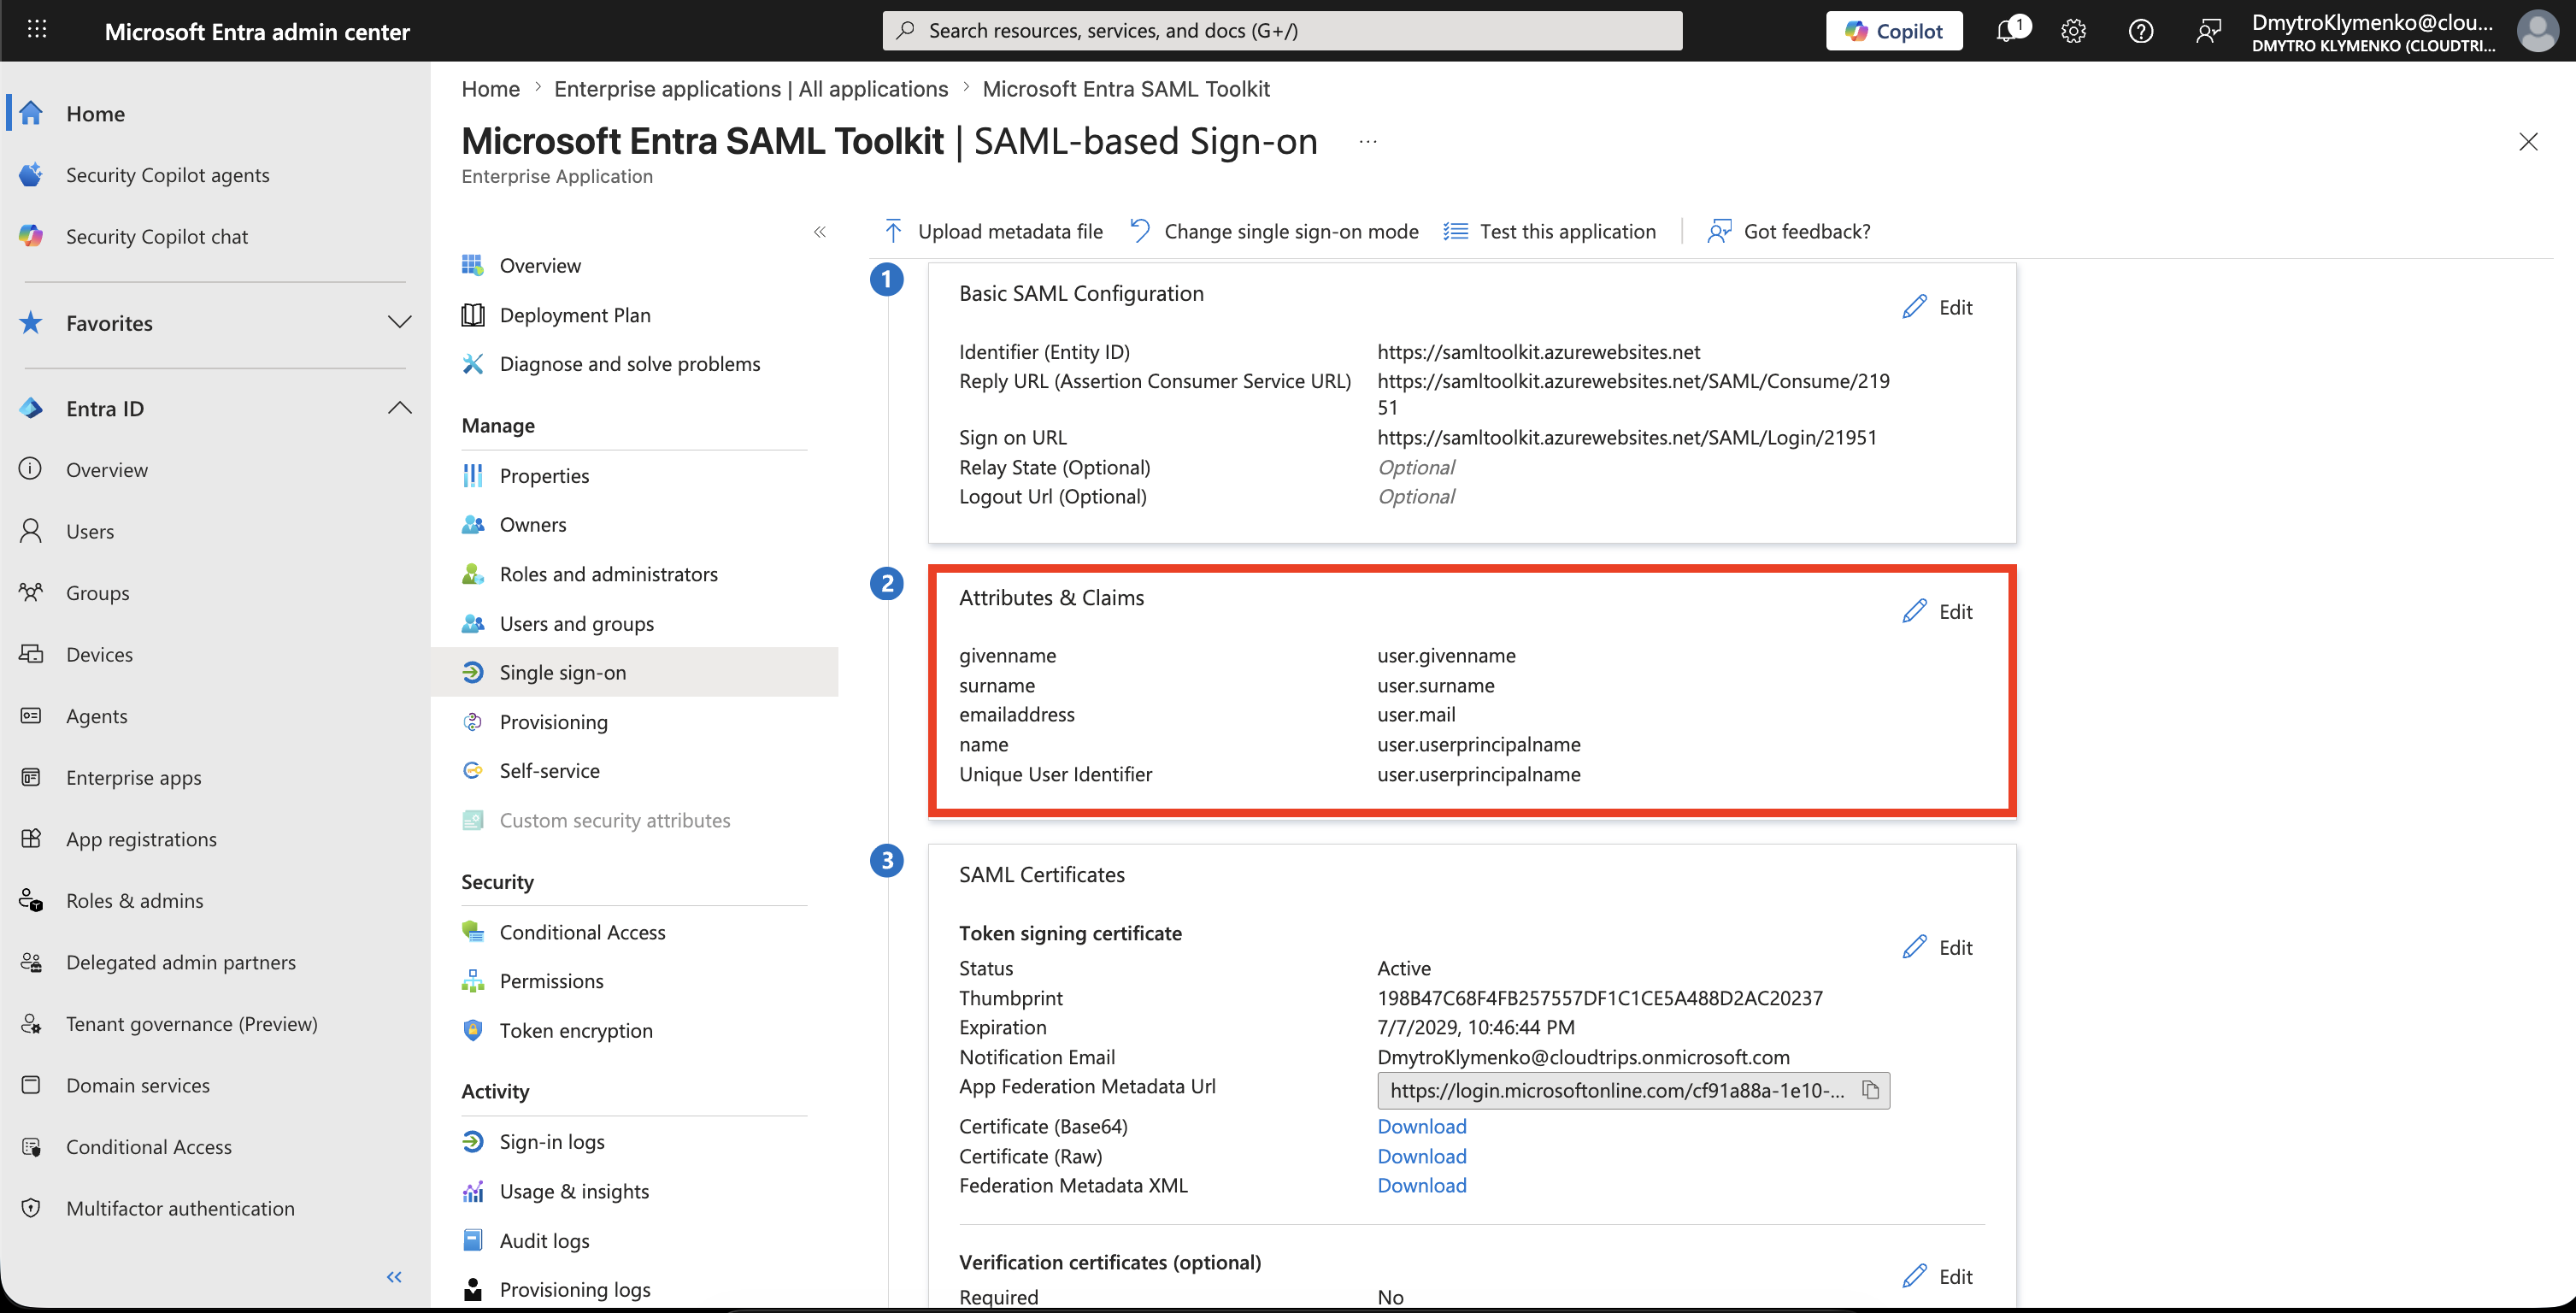
Review Attributes and Claims
Open:
Attributes & ClaimsThis controls which user values Entra sends to the SaaS app.
Common claims include:
Name ID
user.userprincipalname
user.mail
user.displayname
user.givenname
user.surname
Only send claims the SaaS app needs.
For this demo, the important value is the NameID.
It must match the toolkit user account you created earlier.
Assign Users or Groups
Open:
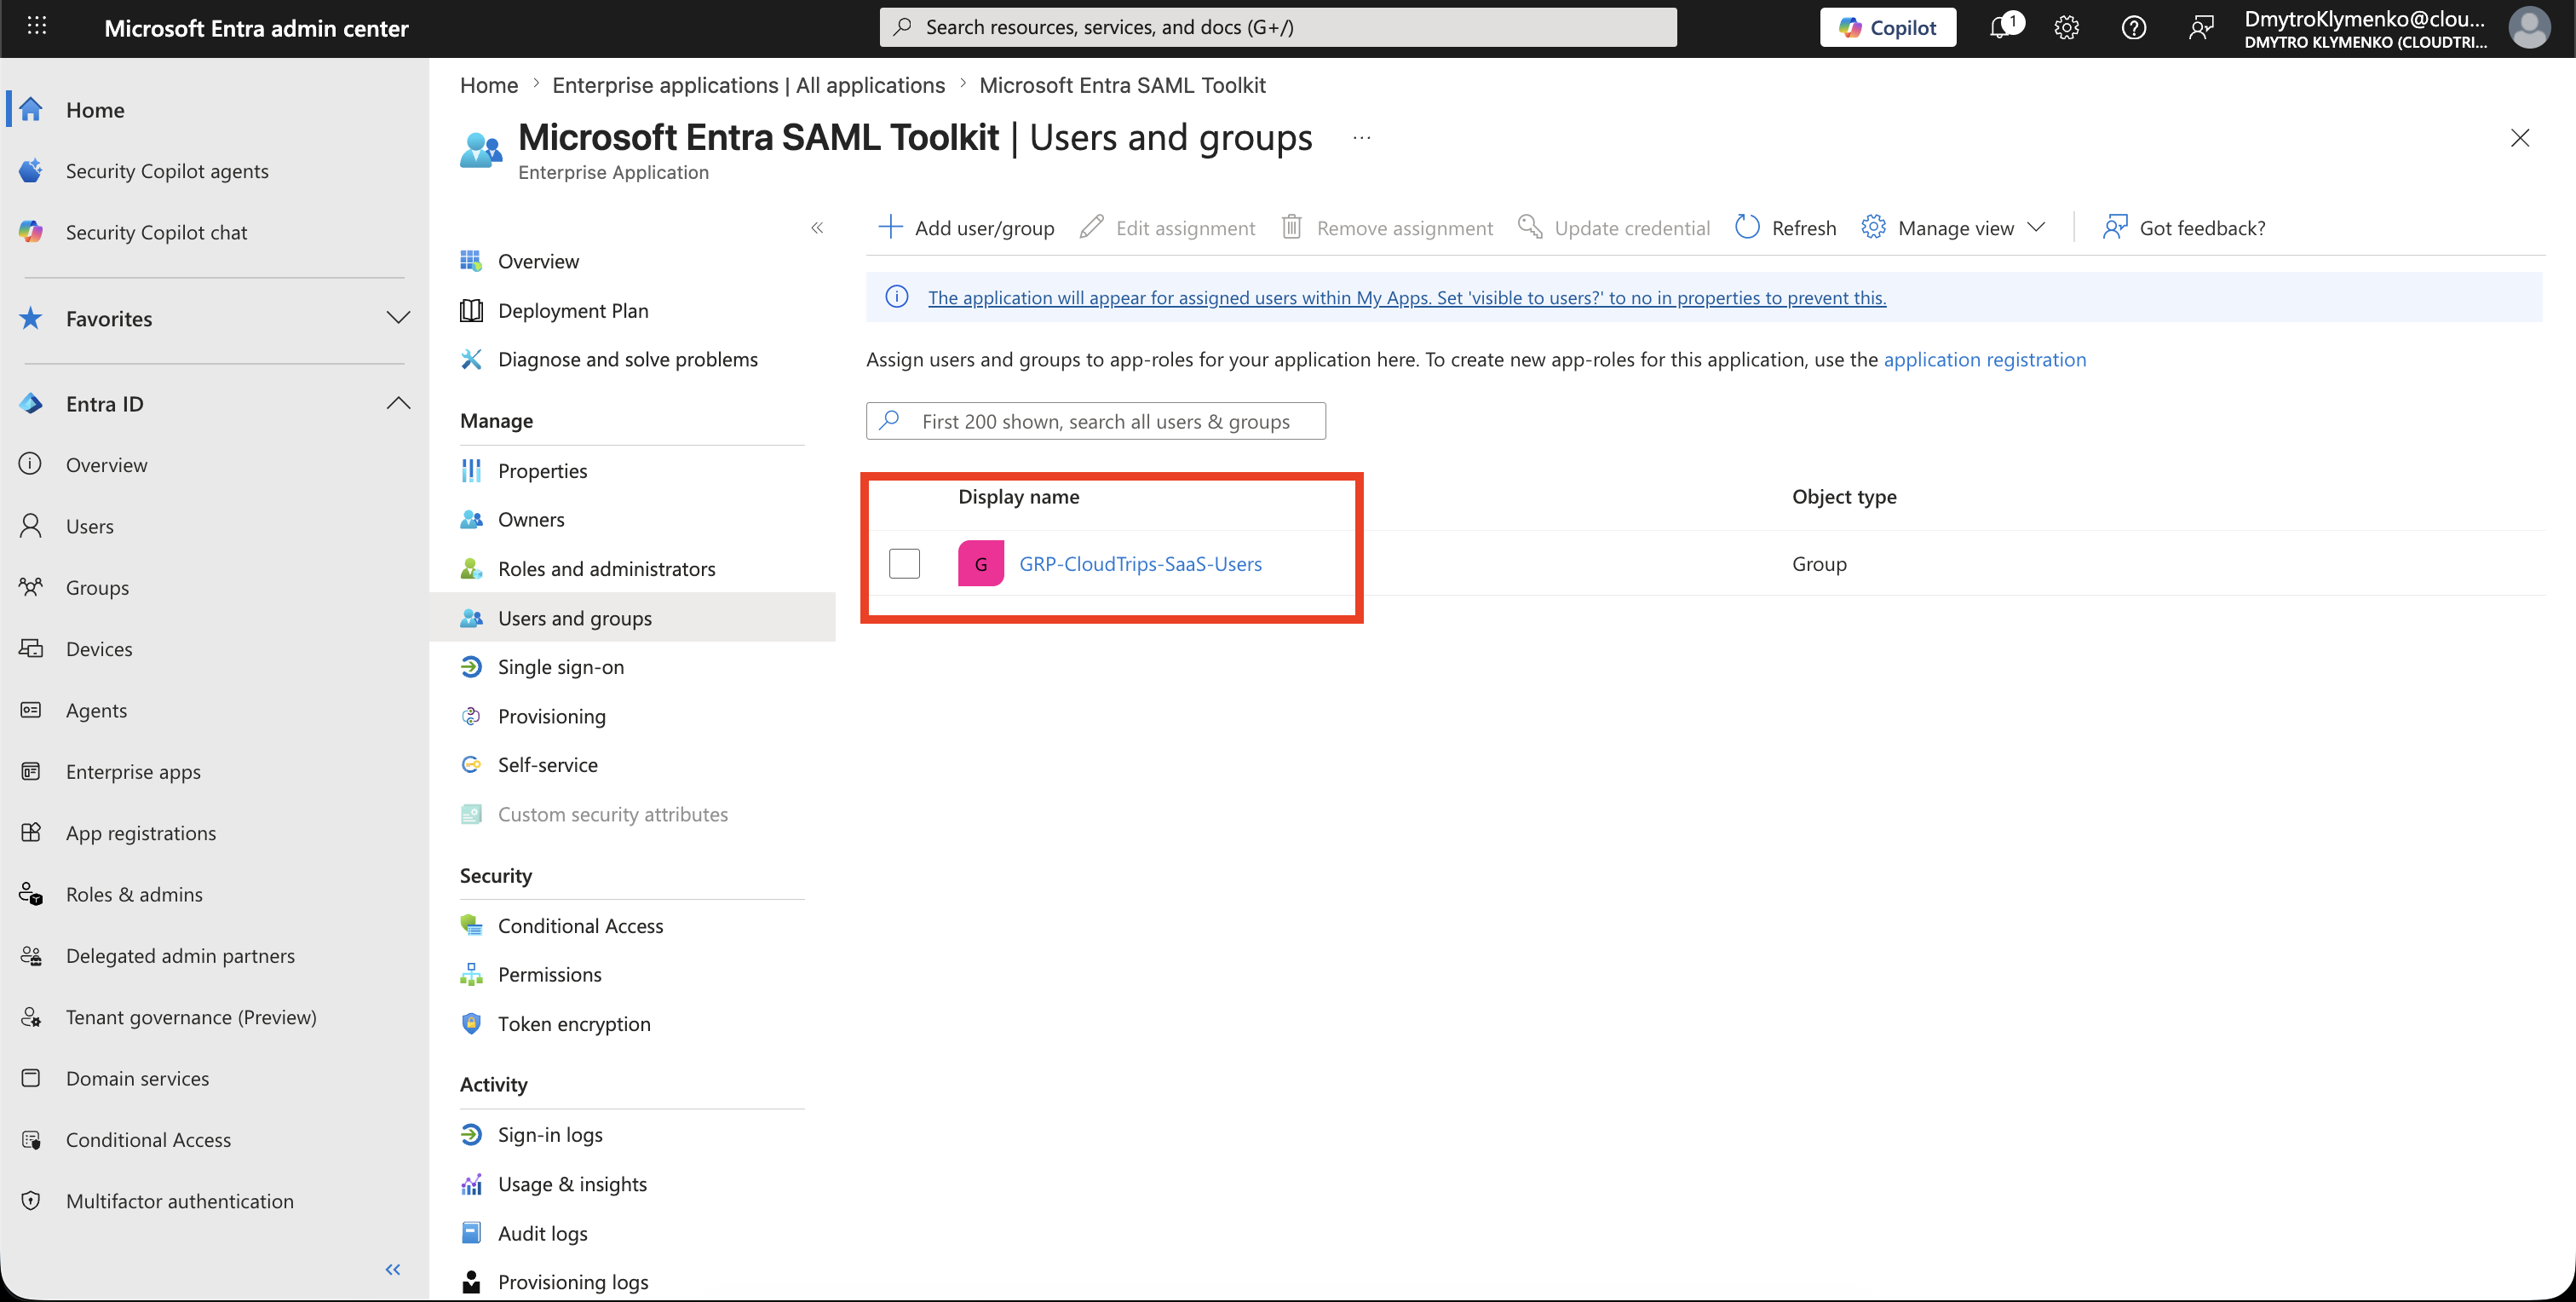
Users and groupsAdd the test user or group.
Example:
GRP-CloudTrips-SaaS-UsersOnly assigned users can access the app when assignment is required.
Test Single Sign-On
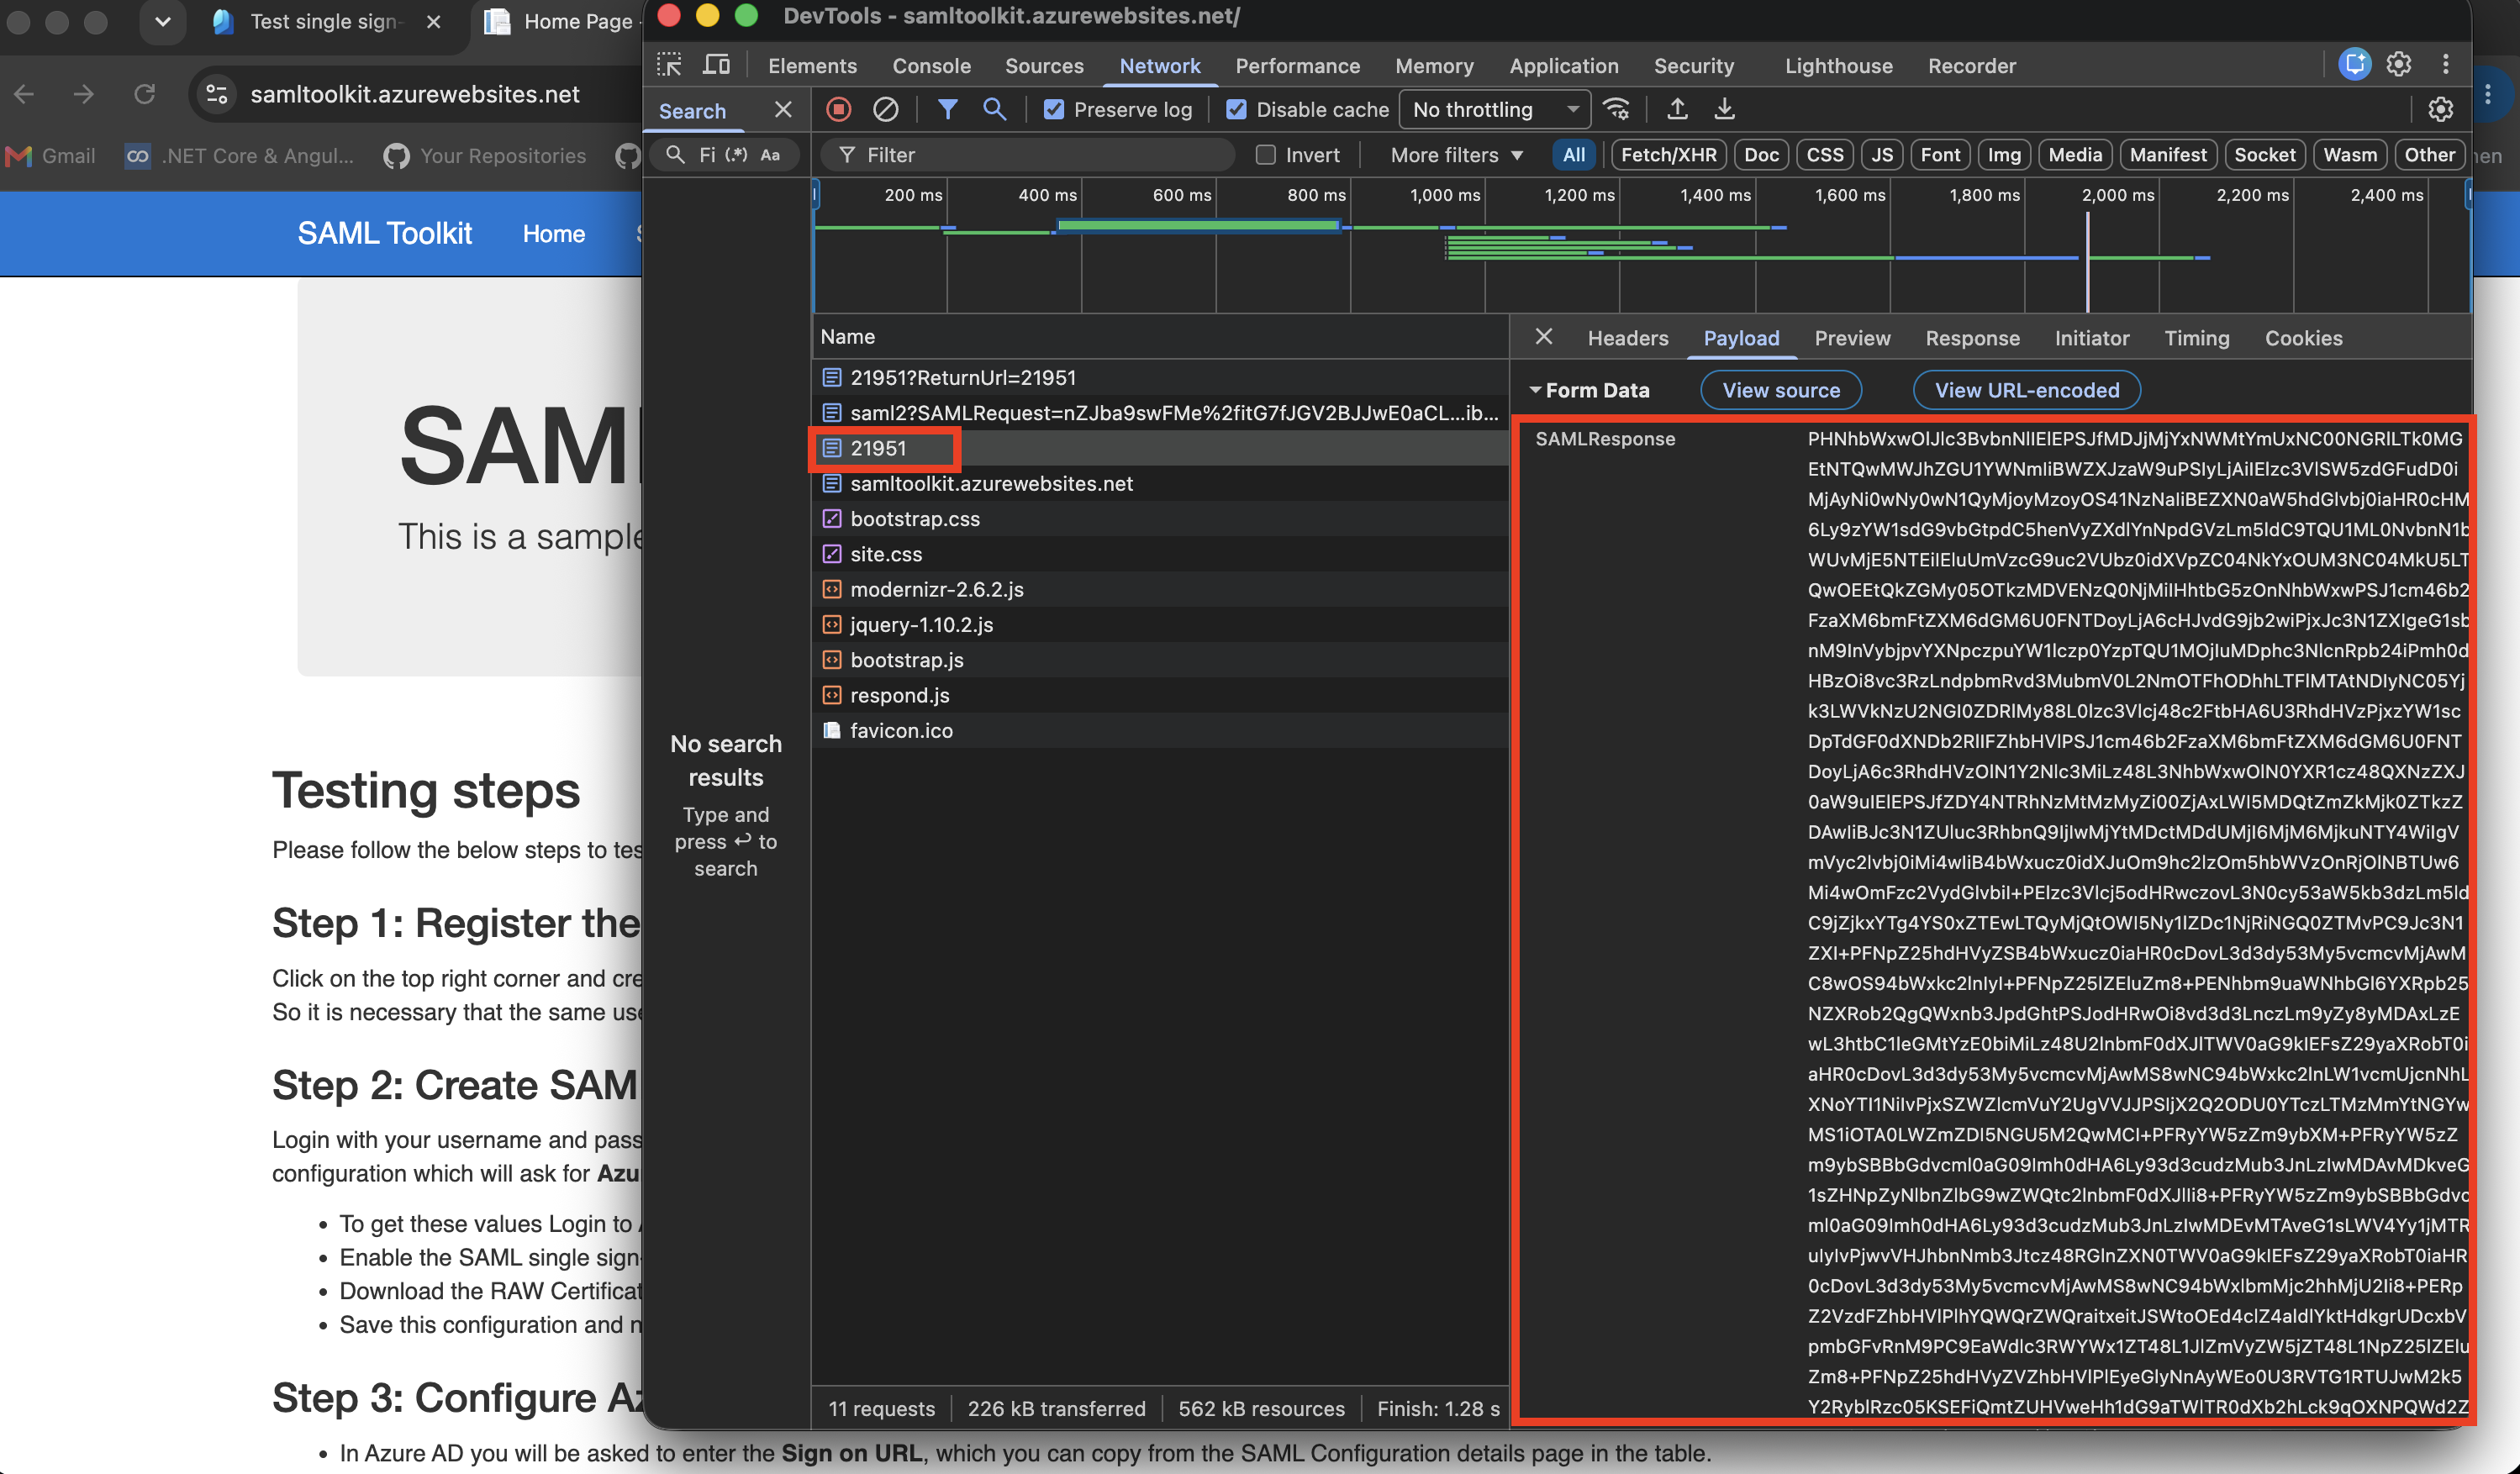
Test in a new InPrivate browser window.
You can test from:
https://myapps.microsoft.comor from the toolkit:
SP initiated SSO URLSign in as the assigned Entra user.
The proof is that Entra issues a SAML response and the toolkit accepts it as the matching local user.
Enterprise Note
Enterprise application SSO is not only an authentication setting.
It is also an access-control boundary.
Recommended checklist:
- assign users or groups intentionally
- keep app assignment required when appropriate
- send only required SAML claims
- document who owns the SaaS app configuration
- protect the app with Conditional Access if it contains sensitive data
- review audit logs when SSO settings change
- remove unused enterprise applications