SQL Server Compatibility Needed? Create Managed Instance
Your existing SQL Server application joins tables from different databases in one query and runs nightly jobs through SQL Server Agent, its built-in job scheduler. You want to move it to Azure while keeping that code and those jobs working. Azure SQL Database manages databases individually: even under one logical server, those cross-database queries need a different setup, and scheduled jobs need another service.
Azure SQL Managed Instance provides a managed SQL Server instance with direct cross-database queries and SQL Server Agent. Choose it when your application depends on these instance-level features and you want fewer migration changes, while Azure handles patching, backups, and availability.
Managed Instance gives you more SQL Server features and settings to manage—such as instance-level logins and scheduled jobs.
Create the Instance
In the Azure portal, open SQL managed instances → Create → SQL managed instance. Use:
Resource group: rg-cloudtrips-mi-test-weu (new)
Managed instance name: mi-ctappweu
Region: West Europe
Belongs to an instance pool: No
Authentication: SQL authentication
Admin login: ctadmin
Choose and save a strong password of at least 16 characters that meets the portal requirements. This creates a separate instance from sql-ctappweu used in earlier trips.
Under Compute + storage → Configure Managed Instance, choose General Purpose, Standard-series (Gen5), 4 vCores, and 32 GB storage for a small lab. Use Pay-as-you-go licensing and locally redundant backups. Leave zone redundancy disabled for this exercise. If the portal offers a next-gen option separately, use the original General Purpose configuration here.
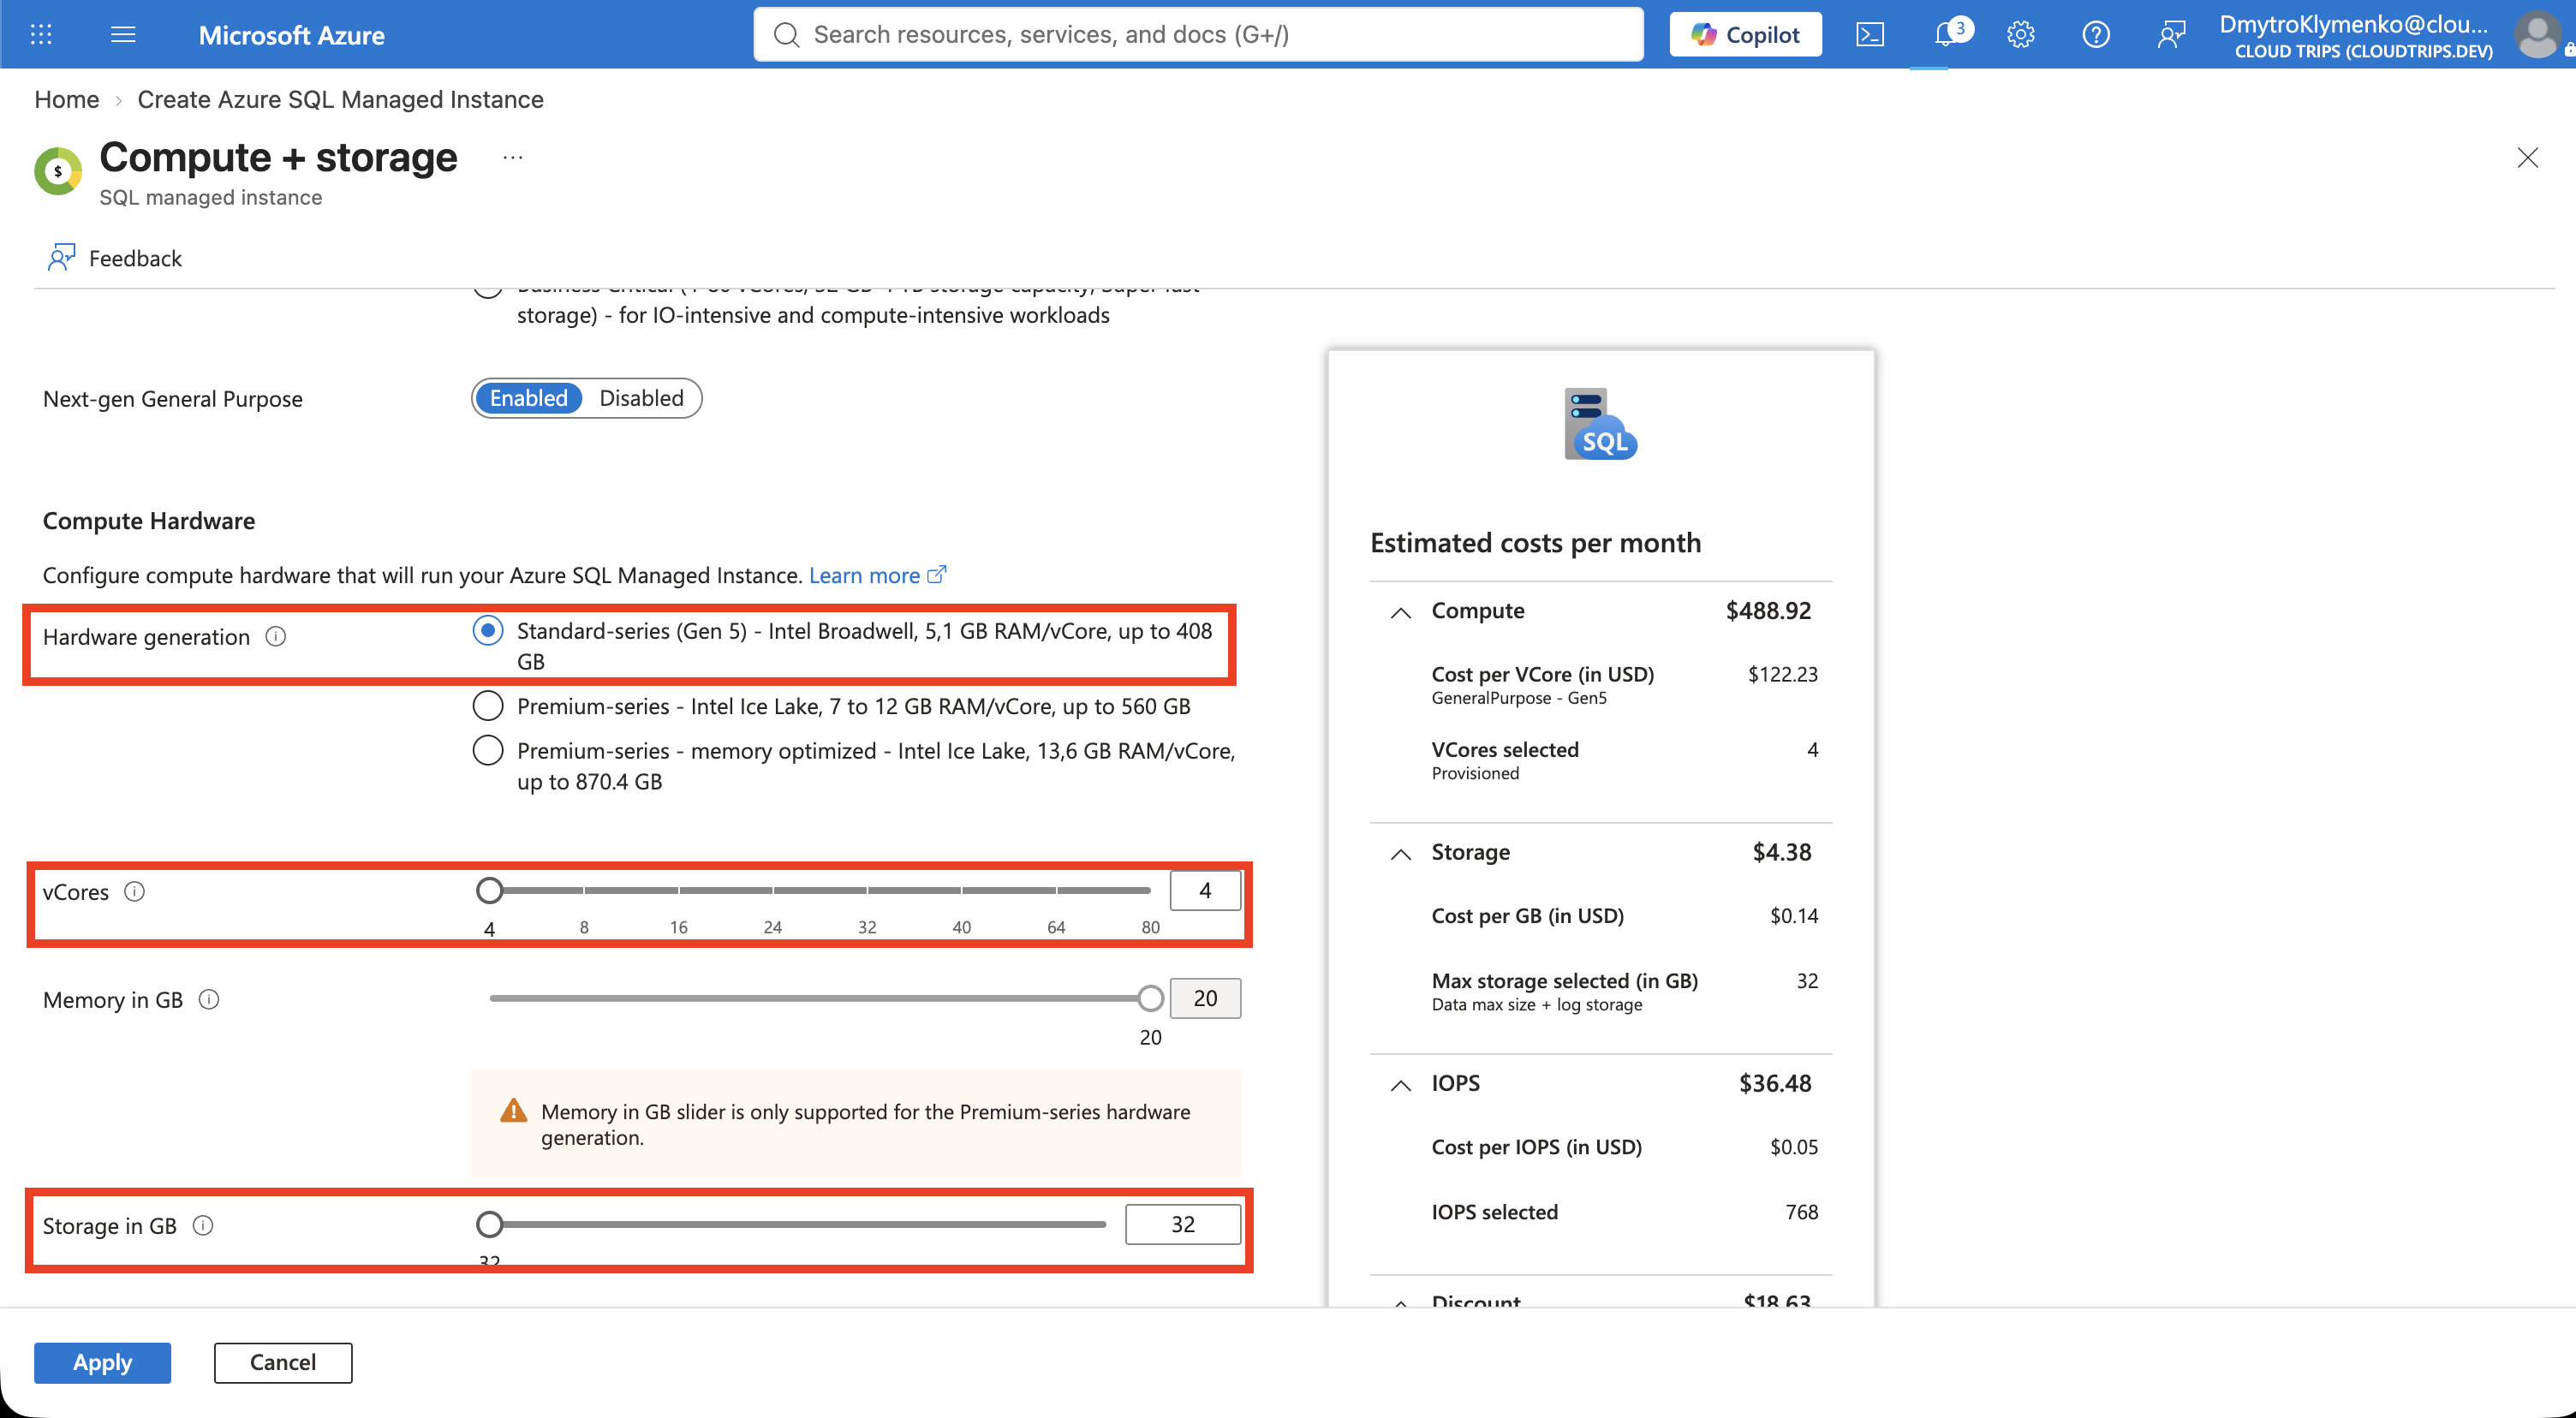
Check the capacity and displayed price before applying. The instance has its own provisioned compute and costs substantially more than the Basic database used earlier. Regional access and available quota depend on your subscription.
Configure the Private Network
On Networking, keep the proposed new network and these settings:
Virtual network / subnet: (new) vnet-mi-ctappweu/ManagedInstance
Connection type (VNet-local endpoint): Redirect (Default)
Public endpoint (data): Disable
Azure creates the virtual network with one subnet and applies the network configuration required by Managed Instance. The proposed network name follows your instance name and may differ if you chose another name.
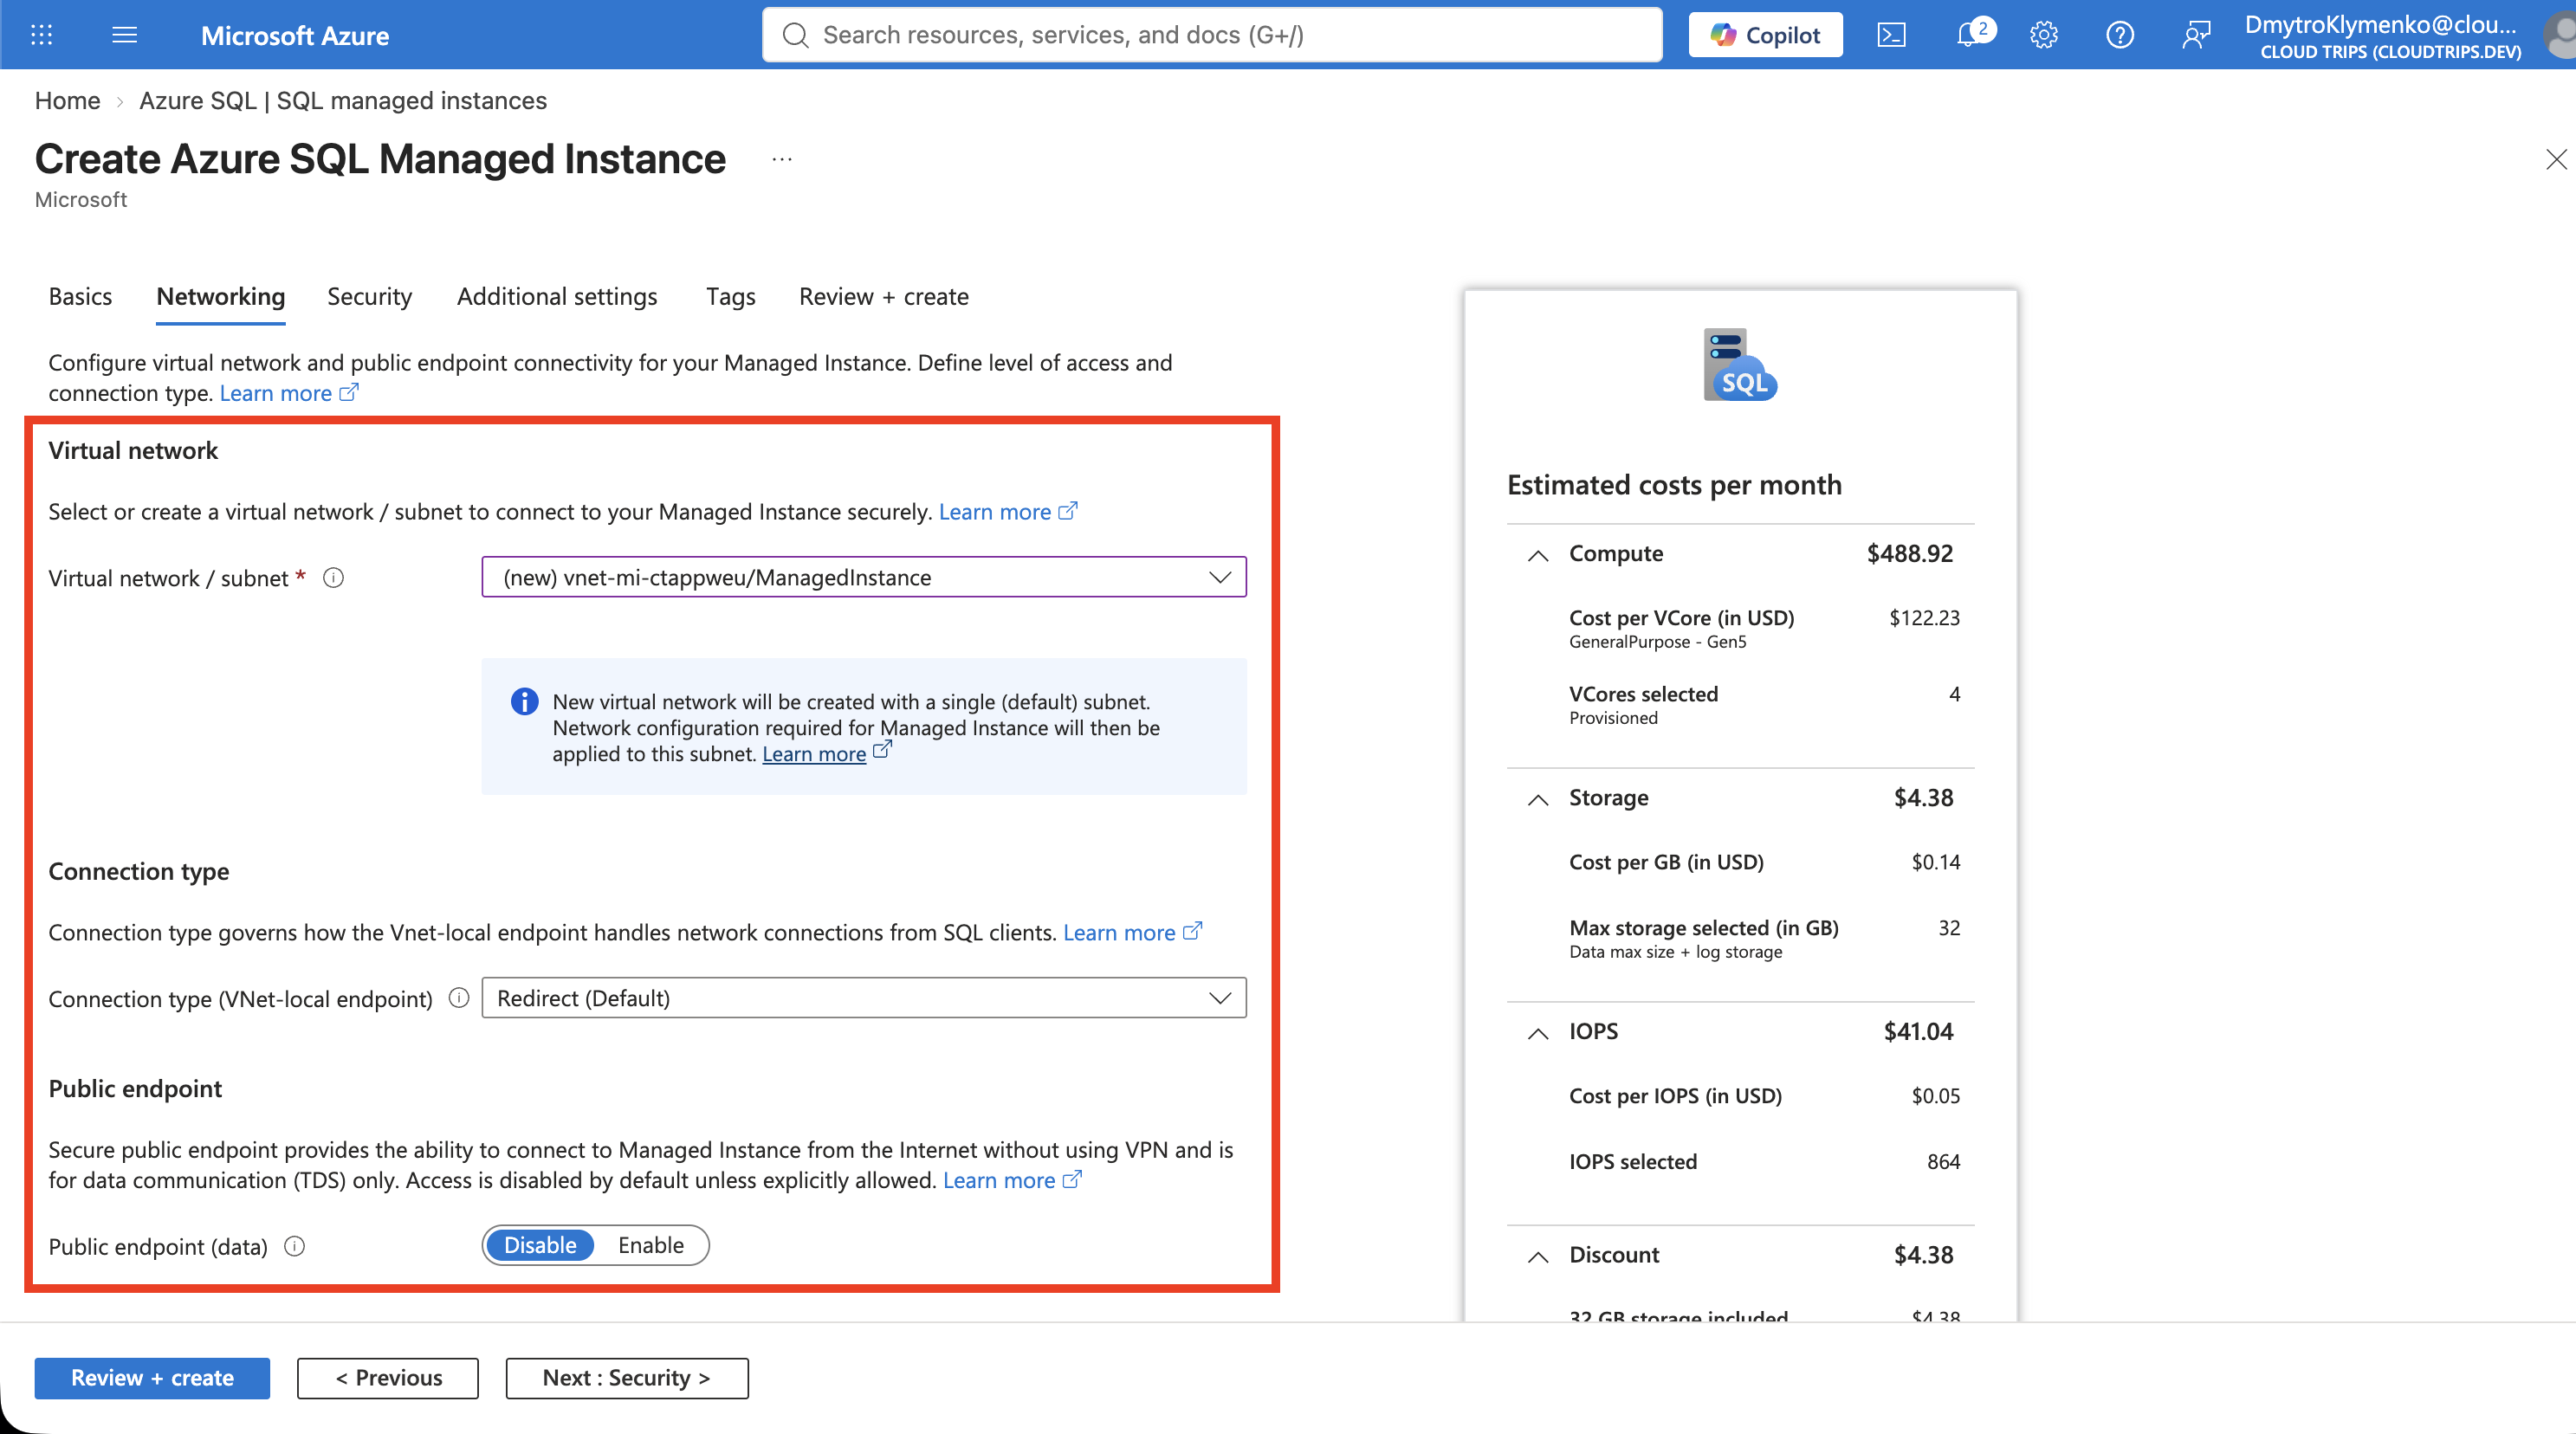
The information box confirms that Azure will create and configure the subnet. Redirect lets SQL clients connect directly to the database node after the initial connection. With the public endpoint disabled, clients need a private network path to the instance.
Keep the remaining lab settings at their defaults, review the configuration, and select Create. Provisioning can take hours; follow Notifications until deployment succeeds.
Add a Database
Open mi-ctappweu → Overview → New database. Enter sqldb-miapp, choose Data source: None, and create it. After deployment, open the instance’s database list.
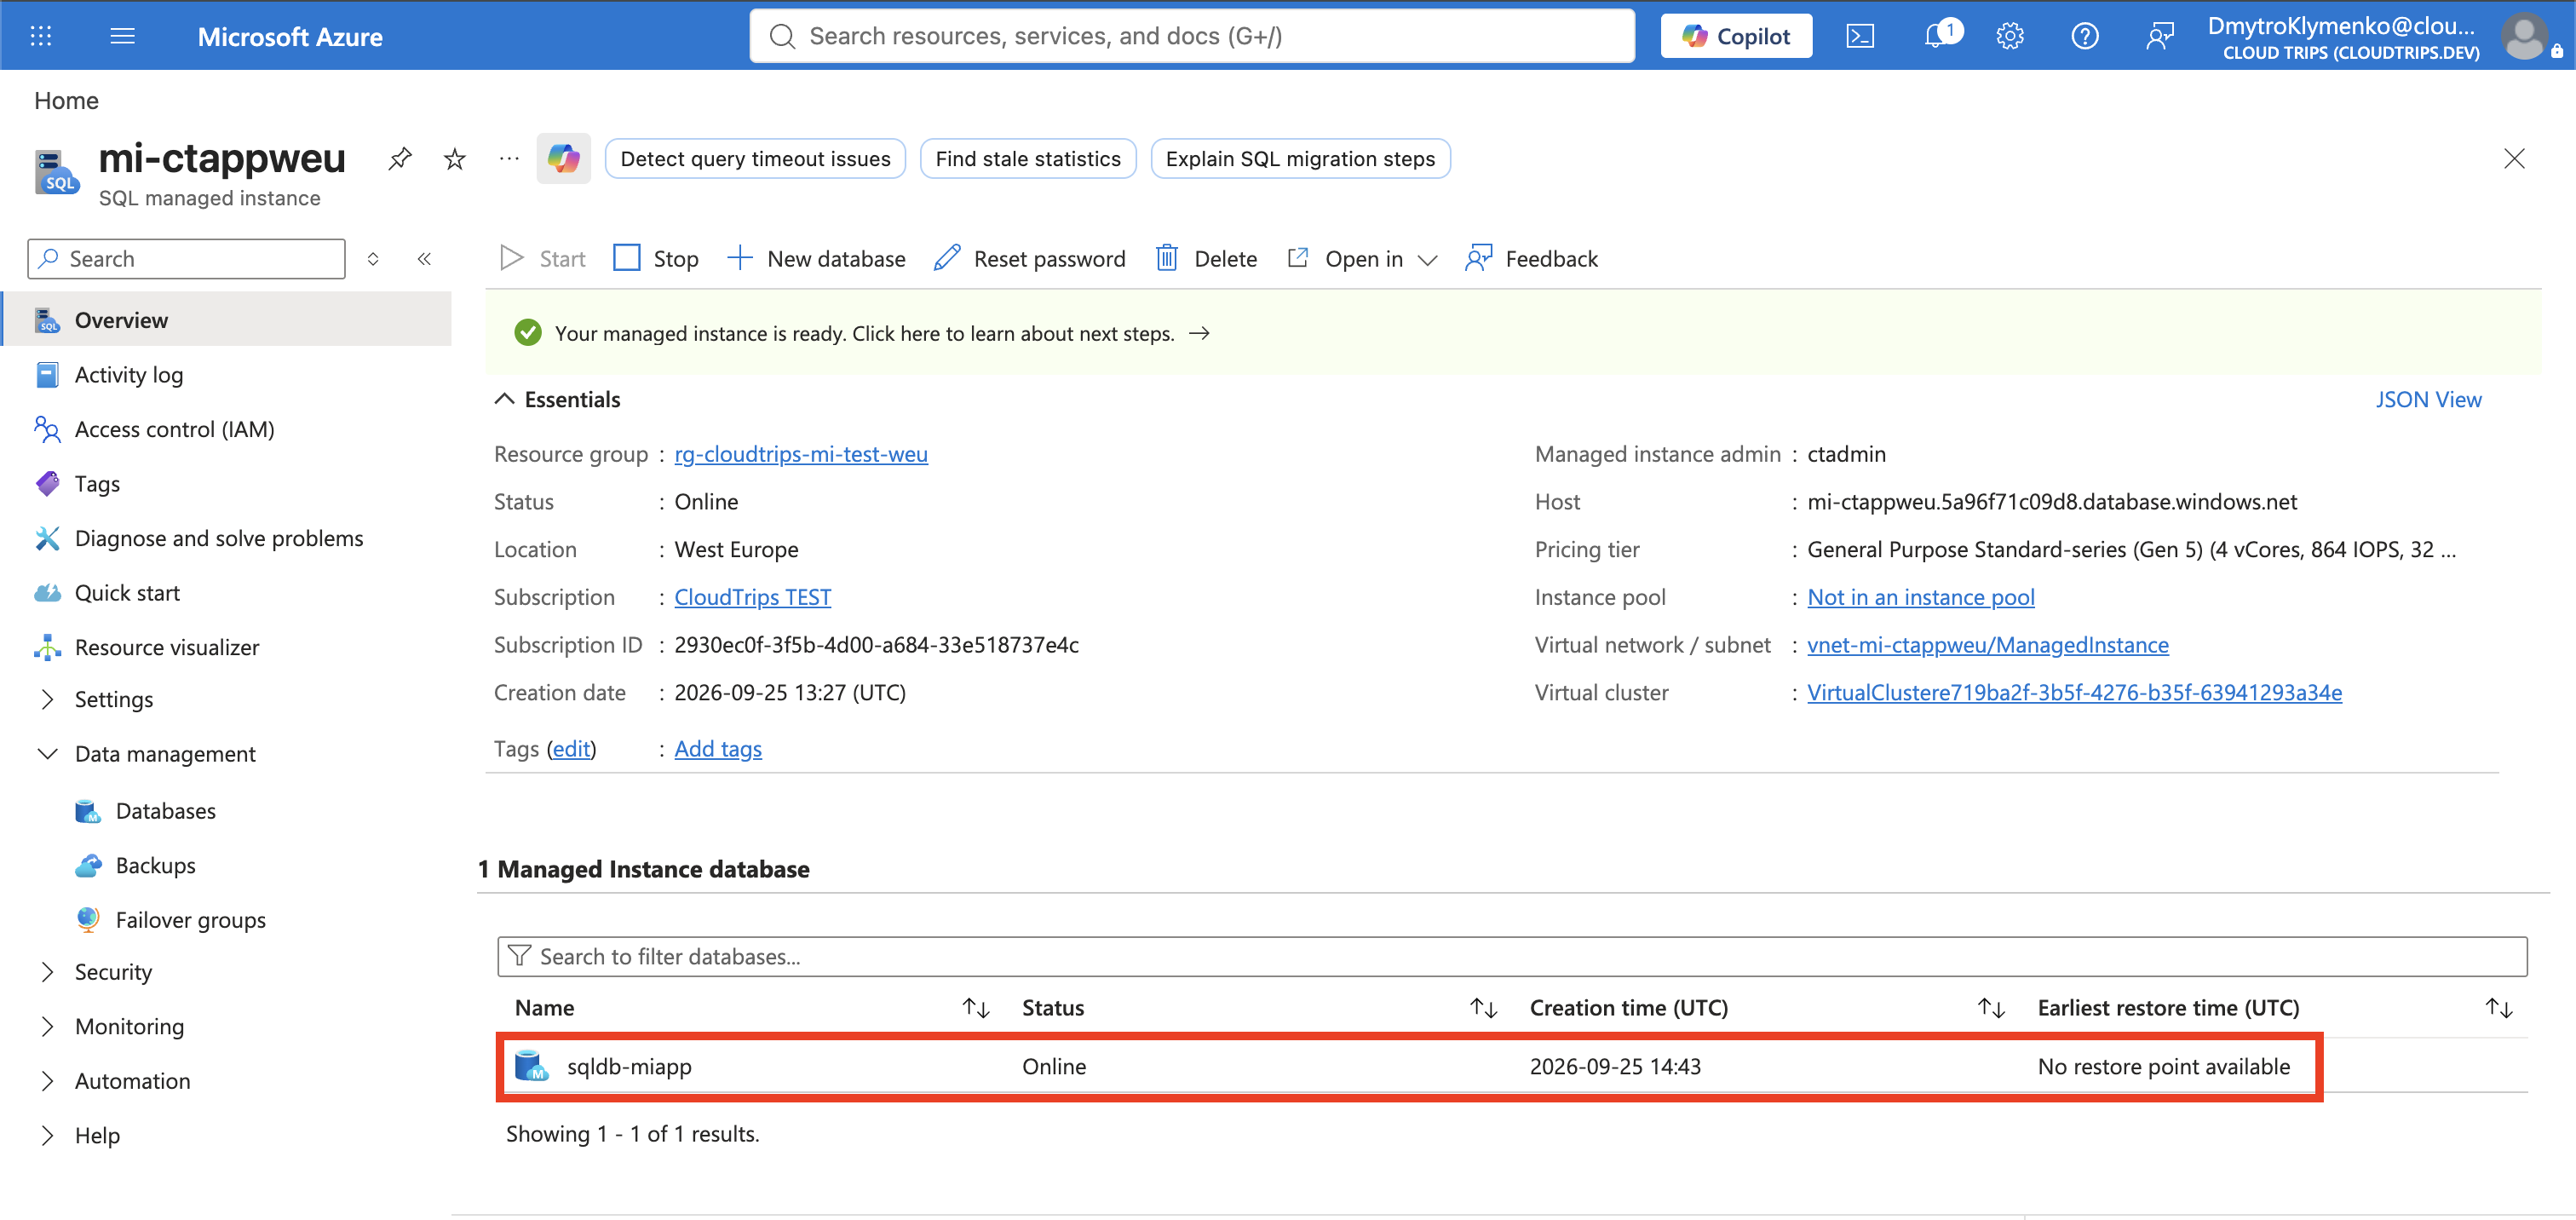
Confirm sqldb-miapp is listed and Online. This verifies resource creation; running SQL requires a client with network access to the instance.
Copy Host from the instance’s Overview for that connection. A client VM can use another subnet in the virtual network; your Mac can connect through a configured VPN. The host includes an Azure-generated DNS segment, so copy the actual value from the portal.
Clean Up
Delete rg-cloudtrips-mi-test-weu when finished and wait for deletion to complete. If network resources remain while the instance is being removed, retry after that operation finishes. Deleting only sqldb-miapp leaves the instance running and billable.