VMs Must Scale Automatically? Configure VM Autoscale
The CloudTrips web tier should add capacity when sustained demand increases and remove unused capacity afterward. Azure Monitor autoscale changes a VM Scale Set’s instance count in response to metrics and limits that you define.
This trip adds CPU-based scale-out and scale-in rules to the existing scale set, generates temporary CPU load, verifies the new instance, and watches capacity return to its minimum.
Confirm the Scale Set
This trip requires the resources from Need Many Identical VMs? Create a VM Scale Set:
Resource group: rg-cloudtrips-vmss-test-weu
Scale set: vmss-cloudtrips-web-test-weu
Orchestration mode: Flexible
Healthy instance count: 2
Load balancer: lb-cloudtrips-vmss-test-weu
Open the scale set > Instances. Confirm that both instances are running and
that NGINX returns active through Run command:
systemctl is-active nginx
curl --fail http://localhost/
Do not configure autoscale until both instances are healthy. An unhealthy application is not fixed by creating more unhealthy instances.
Create an Autoscale Setting
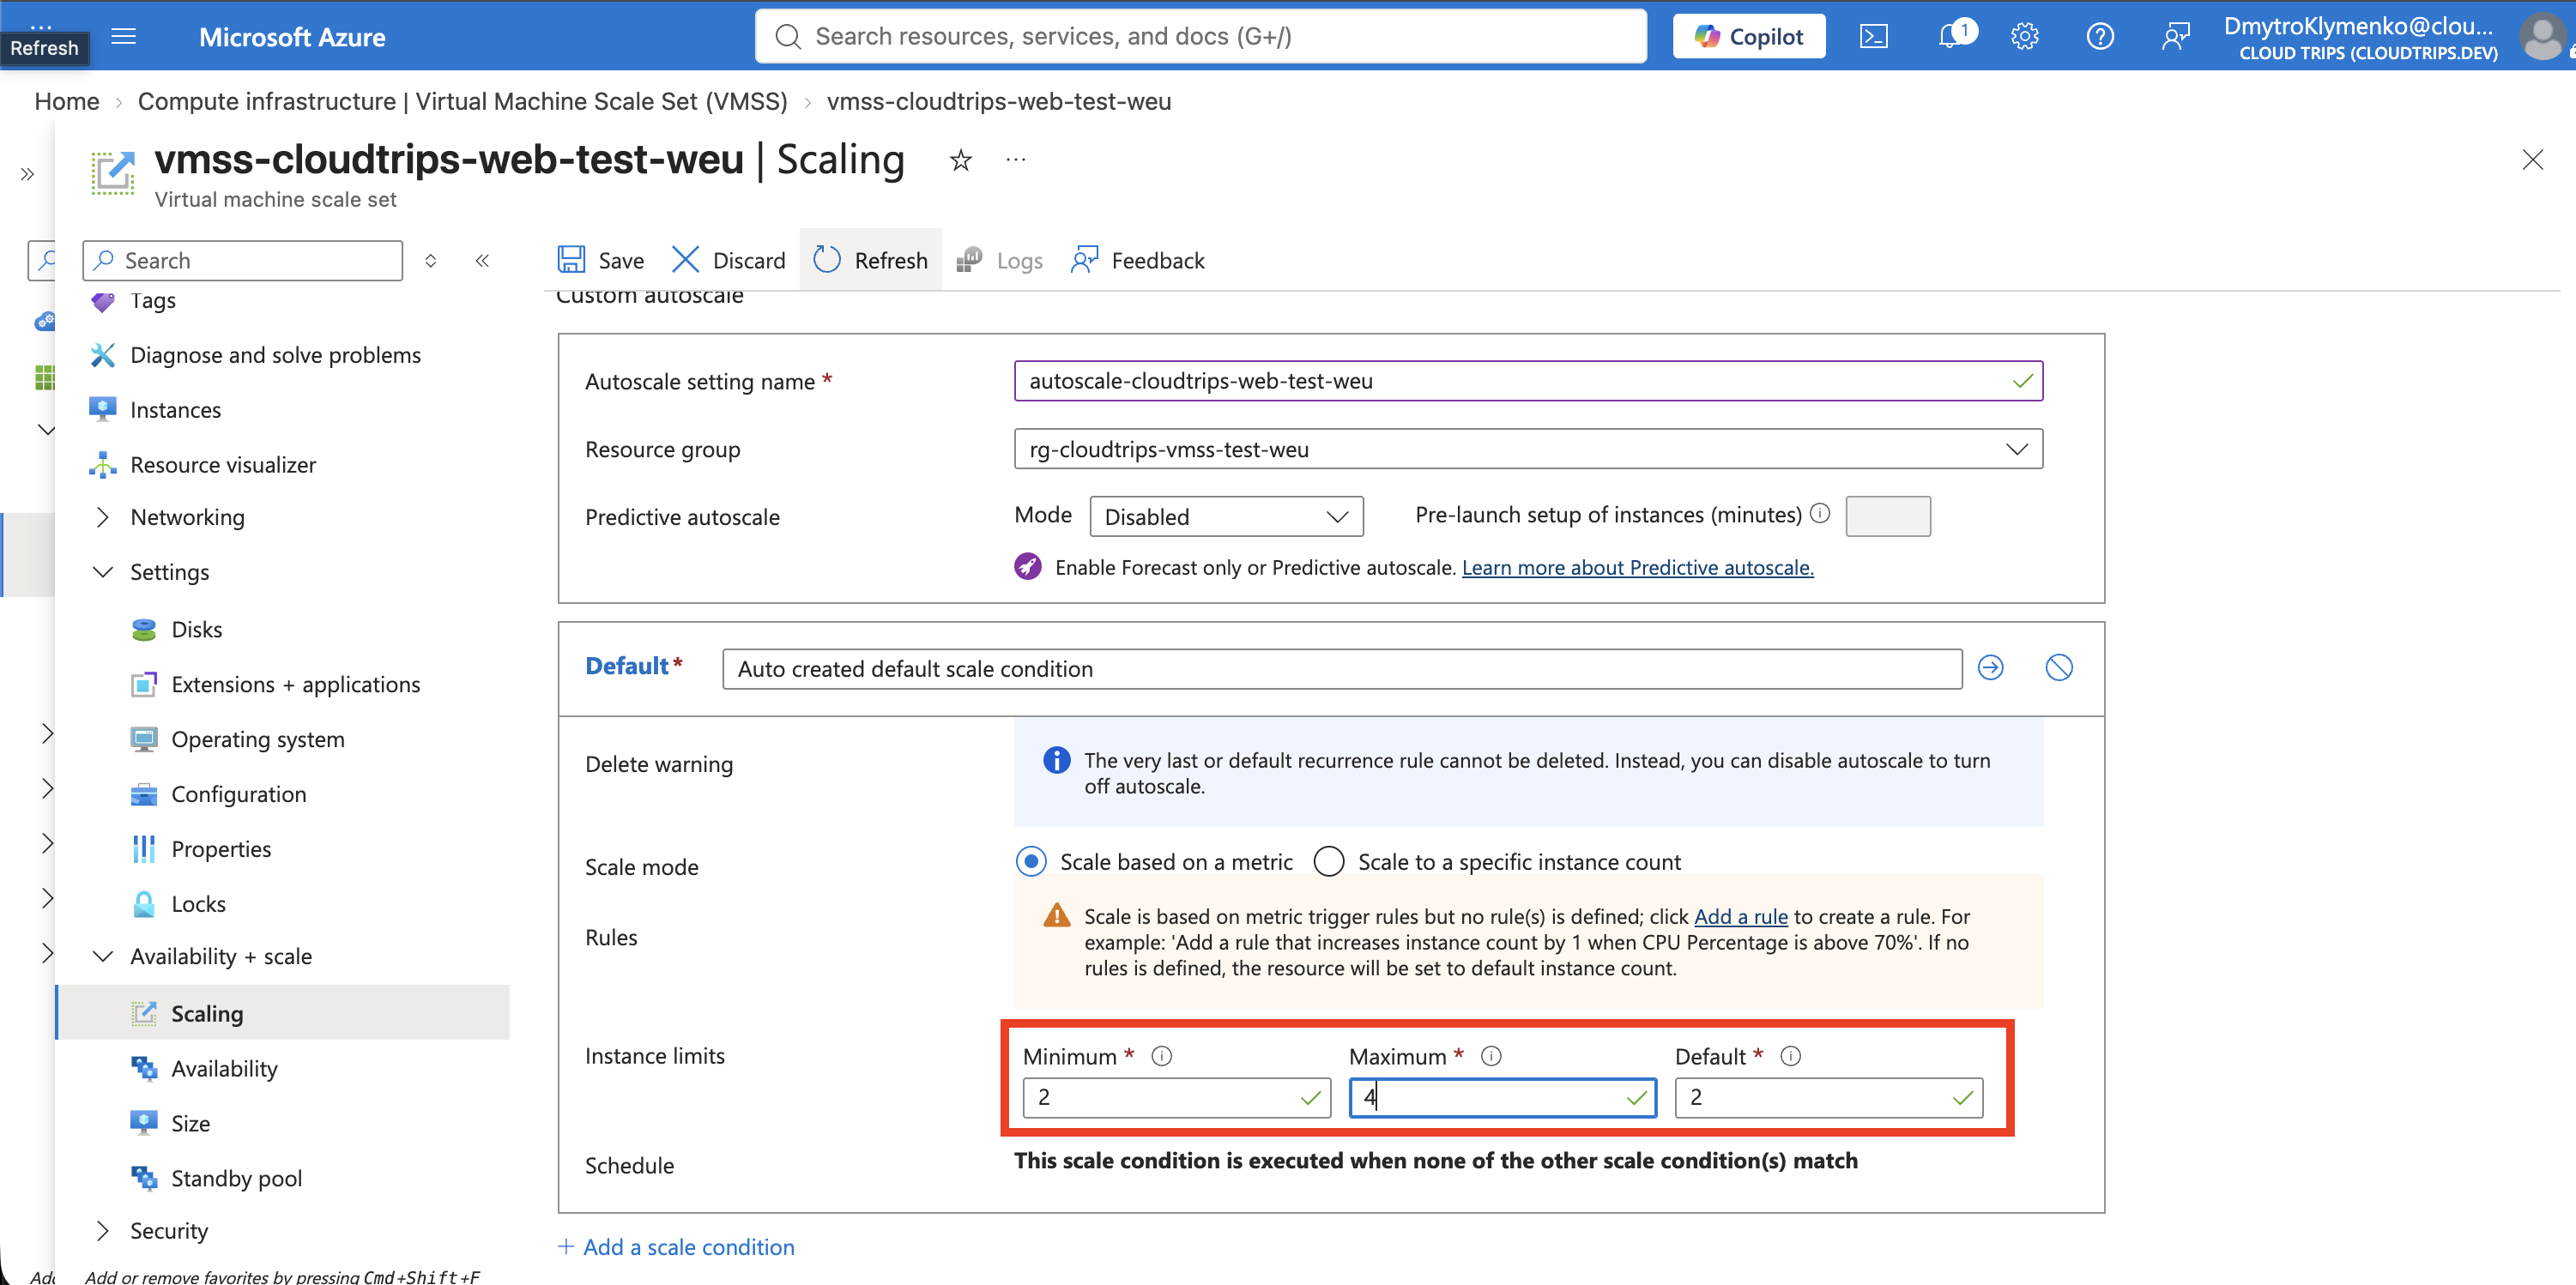
Open the scale set > Scaling and select Custom autoscale or Configure, depending on the portal view. Create an autoscale setting:
Autoscale setting name: autoscale-cloudtrips-web-test-weu
Resource group: rg-cloudtrips-vmss-test-weu
Scale mode: Scale based on a metric
Minimum instances: 2
Maximum instances: 4
Default instances: 2
The minimum preserves two web servers. The maximum prevents this test from creating more than four paid instances. The default is used when Azure cannot read the metric. It is not a normal target that overrides the rules.
Add the Scale-Out Rule
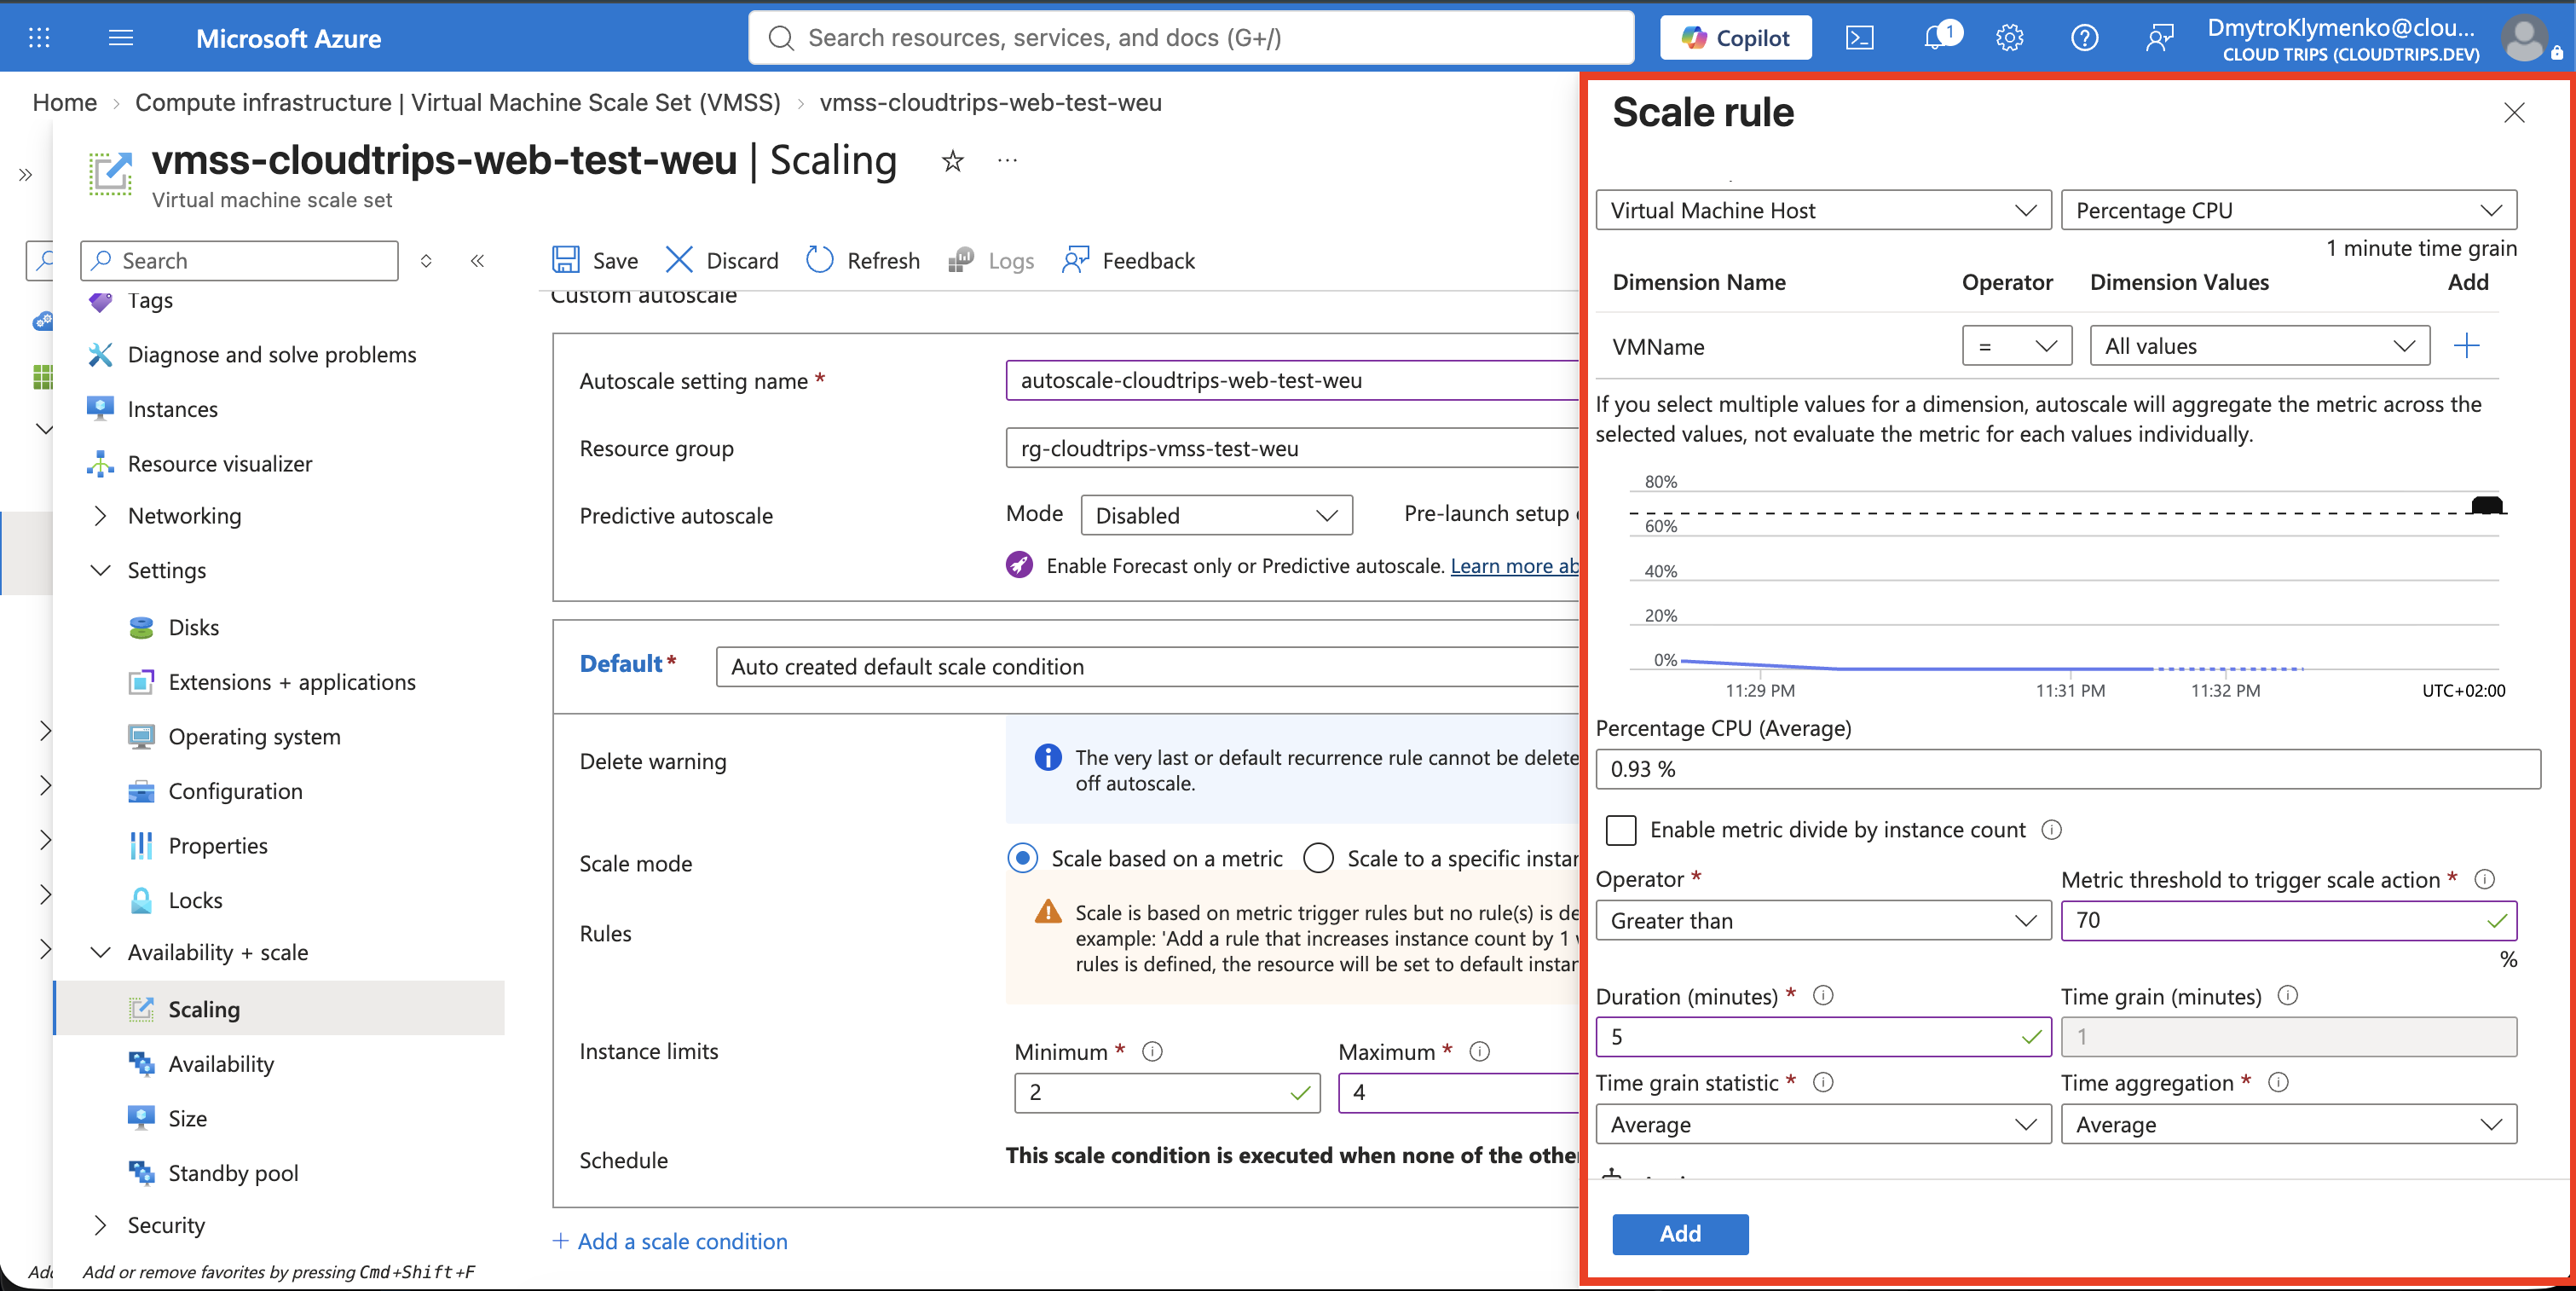
Select Add a rule and configure:
Metric source: Current resource
Metric namespace: Virtual Machine Host
Metric name: Percentage CPU
Dimension values: All values
Time aggregation: Average
Operator: Greater than
Metric threshold: 70
Duration: 5 minutes
Time grain statistic: Average
Operation: Increase count by
Instance count: 1
Cooldown: 5 minutes
All values avoids filtering the metric to one named instance. Azure evaluates
average CPU across the scale set. If it remains above 70% for the evaluation
window, autoscale requests one additional instance. Cooldown allows the new VM
time to start before another scaling action can occur.
Add the Scale-In Rule
Add a second rule:
Metric source: Current resource
Metric namespace: Virtual Machine Host
Metric name: Percentage CPU
Dimension values: All values
Time aggregation: Average
Operator: Less than
Metric threshold: 30
Duration: 10 minutes
Time grain statistic: Average
Operation: Decrease count by
Instance count: 1
Cooldown: 5 minutes
The longer low-CPU window reduces oscillation between scale-out and scale-in. Azure will not reduce capacity below the minimum of two.
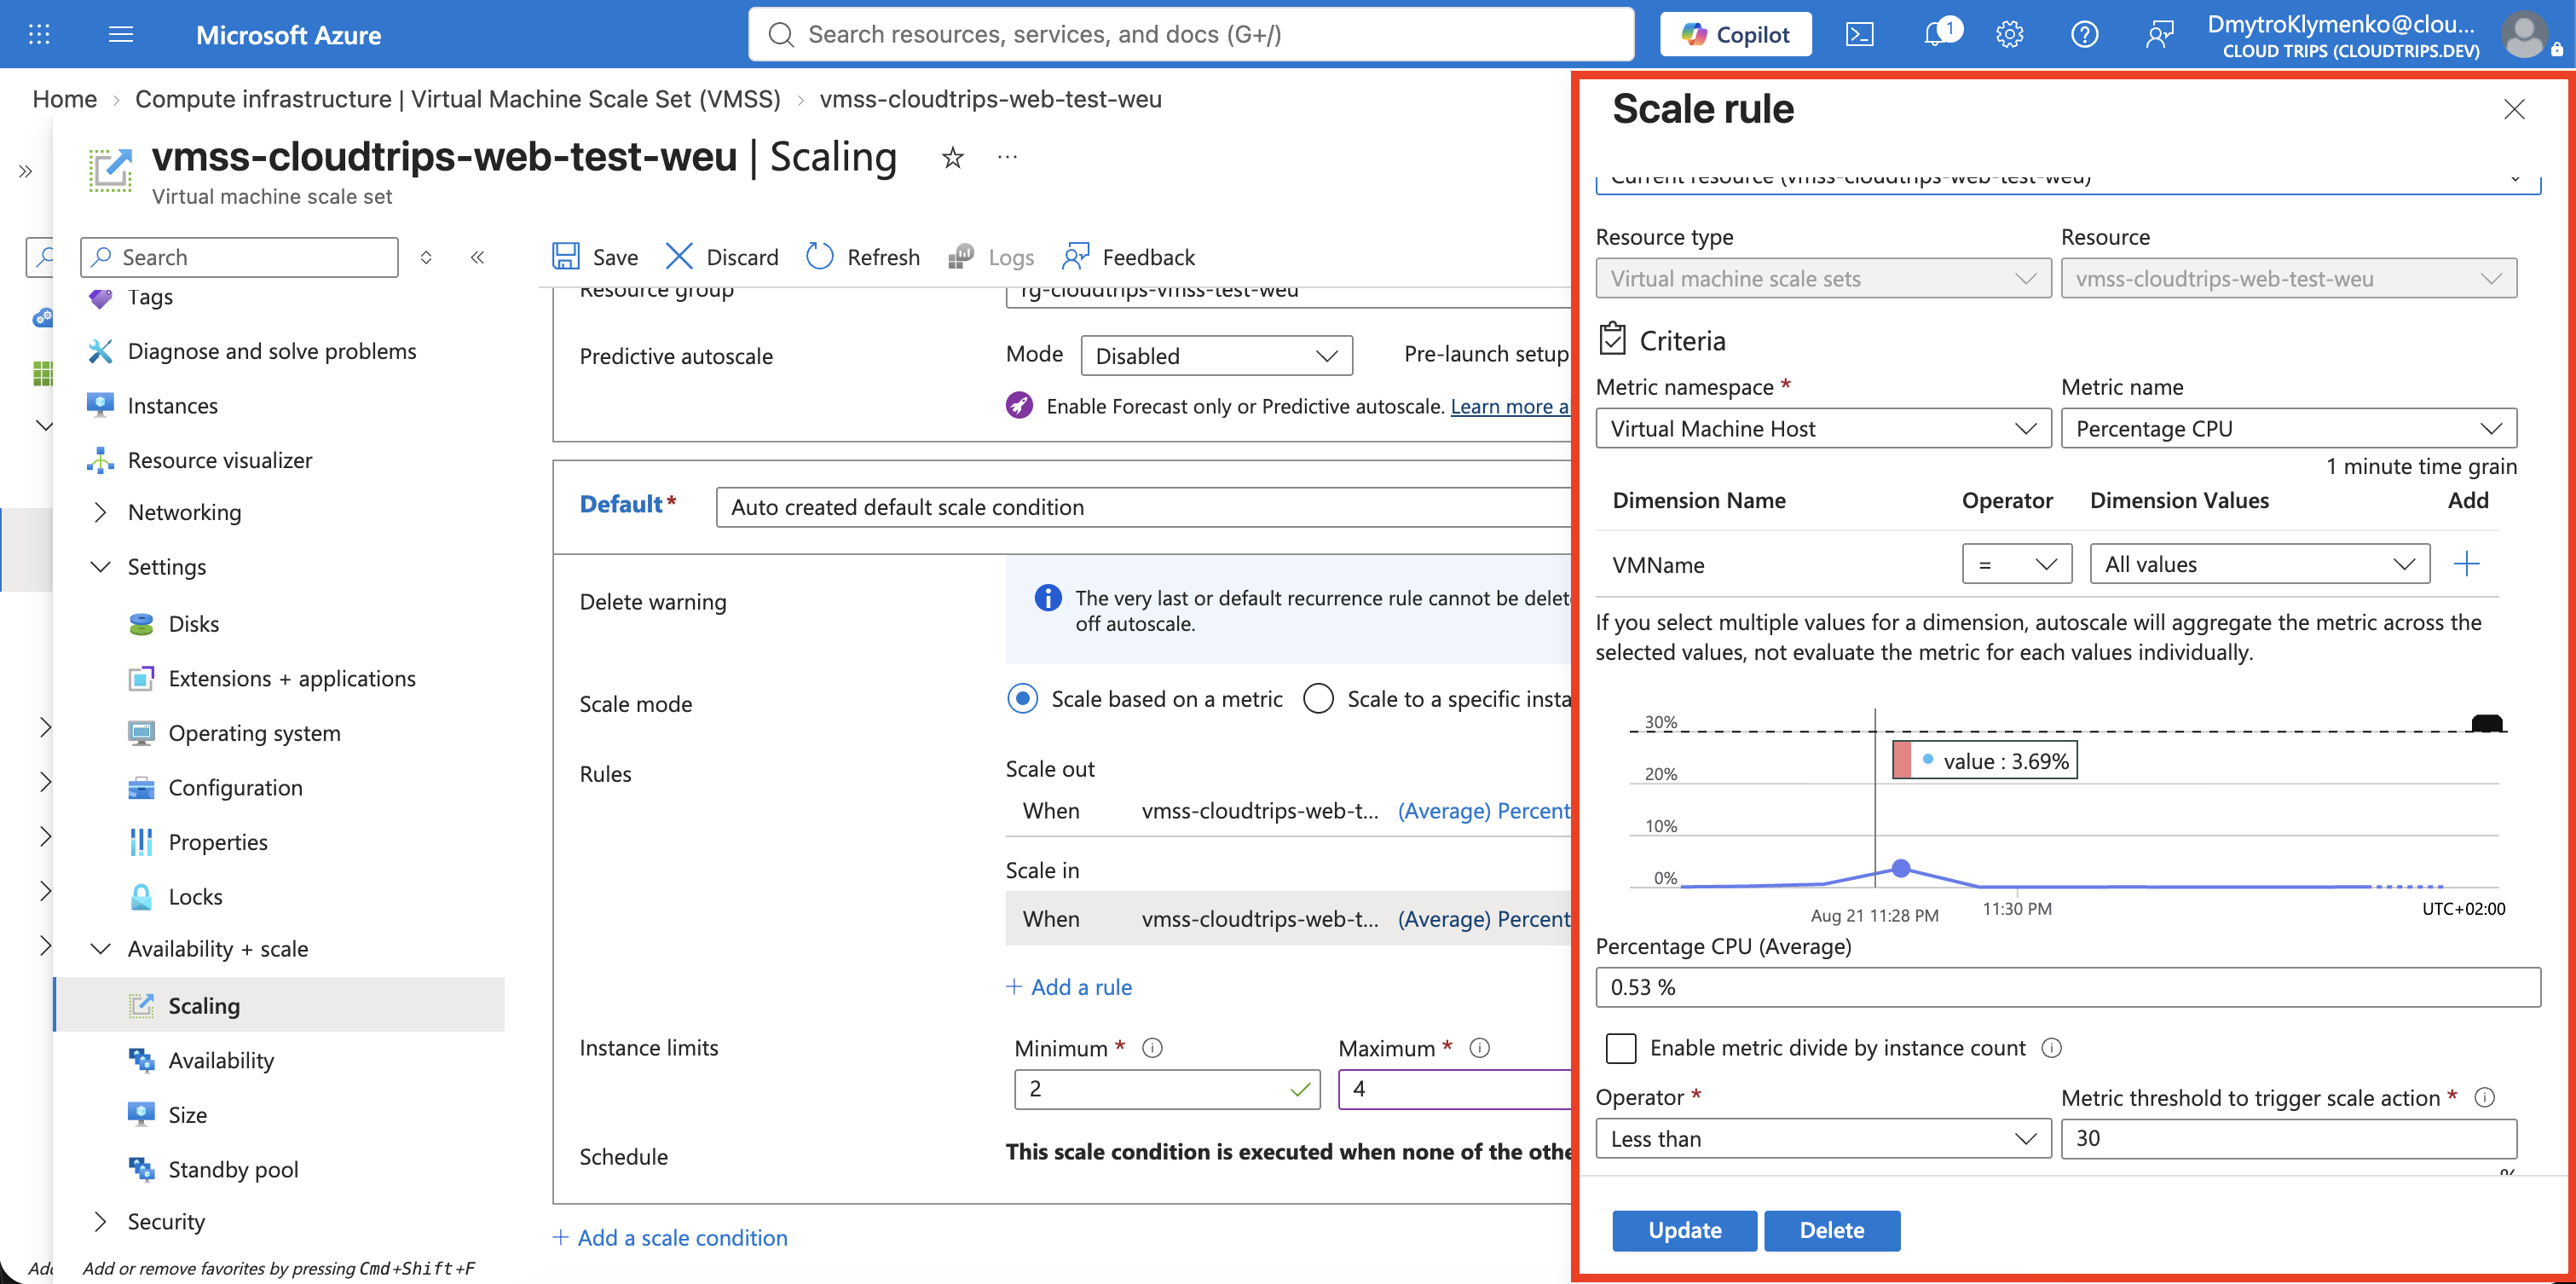
Save the autoscale setting. Confirm that it is enabled and both rules appear in the default profile.
Generate Temporary CPU Load
Average CPU must rise across the scale set, so run the following through Run command > RunShellScript on each of the two current instances:
sudo apt-get update
sudo apt-get install -y stress-ng
nohup stress-ng \
  --cpu 0 \
  --cpu-load 90 \
  --timeout 10m \
  > /tmp/stress-ng.log 2>&1 &

pgrep -a stress-ng
stress-ng deliberately consumes CPU for ten minutes and then stops. Use it
only in this disposable TEST environment. The command runs in the background,
so Azure Run Command can finish while the load continues.
Observe Automatic Scale-Out
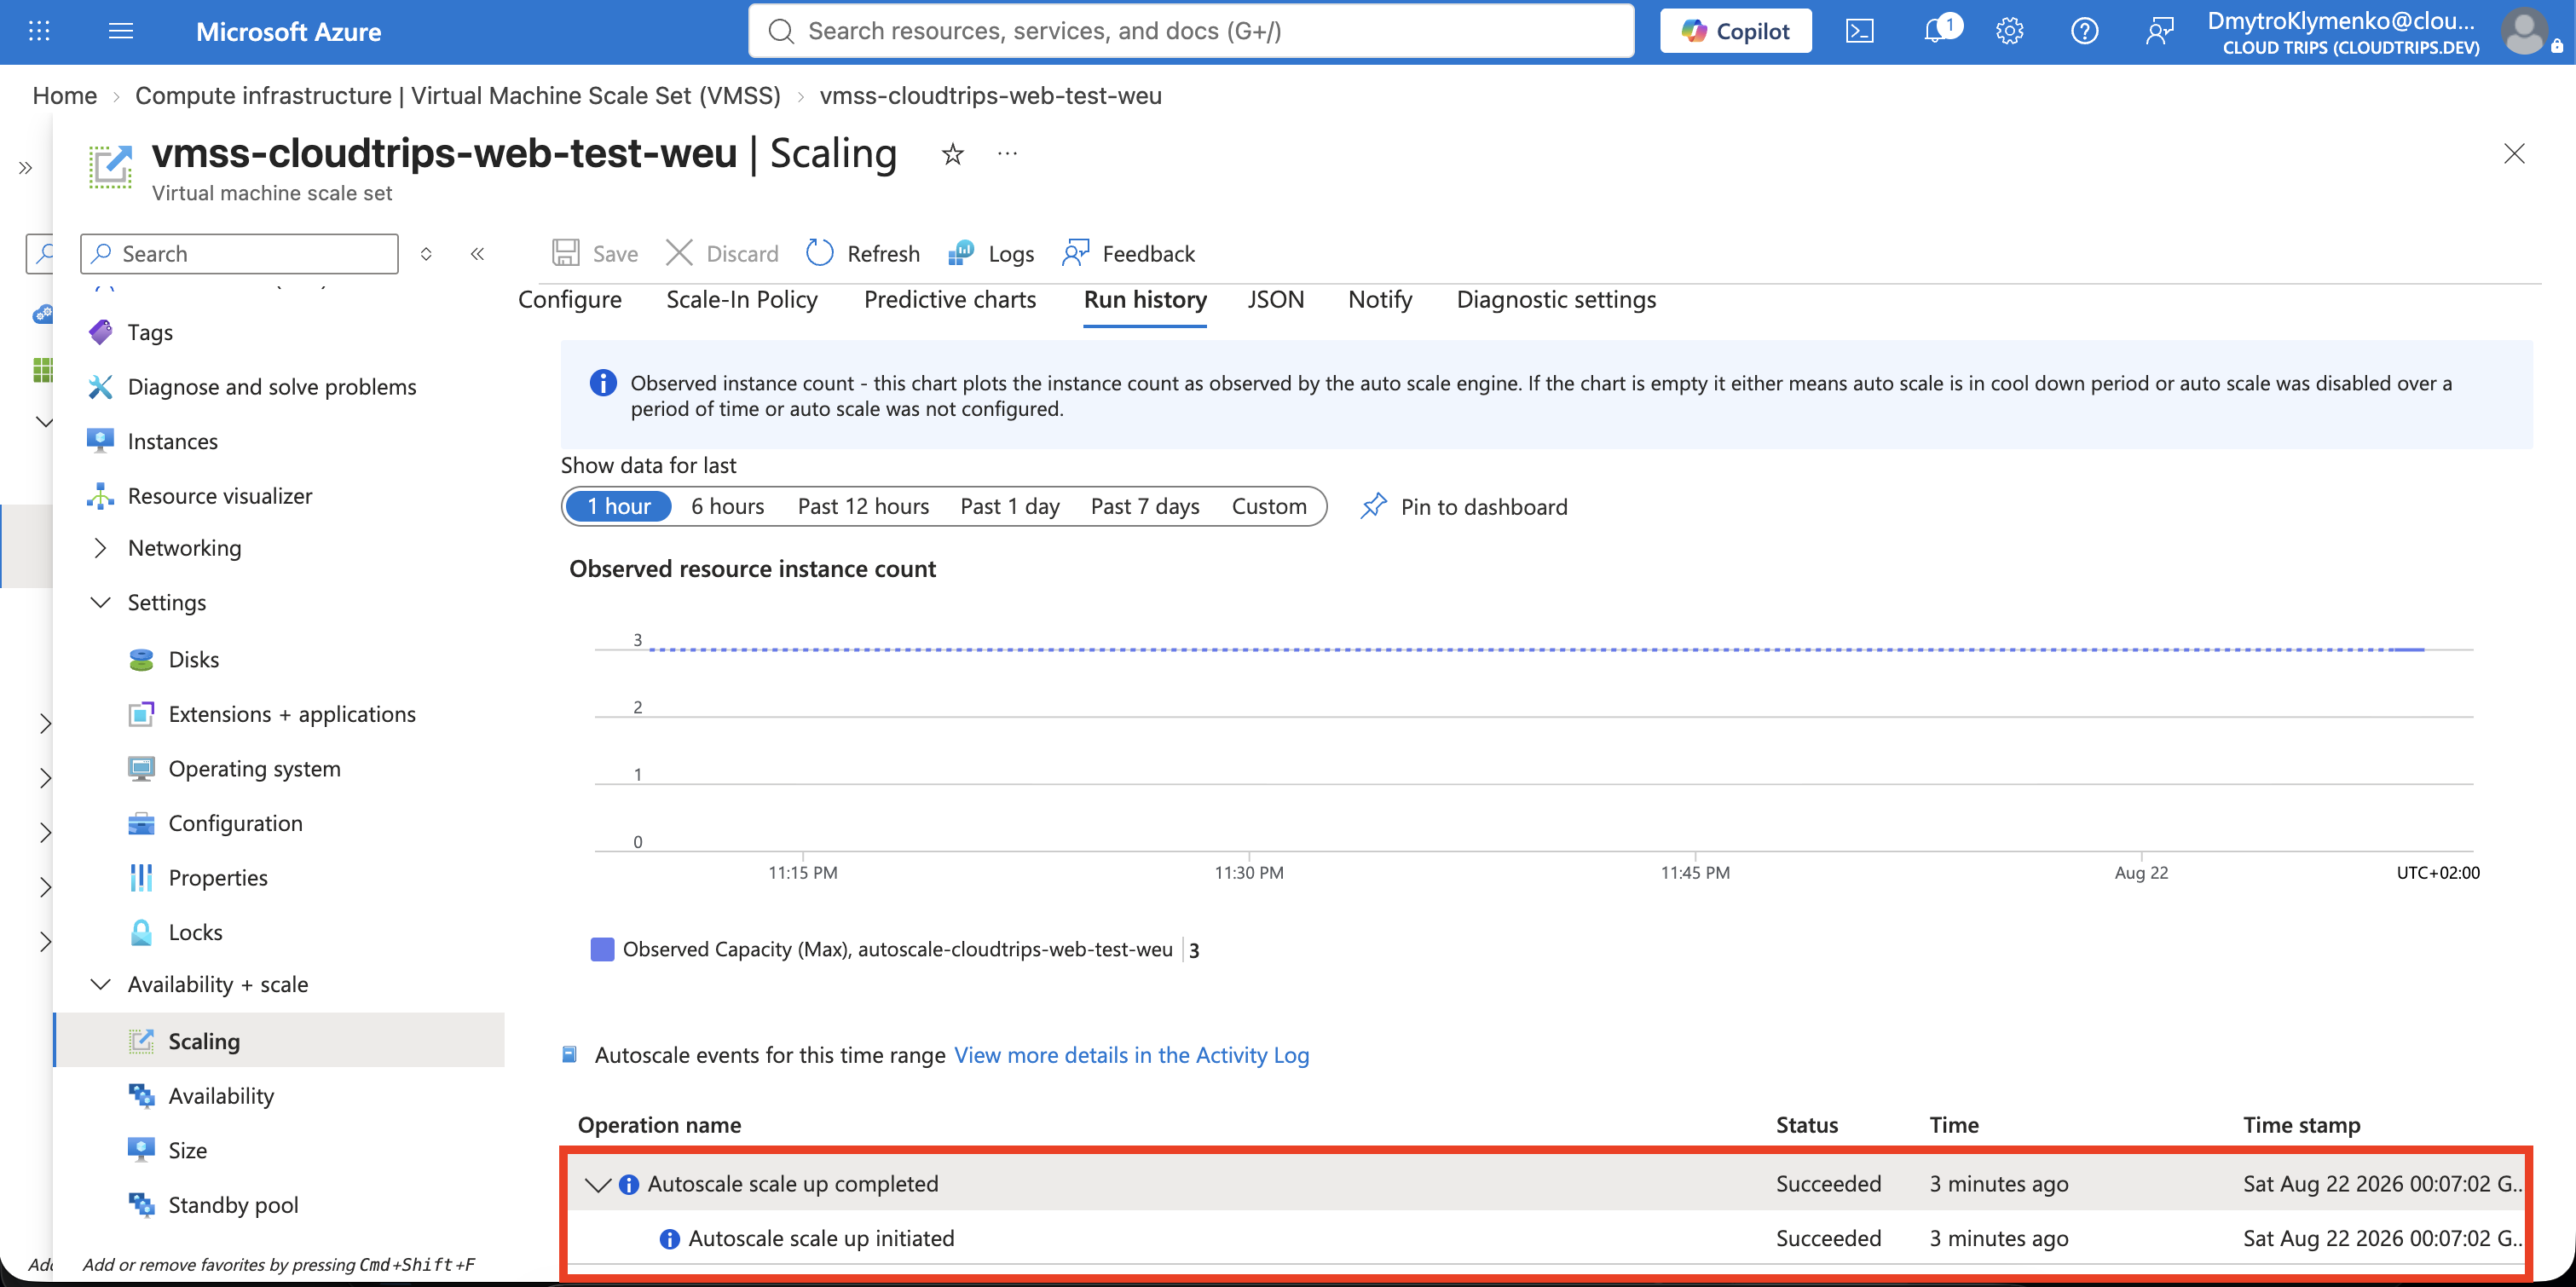
Open the scale set > Metrics and chart Percentage CPU with average aggregation. Then open Scaling > Run history or the autoscale setting’s run history.
Autoscale is not immediate: the metric must remain above the threshold for five minutes, Azure must evaluate the rule, and the VM must be provisioned. Wait for a successful scale-out event and a third instance.
On the new instance, run:
cloud-init status --long
systemctl is-active nginx
curl --fail http://localhost/
The instance must report active and return its hostname. This proves that the
VMSS model can configure automatically created capacity.
Verify the New Instance Behind the Load Balancer
Send multiple connections to the public IP:
for request in 1 2 3 4 5 6; do
  curl --silent --header 'Connection: close' http://<PUBLIC-IP>/
done
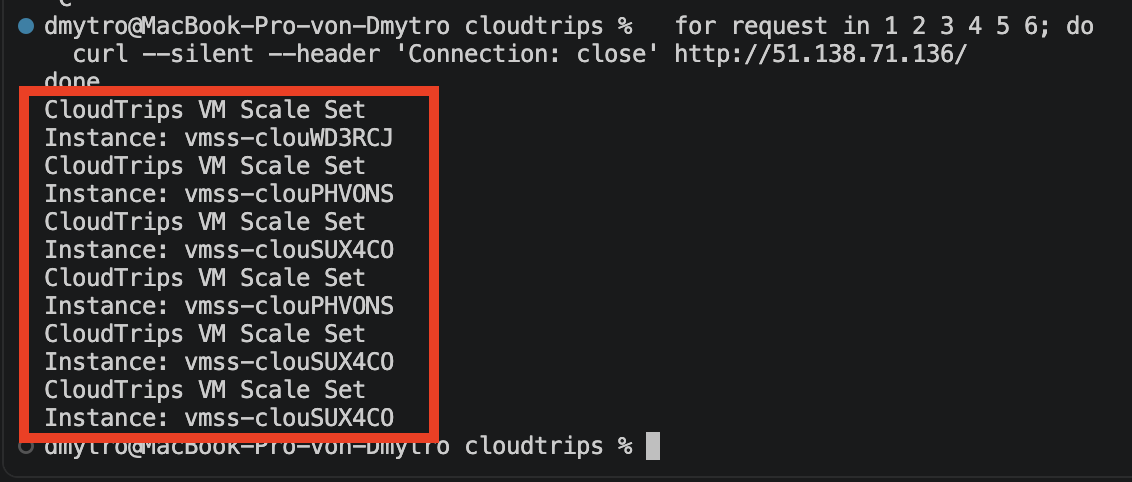
The results should eventually include all three healthy hostnames. Azure Load Balancer distributes flows rather than requests in strict round-robin order, so repeat the loop if a hostname does not appear in the first six responses.
Observe Automatic Scale-In
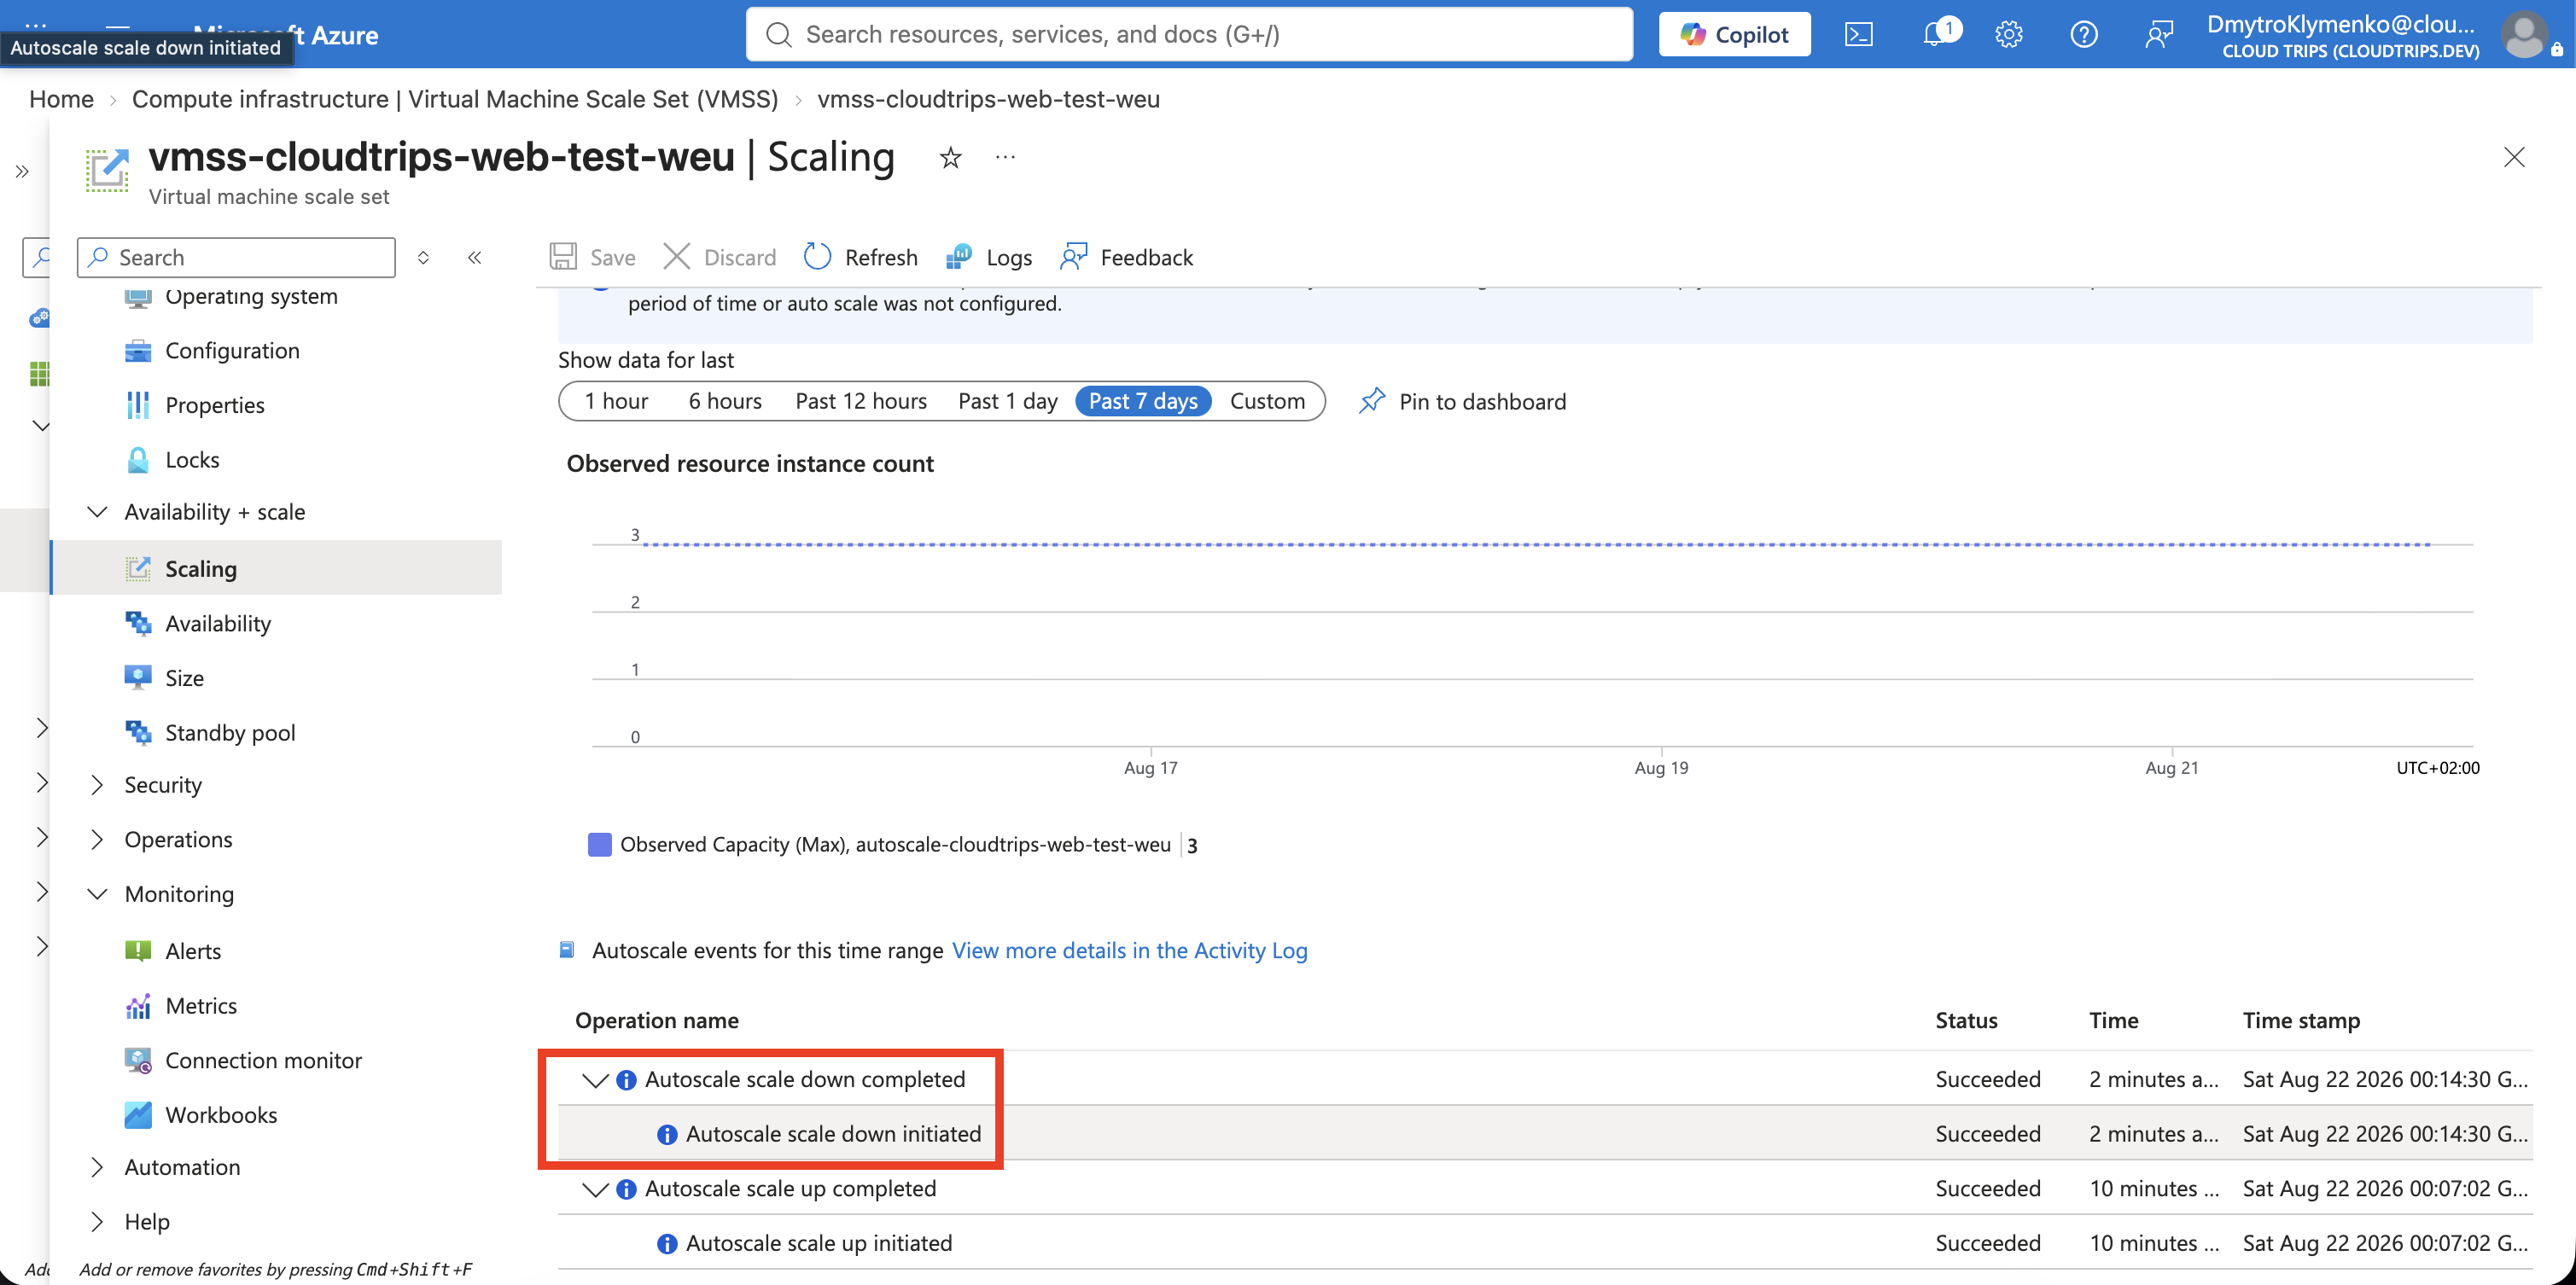
After ten minutes, stress-ng stops. CPU should fall below 30%. Wait for the
ten-minute low-CPU window, rule evaluation, and cooldown. Confirm in autoscale
run history that capacity decreases and the instance count returns to two.
Autoscale removes an instance; it does not preserve data stored only on that VM’s OS disk. Scale-set workloads must keep durable state in external services.
Clean Up
Disable the autoscale setting if you want to inspect the lab without further capacity changes. When finished, delete the dedicated resource group:
az group delete \
  --name rg-cloudtrips-vmss-test-weu \
  --yes
This removes the autoscale setting, scale set, instances, disks, load balancer, public IP, NSG, VNet, and subnet. Verify deletion:
az group exists --name rg-cloudtrips-vmss-test-weuThe expected result is false.